3 ways to remove page breaks in Word – Detailed steps

Word processing skills are essential, especially for students, office workers, and anyone who needs to work with documents. It’s common for users to switch back to the no-page-break mode after enabling automatic page breaks when they finish editing a page and start a new one. So how can you remove page breaks in Word? Let’s explore the steps in this article from Buffcom.net.
Manually removing page breaks in Word
When manually removing page breaks, users can only remove them one by one, making this method suitable for short, low-page-count documents.
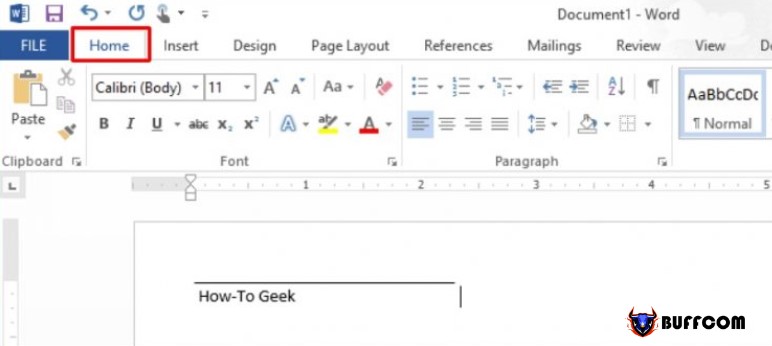
Step 1: Open the Word file you want to remove page breaks from. On the top left of the Word screen, select the Home tab.
Remove page breaks in Word
Step 2: In the Paragraph category, select the Show/Hide icon.

Remove page breaks in Word
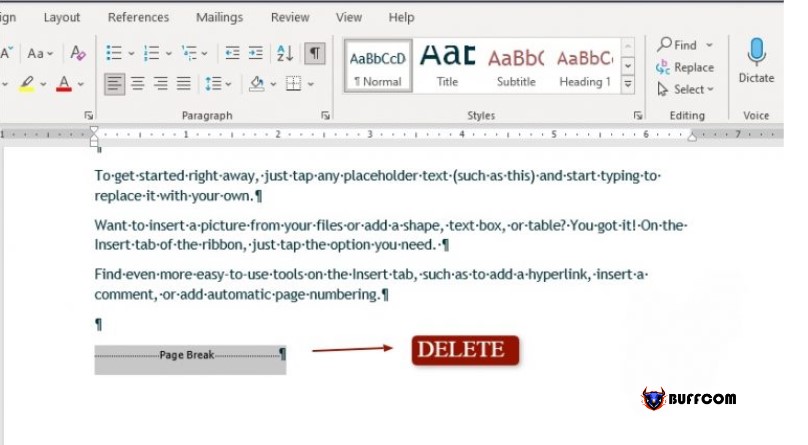
Step 3: In the text that opens, you will see the Page Break markers. Click on them and press Delete to remove them.
Remove page breaks in Word
Batch removing page breaks in Word
With this method, users can easily remove all page breaks at once, saving time. This method is suitable for longer documents with many pages.
Step 1: Open the Word file you want to remove page breaks from. On the top left of the Word screen, select the Home tab.
Step 2: In the Paragraph category, select the Show/Hide icon.
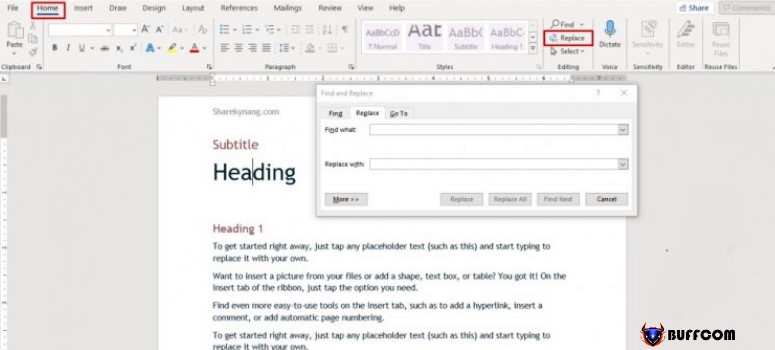
Step 3: Press Ctrl + H to open the Find and Replace dialog box.
Remove page breaks in Word
Step 4: Select Find what and then select More.
Step 5: Go to the Special tab and select Manual Page Breaks.
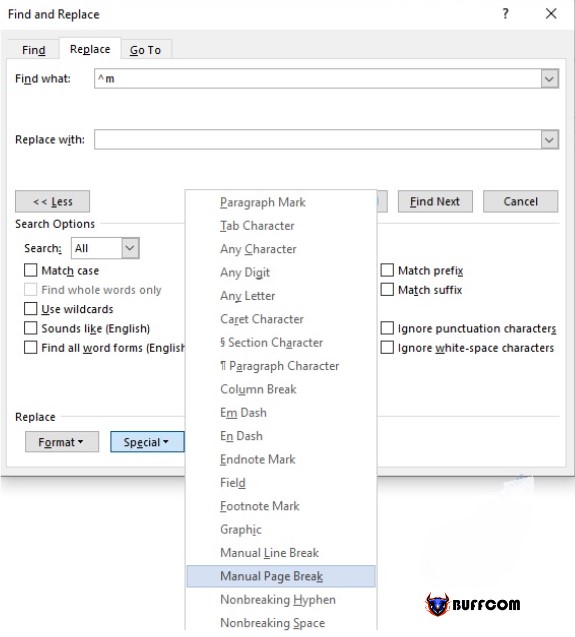
Remove page breaks in Word
Step 6: After selecting Manual Page Breaks, the character “^m” will appear in the Find What box, corresponding to the positions where you want to remove page breaks.
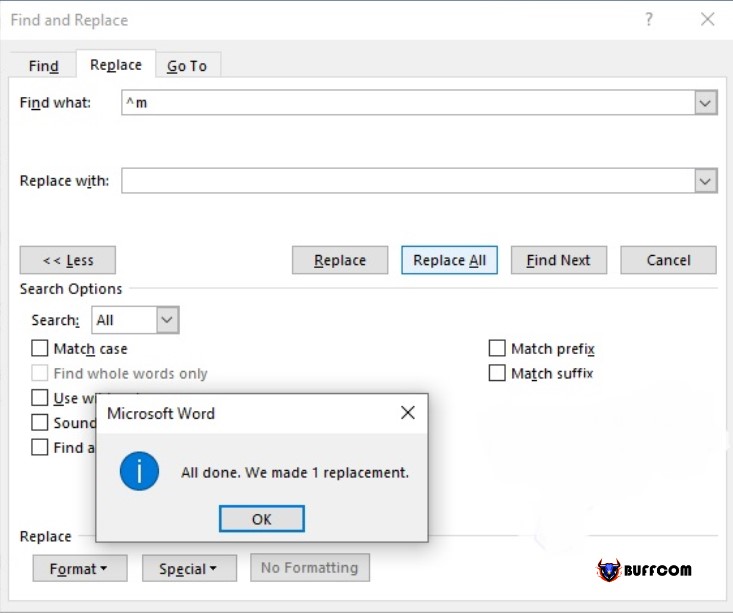
Remove page breaks in Word
Step 7: Finally, select Replace All to completely remove the page breaks.
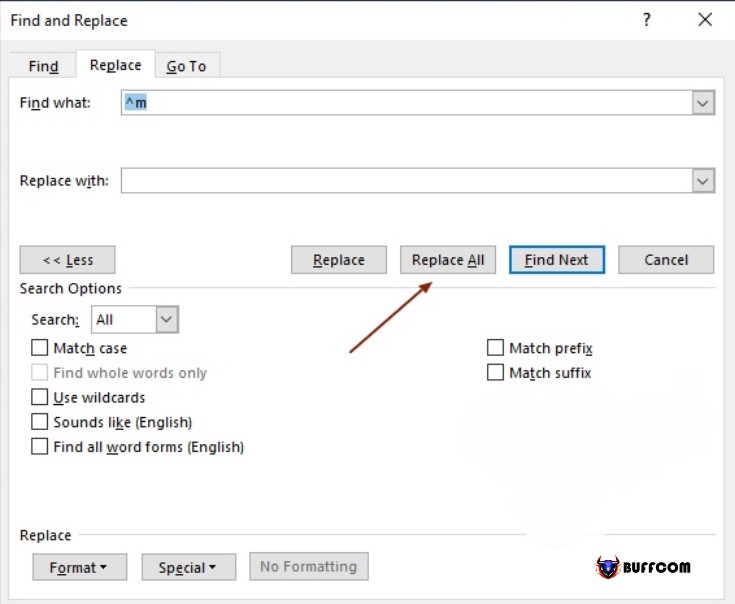
Remove page breaks in Word
How to remove optional page breaks in Word
Removing optional page breaks in Word refers to disabling the automatic insertion of page breaks when they are not needed. To eliminate this feature, follow these steps:
Step 1: Open the Word file that you want to remove page breaks from.
Step 2: Select the Layout tab, then go to the Paragraph section and click the Paragraph Settings icon to open the Paragraph dialog box.
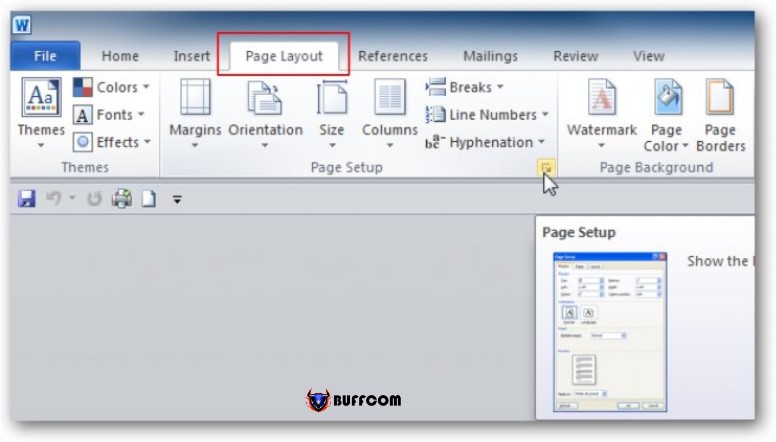
Remove page breaks in Word
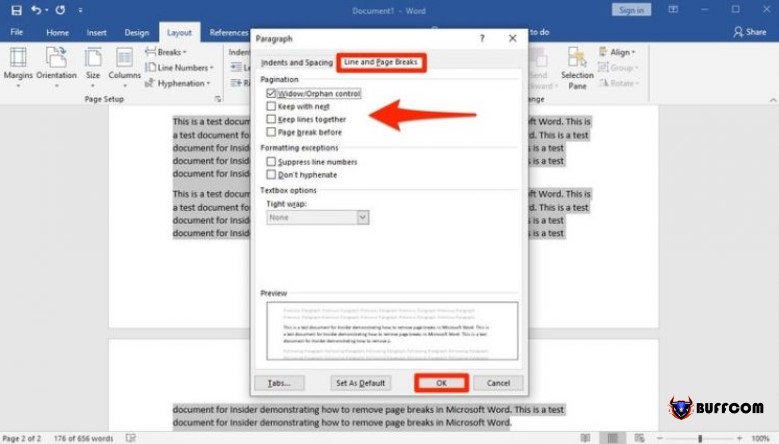
Step 3: In the new window of the Paragraph dialog box, continue to select Line and Page Breaks. Users can check the customization option they want:
Widow/Orphan control: places at least two lines of a paragraph at the beginning or end of a page.
Keep with next: prevents breaks between paragraphs that you want to keep close together.
Keep lines together: prevents page breaks in the middle of a paragraph.
Page break before: adds a page break before a specific paragraph.
Check the page break removal options in Word.
Remove page breaks in Word
Step 4: Finally, select OK.
These are the ways to remove page breaks in Word that help you master your data files. We wish you successful implementation. And don’t forget to visit the Buffcom.net website for more useful articles on office tricks, as well as technology and photography every day!

