Excel tutorial: How to lock cells in Excel and keep your data secure
Excel tutorial: How to lock cells in Excel and keep your data secure. If you want to prevent unauthorized editing or tampering of your Excel data, you can choose to lock the cells and safeguard the worksheet.
The good news is that Excel offers extensive customization options, allowing you to lock specific cells and protect the entire worksheet with a password. This step-by-step guide will walk you through the process of locking cells and setting a password protection for your Excel worksheet, ensuring the security of your valuable data.
How to Protect All Cells in Excel with Locking?
Initially, every cell in Excel is locked; however, it is not considered efficient unless the worksheet is protected.
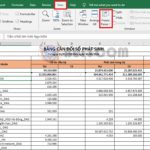
To ensure all cells are locked, simply press “Ctrl + A” to select all cells, then right-click anywhere within the selection and choose “Format Cells.”

Excel tutorial: How to lock cells in Excel and keep your data secure
Switch to the protection tab

Excel tutorial: How to lock cells in Excel and keep your data secure
By default, all cells are locked.

Excel tutorial: How to lock cells in Excel and keep your data secure
Effective Methods for Safeguarding Your Excel Worksheet

Excel tutorial: How to lock cells in Excel and keep your data secure
Please provide a password to unlock the sheet for editing purposes, and then press “ok”.

Excel tutorial: How to lock cells in Excel and keep your data secure
Currently, when someone attempts to modify the cells, they will receive a notification that the sheet is secured.

Excel tutorial: How to lock cells in Excel and keep your data secure
Note: In case you don’t set a password, anyone can access the sheet and manipulate your data.
 What is the method for locking particular cells in Excel?
 To format cells, simply select the desired area and then right-click anywhere within the selection. From there, click on “format cells” to make any necessary changes.
 Switch to the Protection tab and uncheck “Locked”, then click “Ok”.
 To secure particular cells:
 To ensure protection, navigate to the protection tab, select the “locked” option, and then confirm by clicking “ok”.
 It’s important to note that cells cannot be locked until the worksheet is protected. Therefore, it’s crucial to go through the steps of protecting the worksheet again. Once the protection is enabled, Excel will notify anyone attempting to edit a cell that it’s protected.