Guide to Creating Barcodes in Word, Excel

In business or product manufacturing, do you always want to create barcodes for your products quickly and easily? Don’t worry, if you are thinking like that, then read the article below! In this article, I will guide you on how to create barcodes in Word, Excel. Let’s explore the article together.
What are Barcodes?
Barcodes are a representation of information on the surfaces of products, goods, etc. They are printed based on patterns of dots, concentric circles or hidden within images, and can be read by electronic devices.
So how do you create barcodes in Word, Excel? Please read on to the next section.
How to Create Barcodes in Word, Excel
Before starting, make sure your computer has Word, Excel installed. At the same time, your Word or Excel must have the Barcode font.
Here are the steps:
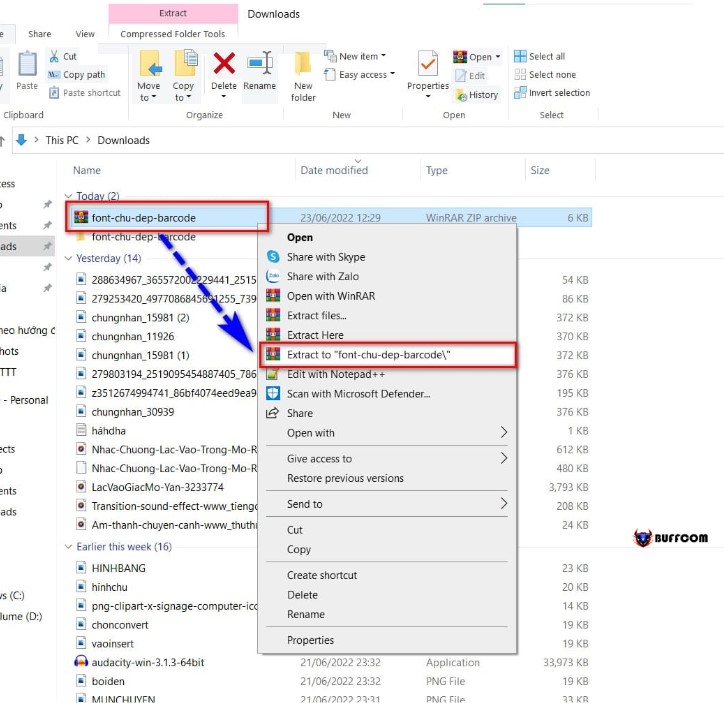
Step 1: After downloading the Barcode font, you will unzip the file by right-clicking on the compressed file, and selecting Extract to +.
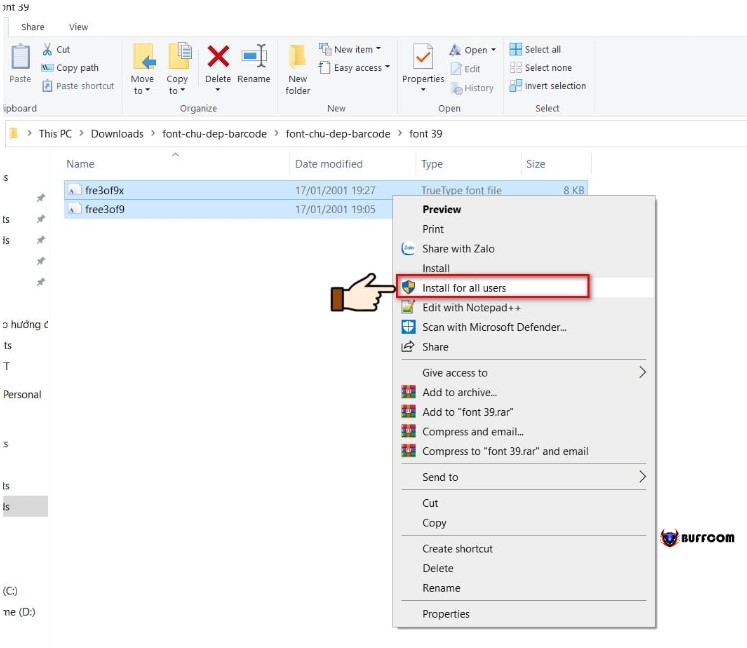
 Next, to install the font, you will select the font to download, right-click and choose Install to install the font.
 Note: There are 2 types of fonts in the file, code 39 and code 128. Both allow encoding of both numbers and characters.
However, the code 39 font requires you to add a “*” at the beginning and end of the data when entering data.
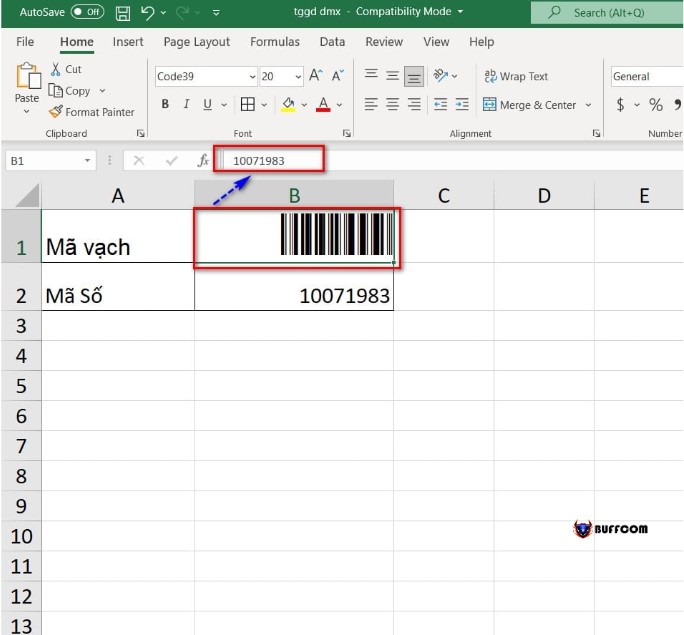
Step 2: This is the step to create the barcode. First, you open the Word or Excel file.
In the font selection box, you select the font you just installed.
 To increase the size of the barcode, simply change the font size.
In conclusion, creating barcodes in Word and Excel is not a difficult task if you follow the steps mentioned in this article. With the Barcode font installed on your computer, you can easily generate barcodes for your products or goods, which can be read by electronic devices. We hope this guide has been helpful to you in creating barcodes efficiently and accurately.


