Guide To Setting Alarms On Windows 10

In life, most of us are familiar with setting alarms on mobile devices and smartphones. However, have you ever heard of setting alarms on Windows 10? If you didn’t know that Windows 10 supports alarm settings, then read this article to learn how to use this feature right away!
How to Set Alarms on Windows 10
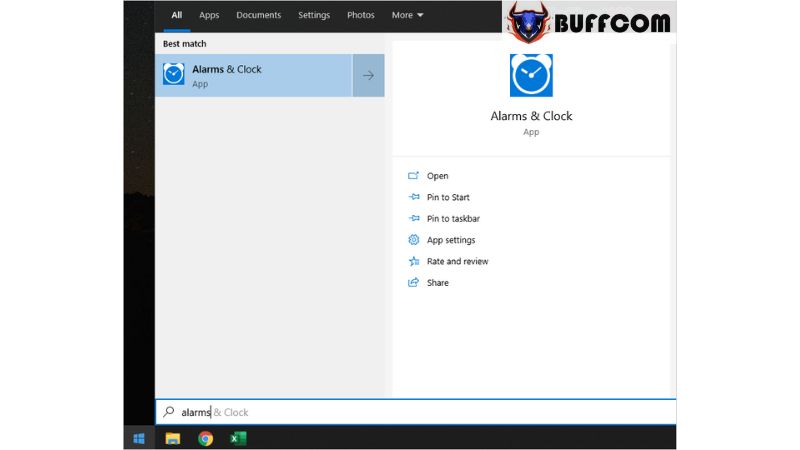
Step 1: Open the Start Menu and type “Alarms & Clock” in the search box to launch the application.
This is a built-in app in Windows 10, so you can easily access it by searching.
 Step 2: Then, select the “Alarm” tab and click the “+” icon to add a new alarm.
 Step 3: Next, proceed to set the following information:
- New Alarm: Set the alarm time (AM for morning, PM for evening).
- Alarm Name: Give a name to the alarm.
- Repeats: Set the alarm to repeat.
- Sound: Choose the alarm sound.
- Snooze time: Set the snooze duration.
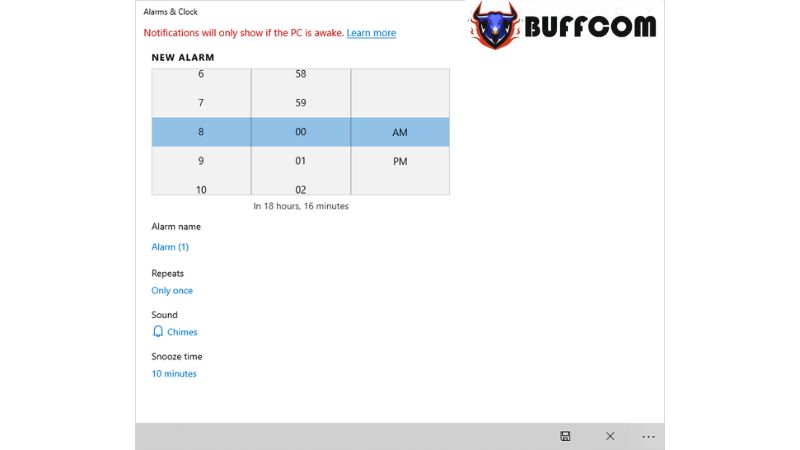 Step 4: Once you’re done, click the Save icon to save the alarm on Windows 10.
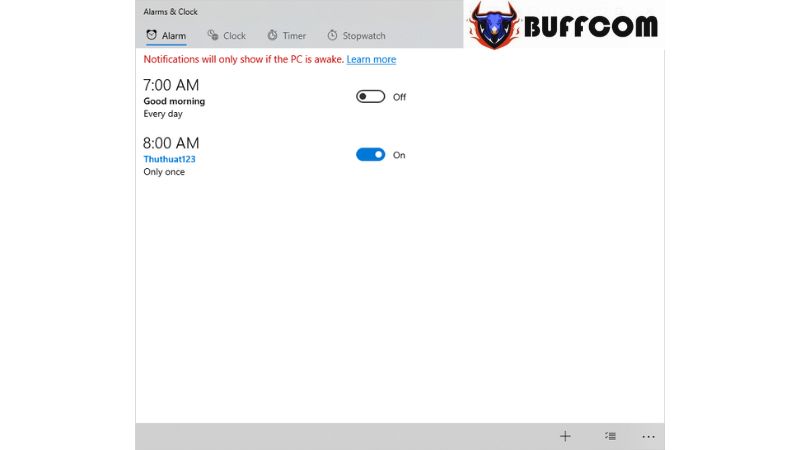
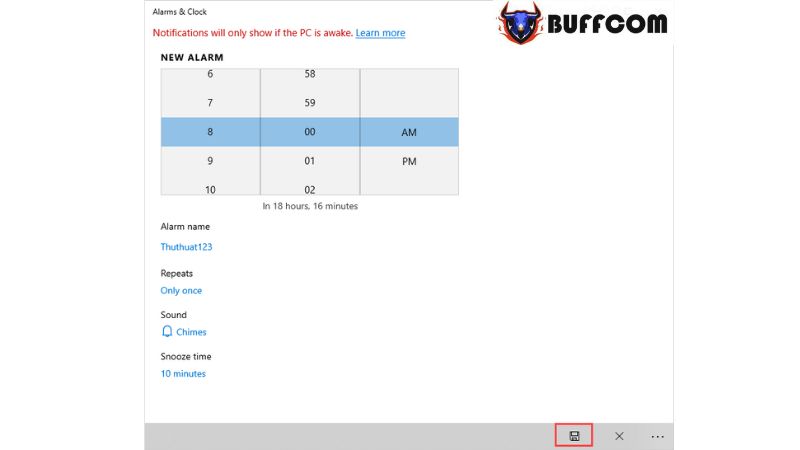 Finally, you will have a result like the one below:
 How to Delete Alarms on Windows 10
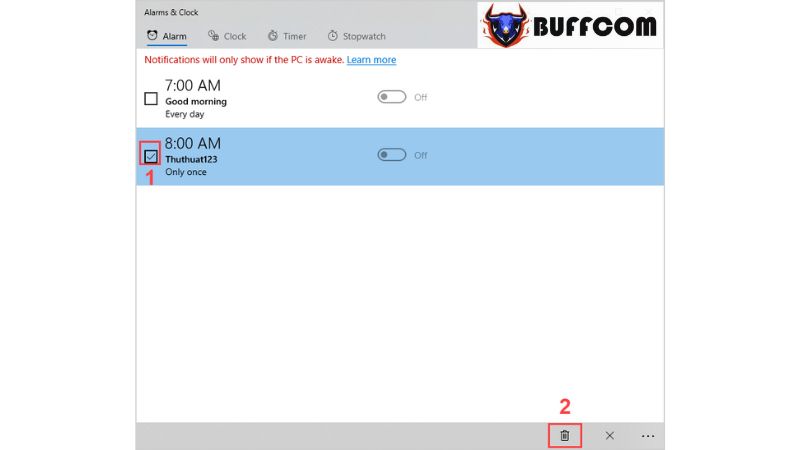
If you no longer want to use alarms on Windows 10, you can either turn them off or delete them completely. To delete an alarm on Windows 10, follow these steps:
Step 1: Select the Options icon at the bottom right corner of the screen.
 Step 2: Then, check the “V” mark next to the alarm you want to delete and click Delete.
 Notes for Using Alarms on Windows 10
Alarms on Windows 10 only work when your computer is in an active state (not sleeping). Therefore, to ensure it works, you should disable the Sleep mode on Windows 10 when your computer is supposed to be awake for the alarm.
Step 1: Open the Start Menu and select Settings (or press the Windows + I combination) to open the Settings window on Windows 10.
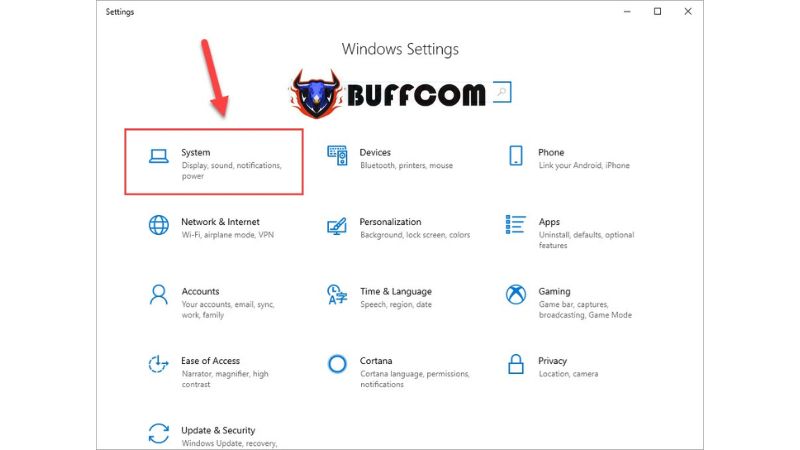
 Step 2: Next, choose System to access the general system settings on Windows 10.
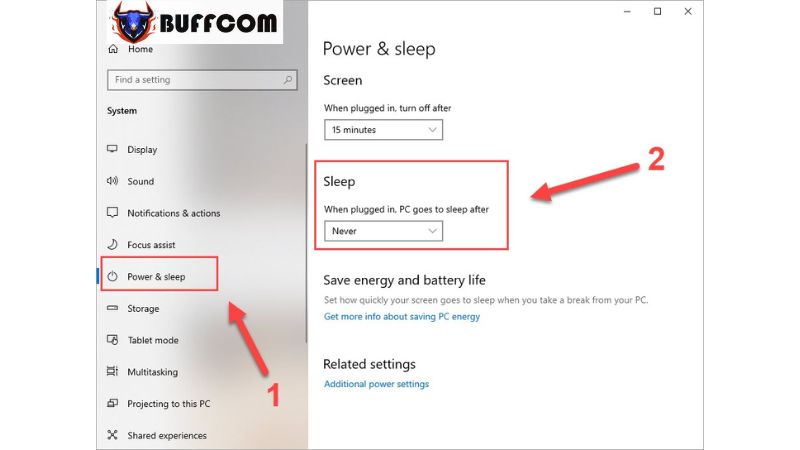
 Step 3: Select the Power & Sleep tab. Here, you will find the Sleep section. You can adjust the settings as follows:
Never: Disable Sleep (SELECT NEVER)
Times: Enable Sleep
When you choose a specific time, it means that after that period of inactivity, the computer will automatically go into sleep mode to save power.
 After making your selections, close the Settings window, and all the settings will be applied to the system.
In this article, Buffcom.net has provided a quick and effective guide on how to set alarms on Windows 10. We wish you success. If you’re interested in genuine Windows keys, please contact Buffcom.net for support!


