How to burn your PowerPoint to a DVD disc
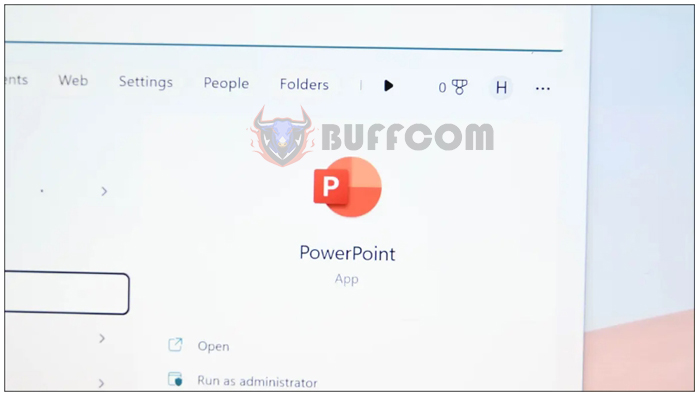
How to burn your PowerPoint to a DVD disc: Do you want to present your PowerPoint presentation using an old DVD player? If so, it’s quick and easy to burn your presentation to a DVD disc using the built-in tools on your Windows or Mac computer. Here’s how.
To burn your PowerPoint presentation to a DVD disc, you first create a video file from your presentation and then use the built-in tools on your Windows or Mac computer to burn that file to a DVD disc. You’ll need a blank DVD-R disc or a rewritable DVD-RW or DVD+RW disc that is writable, along with a DVD burner, so make sure you have a disc before proceeding. The LG GP65NB60 is an affordable external DVD drive that will work for this purpose.
Step 1: Create a video file from your PowerPoint presentation
The first step is to turn your PPTX into a video file. To do this, you’ll use the built-in option within the PowerPoint application. Follow the section below based on your specific operating system, and you’ll have a video file ready for your presentation.
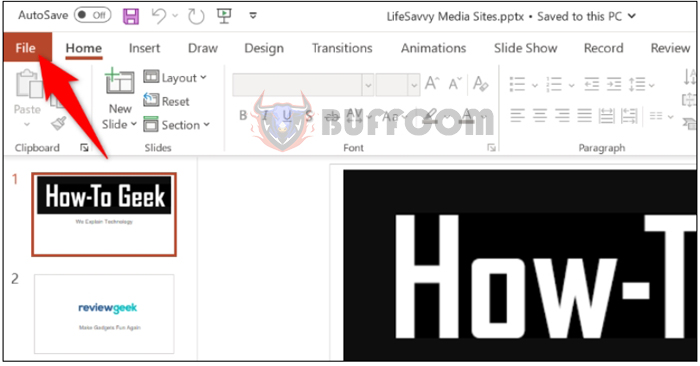
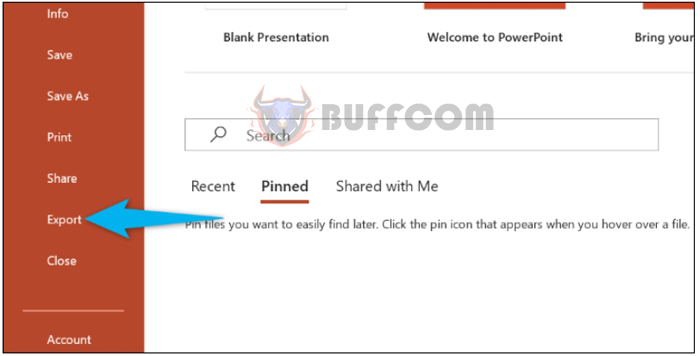
Open your presentation in PowerPoint. Then, at the top left corner of the application, click on “File.”
Select “Export” on the left sidebar.
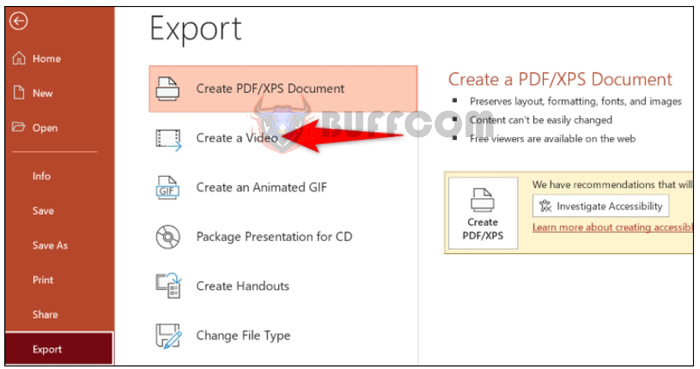
 On the right pane, select “Create a Video.”
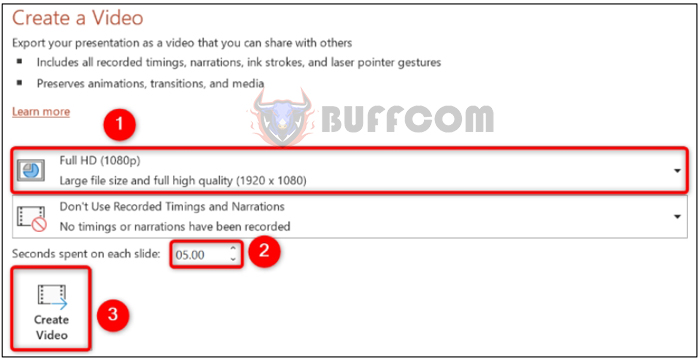
On the outermost right pane, you’ll see the “Create a Video” section. Here, click on the first drop-down menu and choose “Full HD.” This ensures that your video file has high quality. You can choose a lower resolution if you want to save memory, but it will also reduce the quality of your video.
Next, in the “Seconds spent on each slide” box, enter the amount of time each slide will be displayed in your video. The default is 5 seconds, and you can change this value to whatever you prefer.
After configuring those options, click on “Create Video” to start creating your video file.
Select “Create Video.”
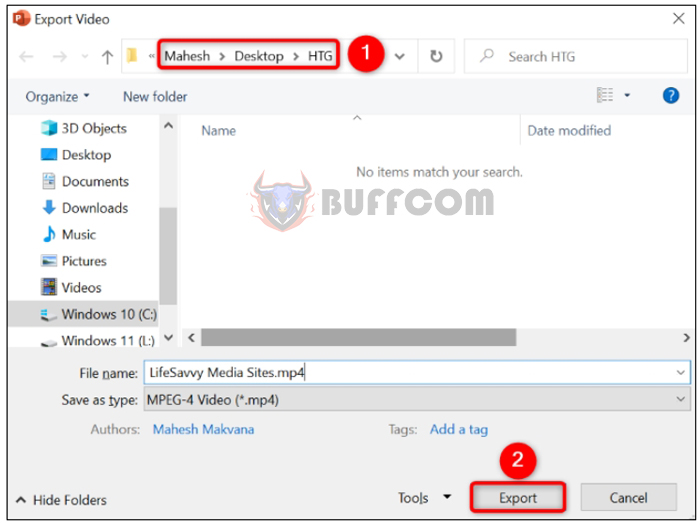
 The “Save Video” window will open. Here, choose a folder to save your video file in and click “Save.”
Select a folder and click “Save.”
 At the bottom of PowerPoint, you’ll see the status of the video creation. Once this process is complete, your video file will be ready.
Please note that PowerPoint’s built-in video creation feature may vary slightly depending on the version and edition of PowerPoint you are using.
Step 2: Burn Your PowerPoint Video onto a DVD Disc
Now that you have converted your PowerPoint presentation into a video file, let’s burn this video onto a DVD disc on a Windows machine.
Start by inserting a blank DVD disc into the DVD burner of your computer. At the bottom right corner of the screen, you’ll see a prompt. Click on it.
Select the Windows disc prompt.
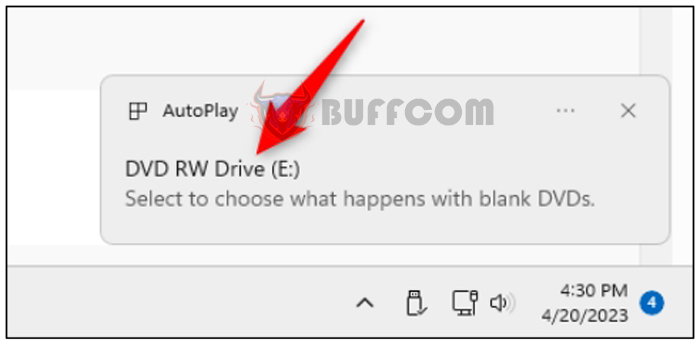 Note: If your disc is a DVD-RW or +RW disc, you may need to format the disc before you can use it. Windows will guide you on how to do this.
In the pop-up menu, choose “Burn files to disc.”
Select “Burn files to disc.”
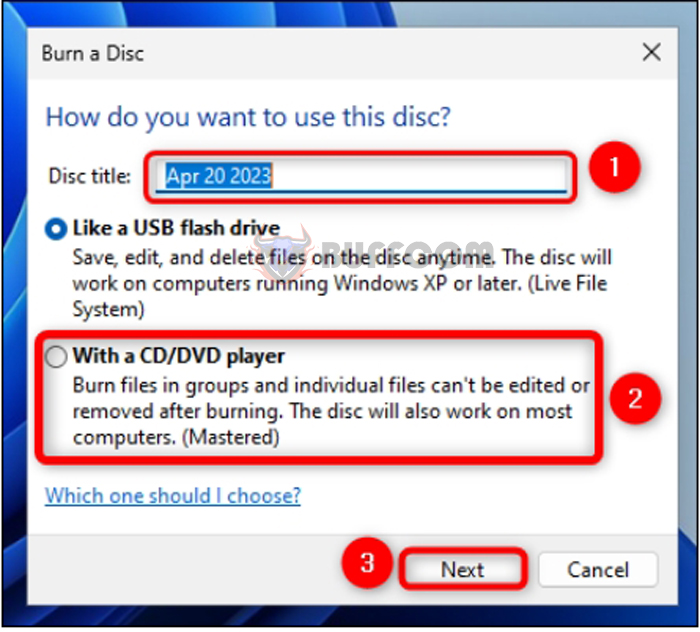
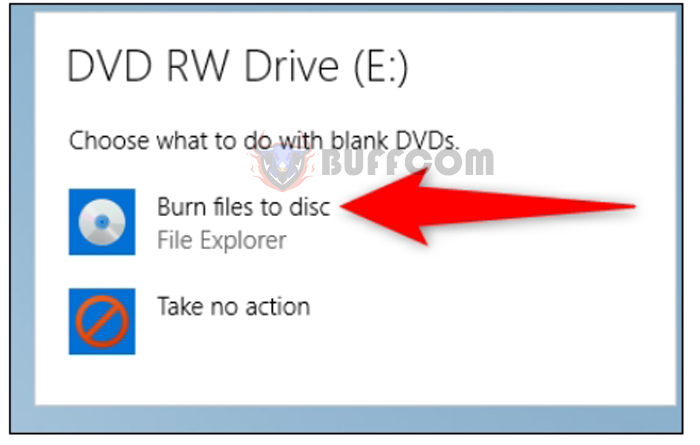 The “Burn a Disc” window will launch. Here, click on the “Disc Title” field and enter a name for your disc. Then, select the option “With a CD/DVD player” and click “Next.” (Choosing this option ensures that your disc will play on various existing media players.)
Configure the DVD.
How to burn your PowerPoint to a DVD disc
You’ll see a File Explorer window. Here, drag and drop the PowerPoint video file that you created earlier, and Windows will burn that file onto your disc. And that’s it.

