How to change the Auto Save time in Excel
How to change the Auto Save time in Excel: The Auto Save feature in Excel helps minimize the risk of data loss due to power outages or software malfunctions. In this article, Buffcom.net will guide you on how to change the Auto Save time in Excel.
By default, Microsoft sets the Auto Save time for Excel at 10 minutes. However, you can change it according to your preference. To change the Auto Save time, follow these steps:
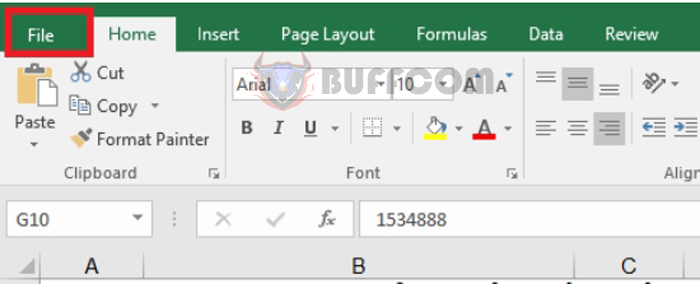
Step 1: First, open any Excel file and select the File tab on the Ribbon toolbar.
How to change the Auto Save time in Excel
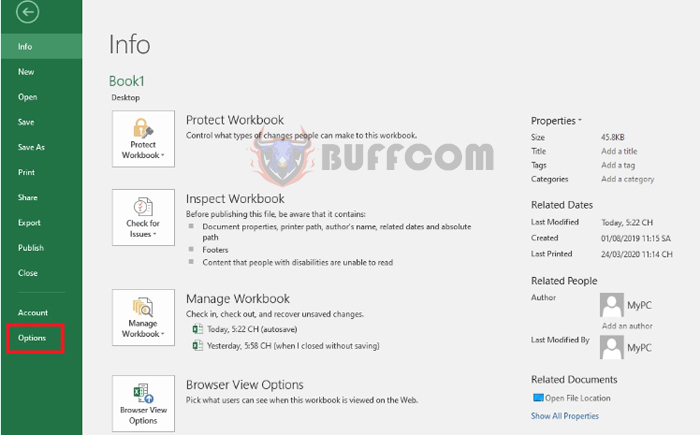
Step 2: After selecting the File tab, the Excel screen will switch to a different mode. Select the Options button located at the bottom left corner of the screen.
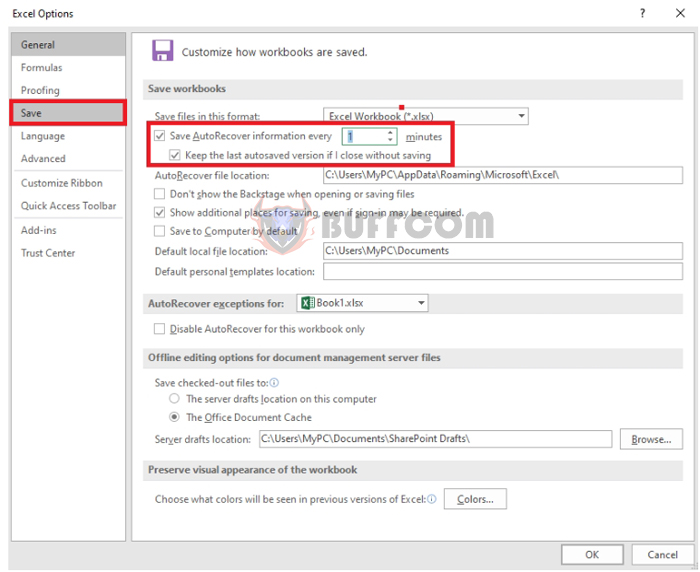
 Step 3: This will bring up the Excel Options window. Select the Save option from the list on the left, then look for the Save workbooks option on the right.
Here, you can tick the box and adjust the time according to your preference in the Save AutoRecover information every…minutes section.
If you want to keep the last autosaved version if you close without saving, tick the box.
After completing the setup, select OK to finish. In this case, I set the time to 1 minute. Now, Excel will automatically save data every minute, preventing the risk of power outages or other incidents.
 That’s it! This article has shown you how to change the Auto Save time in Excel. We hope this article will be helpful to you in your work. Good luck!

