How to create a table in Word quickly and easily

One of the useful tools in Microsoft Word is creating a table. Presenting data in a table format will make conveying content more coherent, clear, and scientific. To help readers know how to create a table in Word quickly and easily, Buffcom.net has compiled the following table manipulation operations, let’s refer to them!
How to create a table in Word
Method 1: Create quickly with Table
- Select Insert > Table.
- Move the mouse cursor to the position showing the number of rows and columns you want. Then click the left mouse button to create a table.
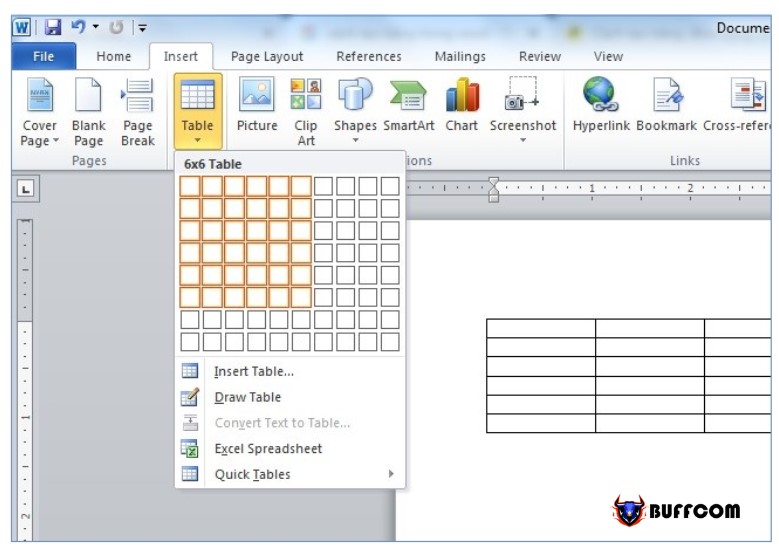
Method 2: Create a table in Word with column and row options
- Select Insert > Table > Insert Table.
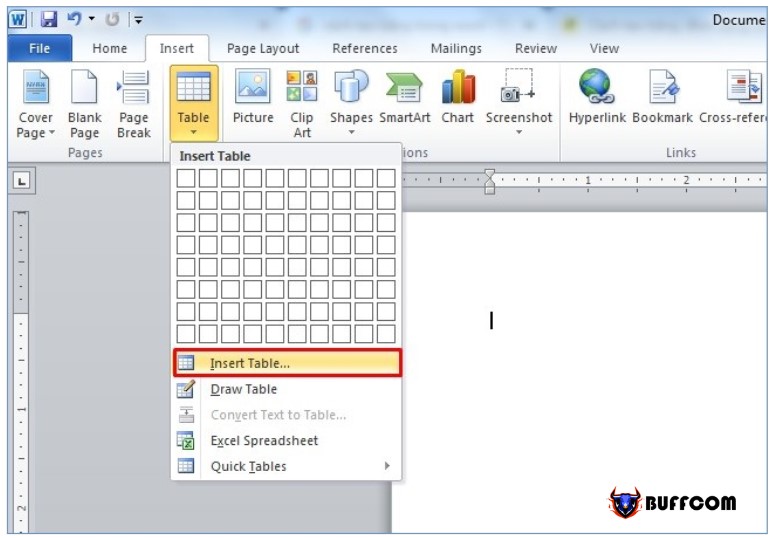
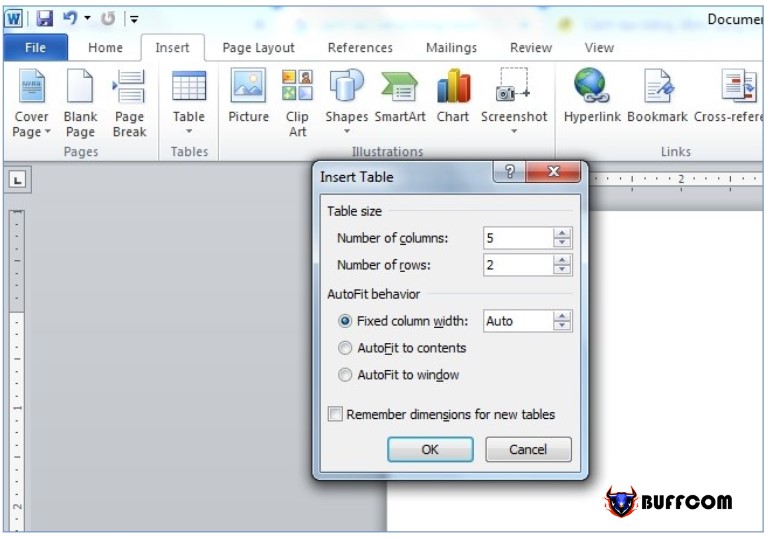
- A dialog box appears. You enter the corresponding number of rows and columns in the Number of rows and Number of columns fields. Then click OK to complete creating the table.
Method 3: Create a table with available templates
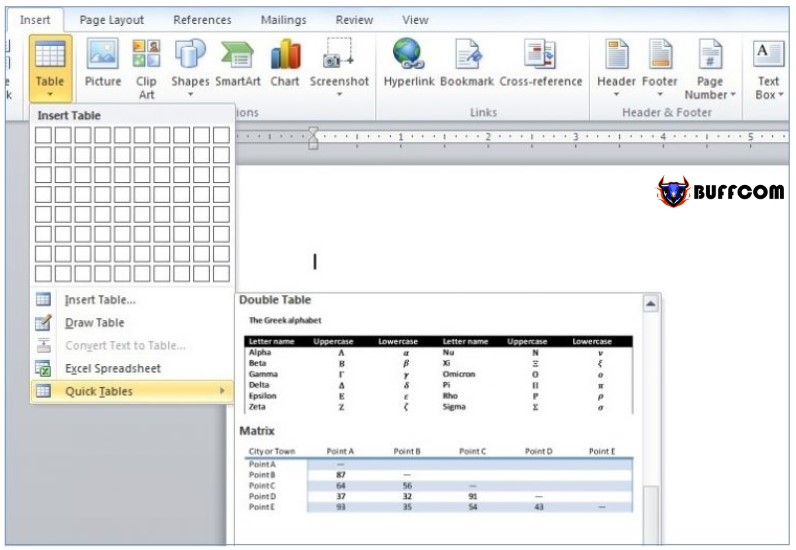
- Select Insert > Table > Quick Tables.
- A list of available table templates allows users to choose as desired. Then you just need to edit the content in the columns.
How to draw a table in Word
In addition to quickly creating a table with available templates or using row and column options settings to automatically create a table, you can also draw a table as desired with the Draw Table tool as follows:
- Select Insert > Table > Draw Table.
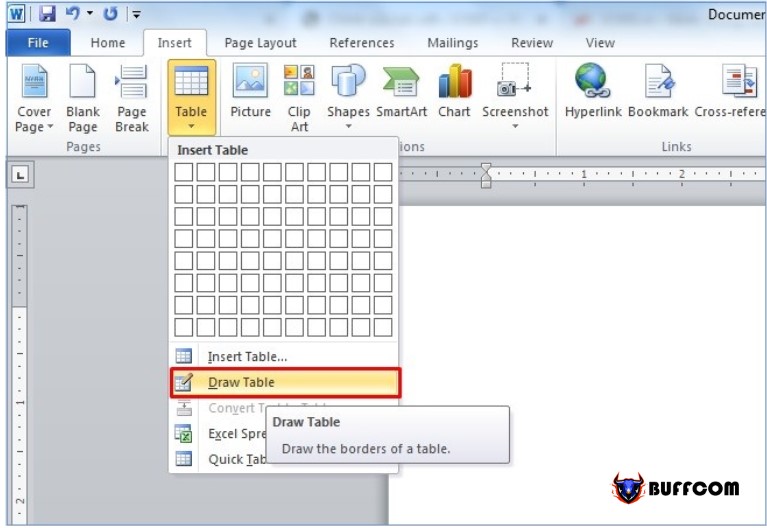
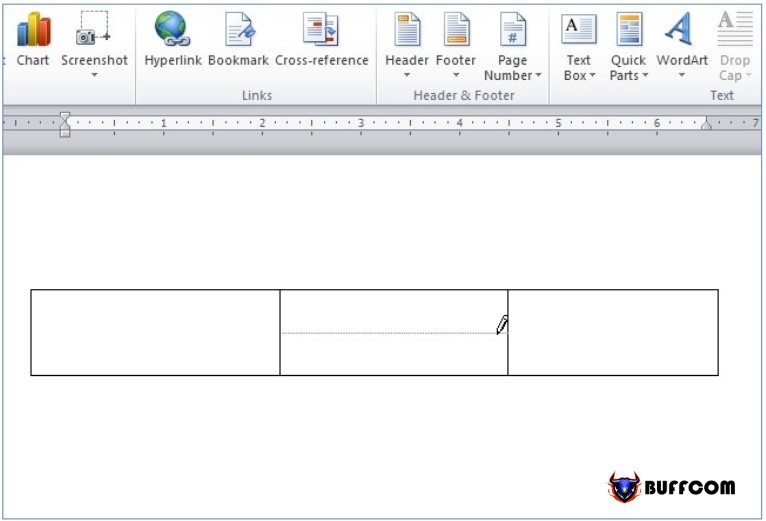
- Then, the computer mouse cursor will display as a pencil. You can create lines as you like.
How to edit a table in Word
Change the width of cells, columns, and the size of the table
To change the size of the table, zoom in or out, you just need to point the mouse cursor to the small square position at the bottom right corner of the table. Then drag up, down, left or right to resize the table as desired. With this method, you will change the size of cells and columns in the table evenly.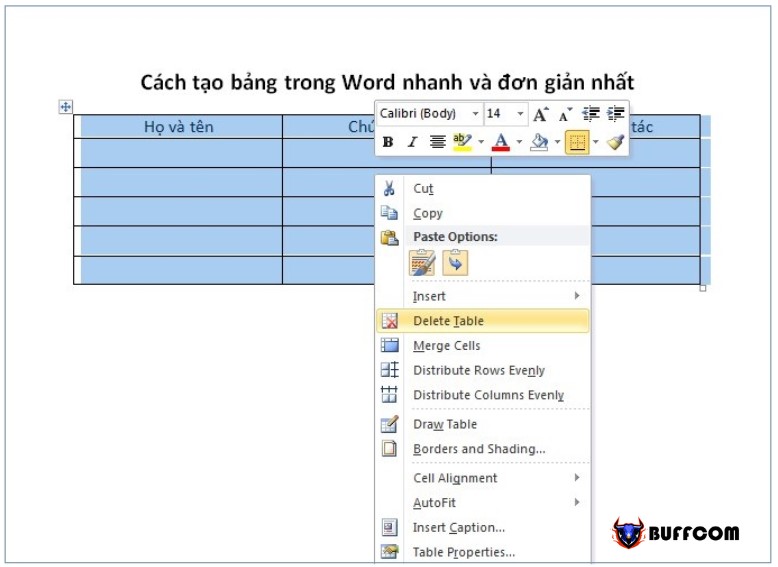
In addition, to change the width of each column, each row separately, you need to adjust the vertical or horizontal lines of the table as follows:
- At the column you want to expand. Place the mouse cursor on the right side of the column, which is the line that intersects with the next column. Then, the mouse cursor will change to a two-way arrow icon.
- Press and hold the left mouse button and drag to the appropriate position to achieve the desired width of the column.
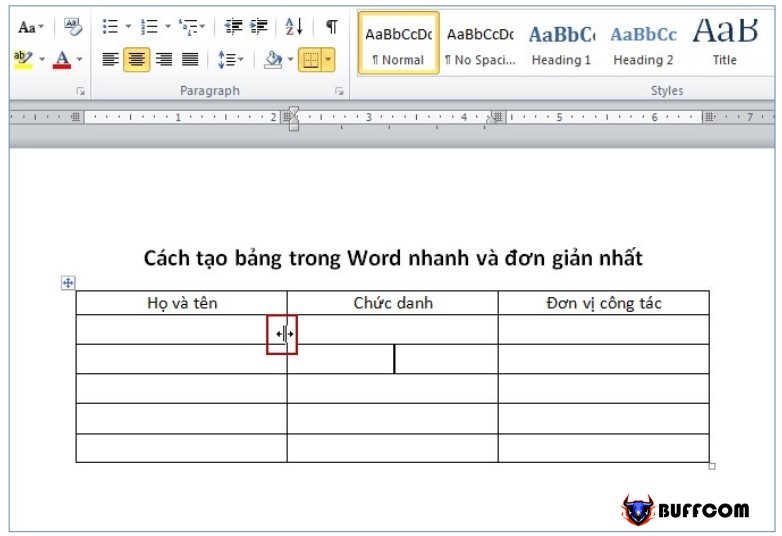
For expanding the size of the row, you can also perform the same steps as with the column.
Merge or split cells in a table
- To merge multiple cells into a single cell, select the cells you want to merge. Then click on Layout > Merge Cells. Immediately, the selected cells will be merged into a single cell.
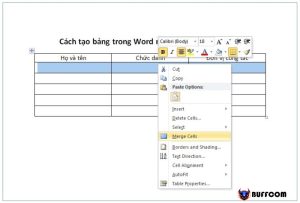
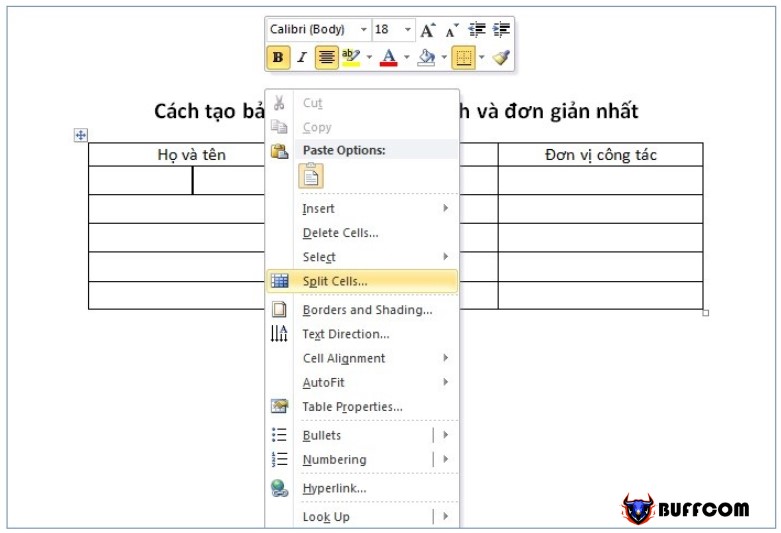
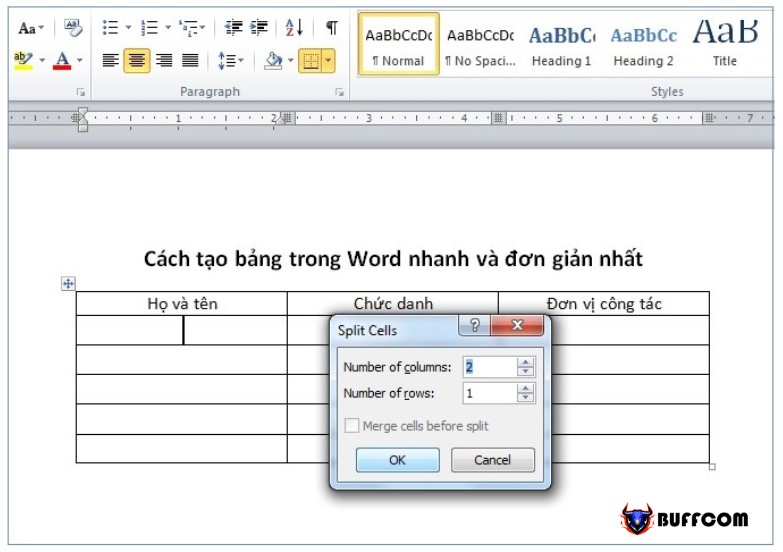
- To split a cell into multiple cells, select the cell you want to split. Then click on Layout > Split Cells. A dialog box will appear, where you can enter the number of rows and columns you want to split the cell into. Finally, click OK to complete the process.
Cell alignment in tables
To display your table with a beautiful, easy-to-read, and scientific interface, you need to align the text in the table appropriately. Therefore, if you want to center, left-align, right-align, align text on top, align text on the bottom, or rotate text in the cell, you can perform the following steps:
- Highlight the cell whose text position you want to align. Then click Layout> Alignment.
- The Alignment section will provide options for text positioning. You just need to select the custom format you want. Immediately, your text will be displayed immediately in the cell as you wish.

Changing table borders
For tables representing different information in different fields, you will need to change the table borders appropriately. To change the table borders, follow these steps:
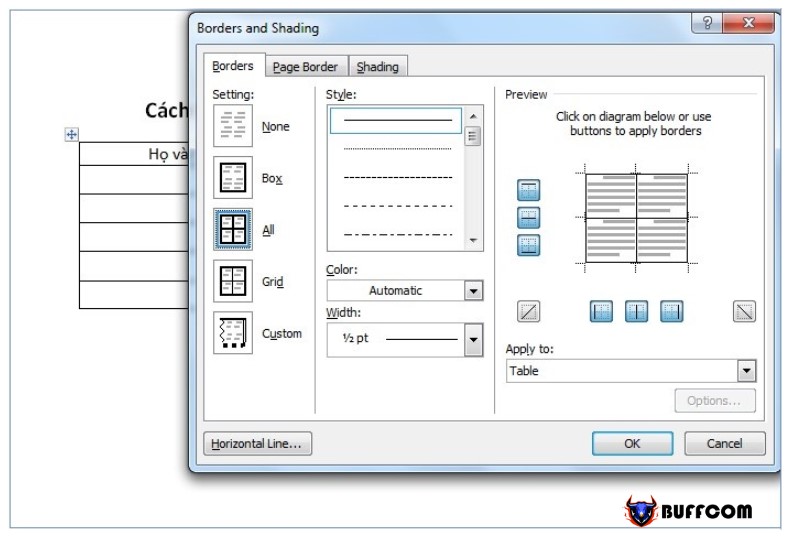
- Highlight the entire table. Select Design> Borders> Border and Shading.
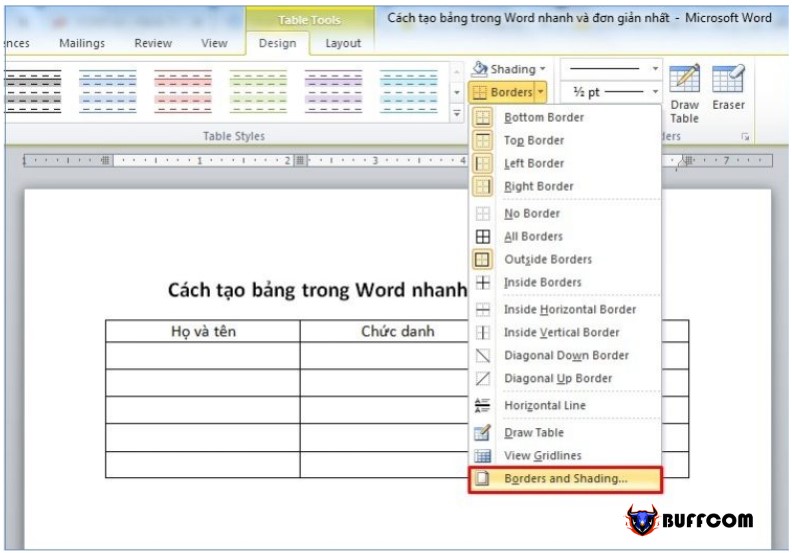
- The Border and Shading dialog box appears. You can choose the table border style, border style, border width, and border color as desired according to the Setting, Style, Width, and Color options. Finally, press OK to complete.
Adding color to the table
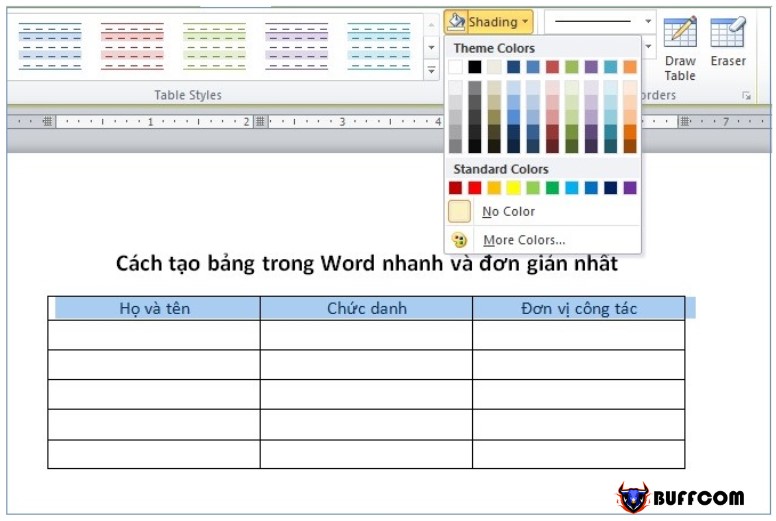
To make your table more attractive and to divide the sections more clearly, you can color the table as follows:
- Highlight the cells, rows, or columns you want to color. Then select Shading.
- Choose the color you want and apply it. The selected part of the table will be colored as desired.
Changing the table layout
Microsoft Word provides you with many beautiful and professional table styles that you can use. To choose one of these table styles, simply go to Design and select the table style you like.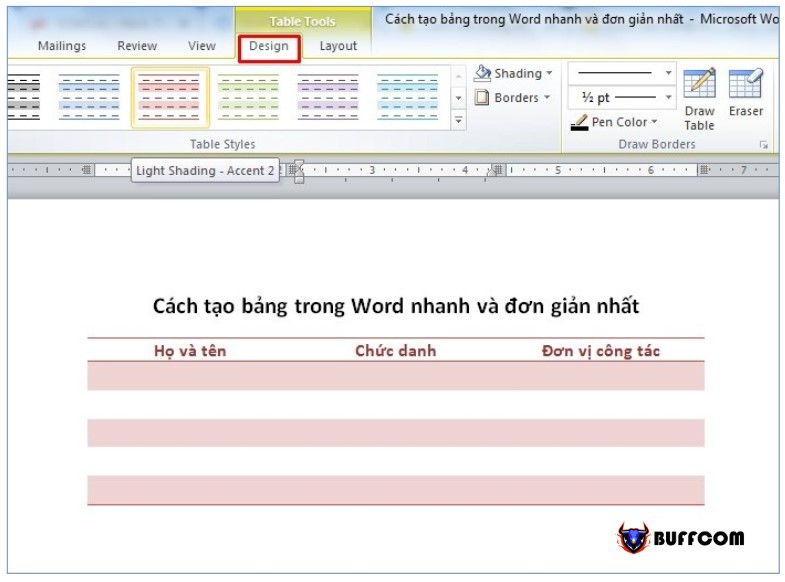
Adding columns or rows in a table
To add a cell or row in the middle or at any position in the table, follow these steps:
- Highlight the column or row you want to add next to. Right-click and select Insert.
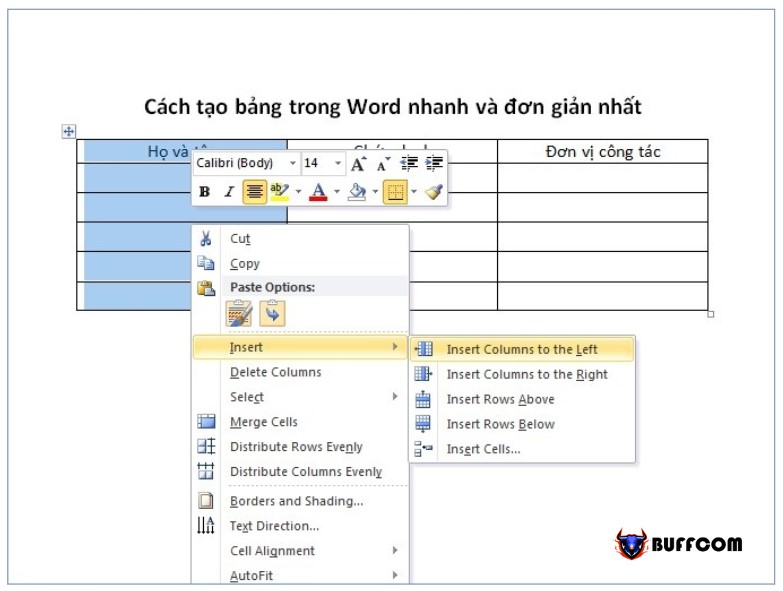
- Then there will be a series of options to insert rows, columns including:
Insert Columns to the Left: Insert a column to the left of the selected column.
Insert Columns to the Right: Insert a column to the right of the selected column.
Insert Row Above: Insert a row above the selected row.
Insert Row Below: Insert a row below the selected row.
Insert Cells: Insert cells as desired.
Select the appropriate item to insert rows or columns as required.
Deleting rows, columns, or tables in Word
Highlight the row or column or entire table you want to delete. Then right-click and select Delete. Immediately, the highlighted parts will be deleted quickly.
I hope with the detailed instructions above on how to create tables in Word as well as how to edit tables in Word, readers will easily create the desired table structure to serve their work optimally.


