How To Crop Images In PowerPoint

For regular users of office productivity applications, PowerPoint is an essential tool that cannot be ignored. In addition to being used as a presentation tool, PowerPoint is also commonly used for quick and efficient image editing for office workers. Buffcom.net provides you with the most detailed instructions on how to crop images in PowerPoint in the following article.
Guide on How to Add Images to PowerPoint
To work with images in PowerPoint, the first step is to add your image to any slide. The process of adding images is simple and similar to other office tools, as follows:
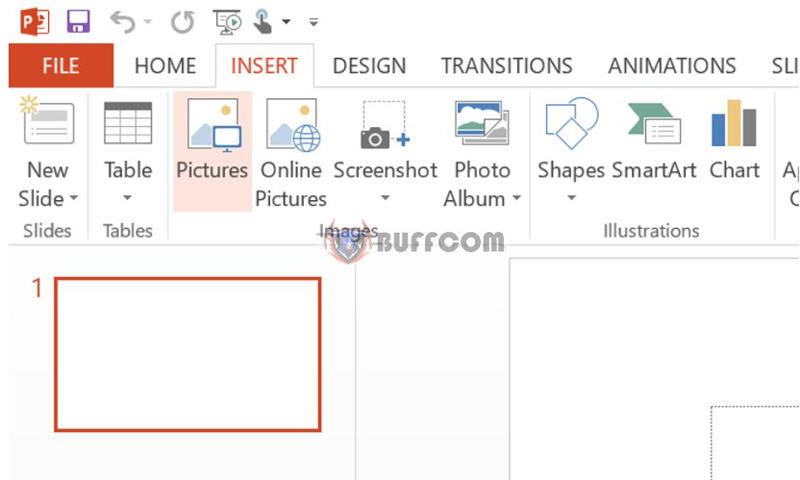
Select Insert => Picture => In some versions, an arrow option may appear under the Picture section => This Device/Online Picture, or these two features may be separate next to each other for easier operation.
 If you want to select an image from your device, choose the This Device option. For a different case where you want to select an image based on your preference by directly choosing from the Internet, click on Online Pictures.
After adding the image to PowerPoint, you can proceed to crop these images according to your preferences using various methods, specifically the three main methods mentioned below.
Three Simplest Ways to Crop Images in PowerPoint
Method 1: Crop Images in PowerPoint Using the Crop Tool
There are multiple ways to crop images in PowerPoint, but the Crop tool is the most commonly used method. The usage is also very straightforward:
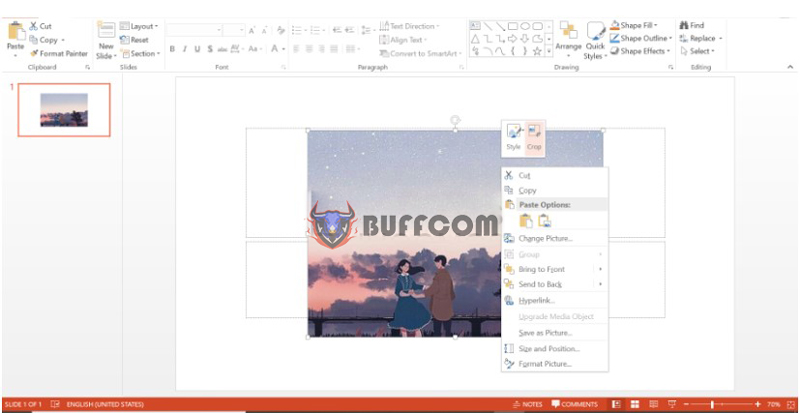
After inserting the image you want to crop, right-click on the inserted image. In some versions, a Crop button (a symbol of two diagonally crossed squares) will appear at the top.
The black crop handles will appear. Use these handles to adjust and crop the image as desired.
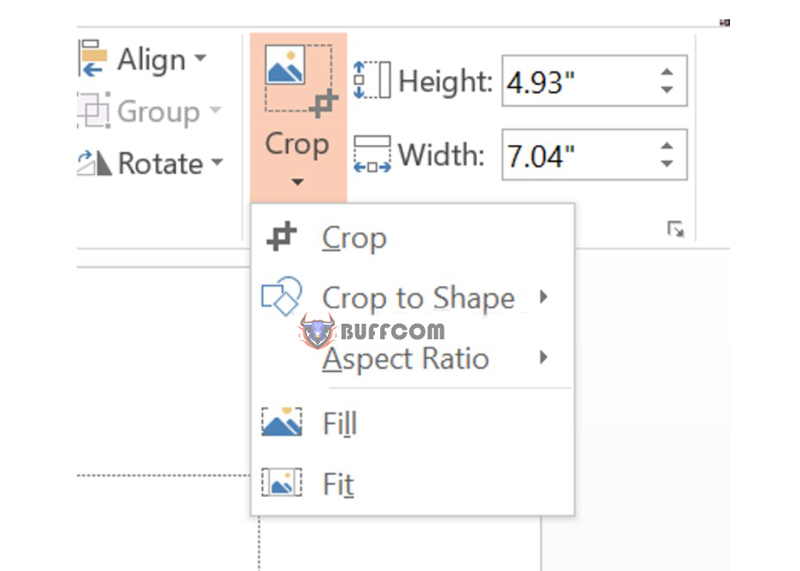
 Next, simply drag and resize the image to the desired size. If you need to crop the image in PowerPoint to a standard size, you can use the dialog box with the Height and Width fields next to the Crop button. Enter the desired dimensions in the dialog box.
After resizing the image to the desired size, simply press ESC or click anywhere outside the image to automatically complete the cropping operation.
Method 2: Crop Images in PowerPoint Based on Aspect Ratio
For those who want to crop images according to a standard aspect ratio without manually entering dimensions, the following method will be helpful. For aspect ratios like 1:1 or 2:3, it can be difficult to align precisely by manual input. PowerPoint provides a feature to crop images based on these dimensions.
Step 1: Click on the image displayed on the slide.
Step 2: Click on Picture Tools => Format. You will then have options for dimensions in the Size group.
 Step 3: You can choose an aspect ratio in Aspect Ratio that you want to use and then apply it to your image below.
Finally, you move the Crop frame (the bold black lines around the image) to achieve the desired size.
How to Crop Images in PowerPoint into Any Desired Shape
The tool that can be used with Crop that everyone may know is Fill Shape. For example, you can apply and use a circle shape to crop a captivating headshot image. It can be presented in the following steps:
Step 1: Select and go to Insert => Shapes. Then choose Format and select one or more shapes from the available default options.
Step 2: The Drawing Tools dialog box appears, click on it. In this group, which is Shape Styles, click in sequence on Shape Fill => Picture.
Step 3: When you have selected an image that you want to use, insert it into the shape format.
Step 4: When you want to select an image within the picture part, click on it.
Step 5: We will start by going to Picture Tools => Format. At this point, the Size group will appear, click the arrow at the bottom of Crop so that the display can show both cropping options.
Step 6: There will be two choices for you to select: fill or fit.
 Summary of How to Crop Images in PowerPoint
Above, Buffcom.net has provided the most detailed instructions on how to crop images in PowerPoint using various methods depending on individual purposes. Proficiency in office computing is a necessary skill in education and work. Master the knowledge from basics to advanced levels in a systematic way, and to fully utilize all the features, purchasing a licensed Office is essential. Contact Buffcom.net for assistance!


