How to delete blank pages in Word – everyone can do it
How to delete blank pages in Word. Blank pages in Word are pages that do not contain any text and are accidentally created when typing. These pages can affect the text editing process, page numbering, or cause aesthetic issues when printing. Therefore, many people want to delete blank pages in Word, but not everyone knows how to do it. If you are struggling with this issue, here are 3 simple methods to follow with Hiếu!
If you have tried the Backspace or Delete keys at the position of the blank page you want to delete in Word 2003, 2007, 2010, or 2013 without success, consider the following methods:
Delete alternating blank pages
The first case that makes you extremely confused when editing text and numbering pages is the alternating blank pages between normal text pages. This happens when you accidentally press Page Break or press Enter multiple times or create a table in Word. This is one of the most common cases. To fix this, do the following:
Step 1: Open Microsoft Word -> select the file with the blank page issue.
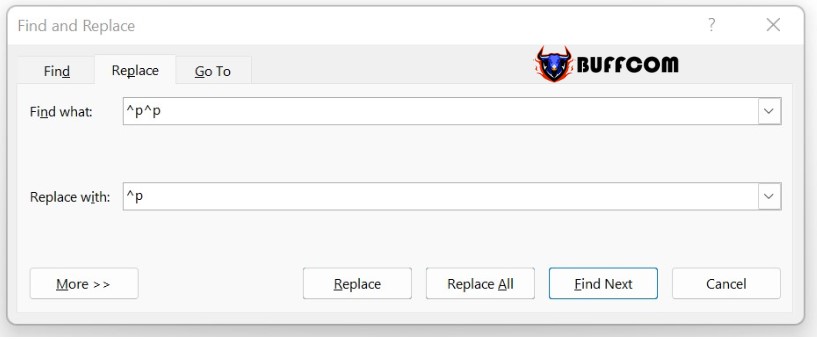
Step 2: Click the mouse pointer on any position in the Word page, then press the Ctrl + H key combination. The Find and Replace dialog box appears. On the Replace tab, fill in the fields:
Find what: In the blank box, enter ^p^p
Replace with: In the blank box, enter ^p
Delete blank pages in Word
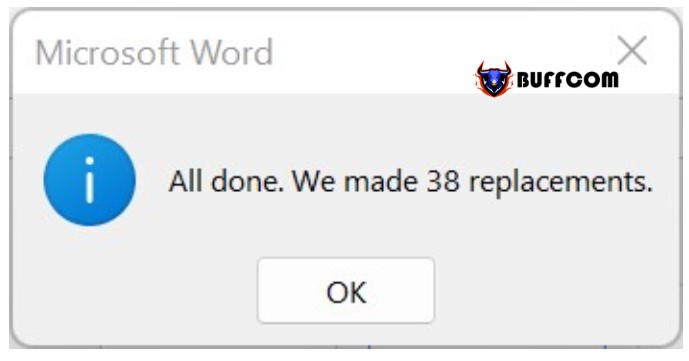
Step 3: Click Replace All. The Microsoft Word dialog box appears on the screen, continue to click OK.
Delete blank pages in Word
Step 4: Repeat step 3 until the blank page is deleted.
Delete the blank page at the end of the document
After the text, there may be blank pages due to multiple Enter errors while typing. Having a blank page immediately after the text causes page numbering errors in many important documents. To delete the blank page, follow these steps:
Step 1: Open Microsoft Word -> select the file with the blank page issue.
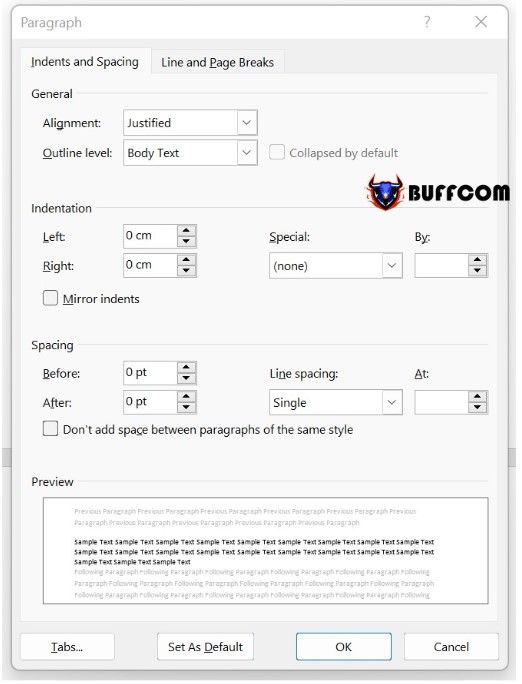
Step 2: Highlight the text below the table on the blank page -> right-click -> select Paragraph. In the Paragraph dialog box, under the Indents and Spacing tab, adjust the spacing as follows:
Before: select 0 pt
After: select 0 pt
Line spacing: select Single
After completion, click OK to save.
Delete blank pages in Word
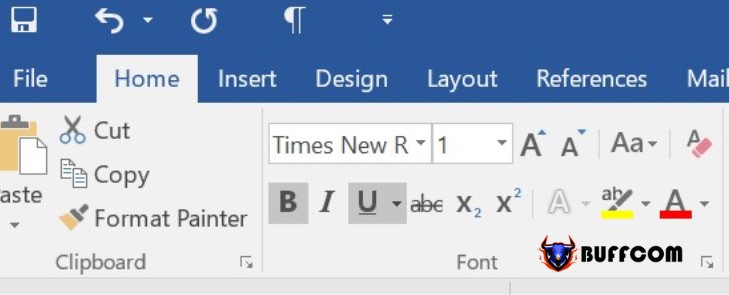
Step 3: Press Home and adjust the font size to 1.
Delete blank pages in Word
Now the blank page should disappear completely.
Delete the blank page at the end of the document without a table
This case is quite common when you press Enter or Page Break multiple times. At that time, you may see a series of blank pages behind, not just one. To handle this, simply follow these steps:
Step 1: Open Microsoft Word -> select the file with the blank page issue.
Step 2: Left-click on the blank page -> Press the Ctrl + Shift + End keys -> press Delete.
Now all the blank pages will disappear and only the normal text pages will remain.
Note:
Deleting blank pages in Word is one of the most frequently used editing tasks. However, there are a few small notes that you need to remember to ensure a smoother process and reduce errors for the next times:
Check carefully the number of blank pages and the positions that need to be deleted, perform step by step.
Perform accurately to avoid accidentally deleting the previous text.
After completion, check the document again. If deleted incorrectly, revert to the previous document and start again step by step.
Your document will look much neater, more beautiful, and more professional when you know how to delete blank pages in Word as above. Hopefully, with this information, you have learned how to perform the task quickly and easily.

