How To Disable Windows 10 Password At Login

If you frequently use your computer at home or if there’s nothing valuable on your machine, setting a login password can be time-consuming when booting up. In the following tutorial, Buffcom.net shares a simple and quick way to disable the Windows 10 password at login.
Disabling Windows 10 password at login
Disable Windows 10 login password in User Accounts
Step 1: Press the Windows + R key combination to open the Run dialog box. Then, type in “netplwiz” (1) and click OK (2).

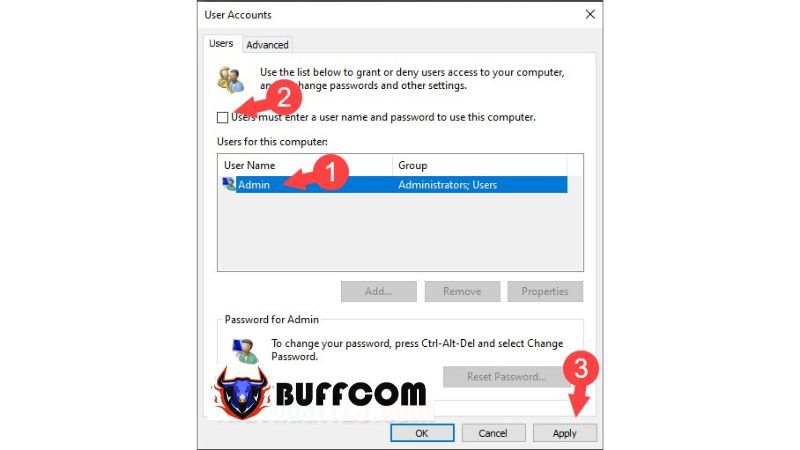
Step 2: Click on the main User Account name (1) and uncheck the box that says “Users must enter a user name and password to use this computer” (2) => Apply (3).
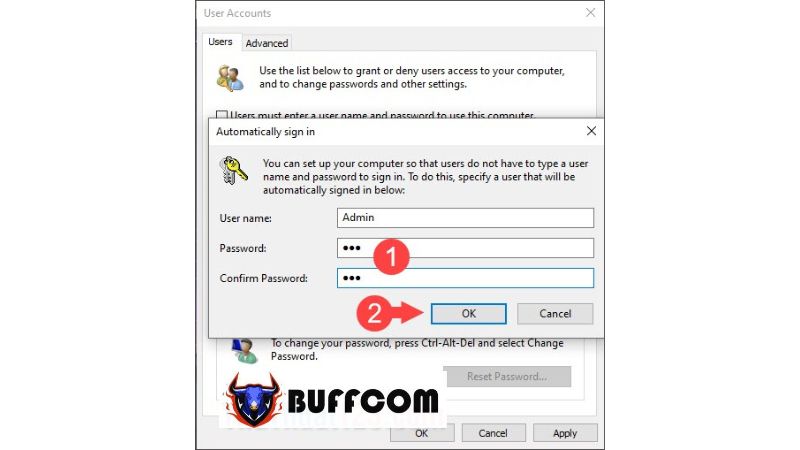
 Step 3: A confirmation dialog box will appear as shown below. Re-enter your Windows login password in the “Password” and “Confirm Password” fields (1). Then, click OK (2) to finish. From now on, you won’t have to enter a password when logging into Windows 10.
 Remove Windows 10 login password
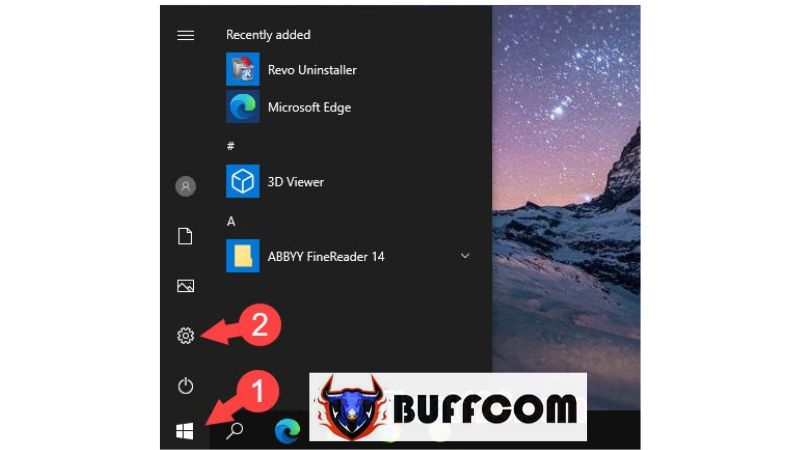
Step 1: Go to Start (1) => Settings (2).
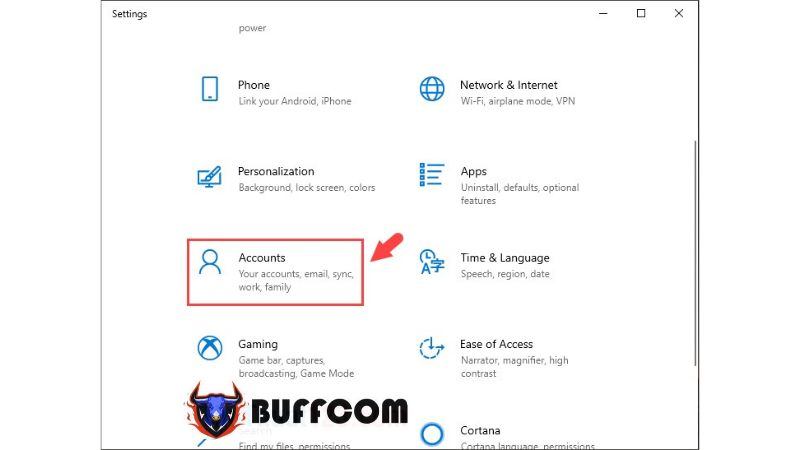
Step 2: Click on the “Accounts” section.
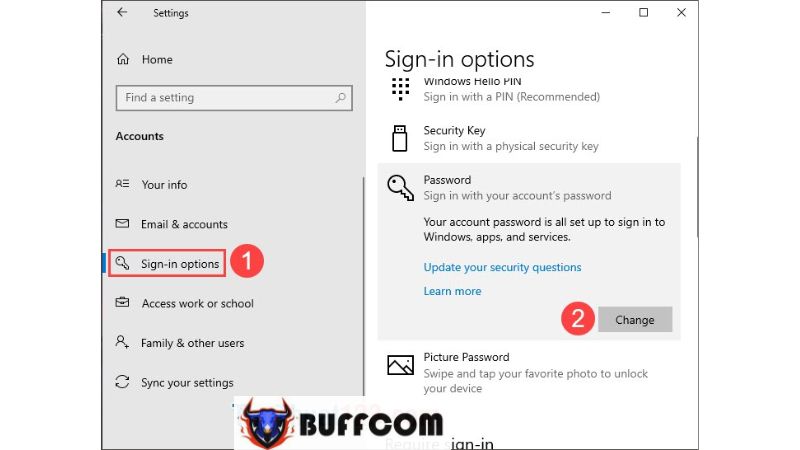
 Step 3: Select “Sign-in options” (1) => Change (2).
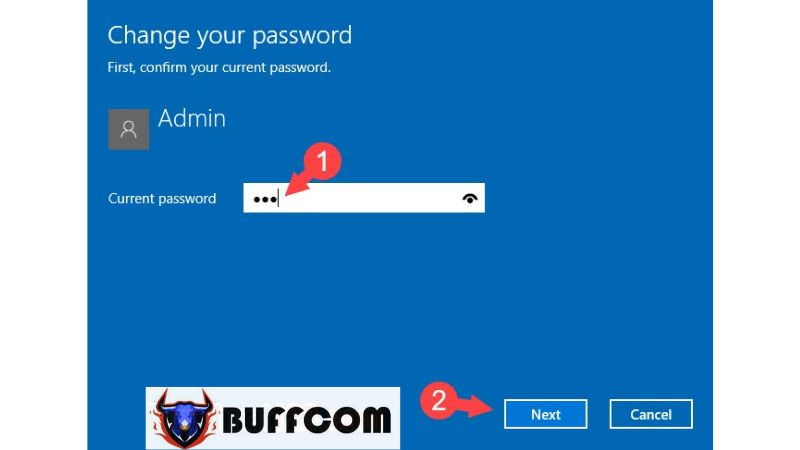
 Step 4: Enter your password (1) => Next (2).
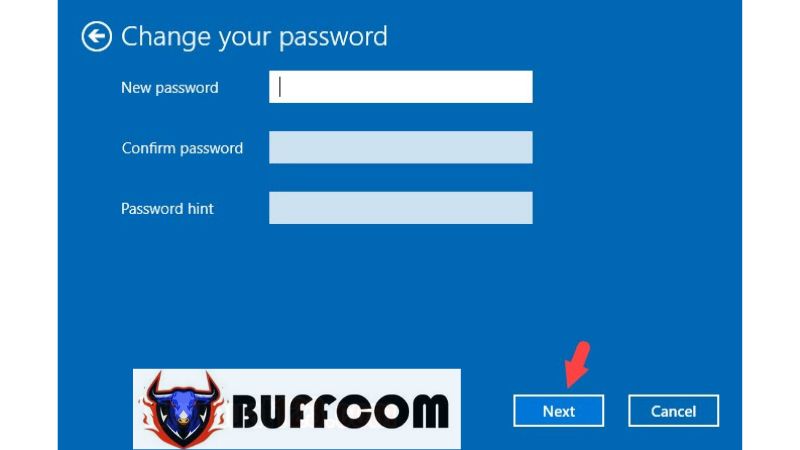
 Step 5: Click Next and leave the password fields blank to remove the password.
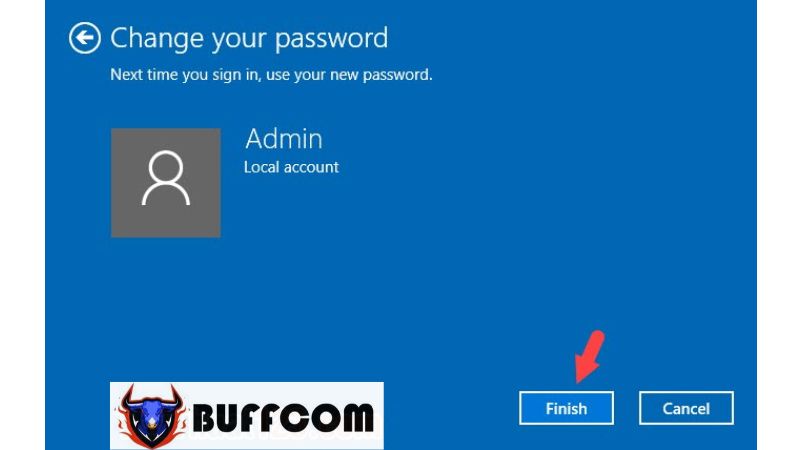
 Step 6: Click Finish to complete the process.
 With the instructions provided in this article, you can log into Windows 10 quickly without the need to enter a password. We wish you success, and if you’re interested in a genuine Windows product key, please contact Buffcom.net for support!


