How to Draw Diagrams In Word – Extremely Simple Guide

To draw diagrams, specifically mind maps, directly within the familiar Microsoft Word application, one can use the feature called “Draw diagrams in Word.” This is an easy and popular method for drawing diagrams without the need to install complicated and resource-heavy mind mapping software. If you’re interested in learning how to utilize this feature, Buffcom.net offers a helpful guide that outlines simple steps to help serve your learning and research needs.
How to Draw Diagrams in Word
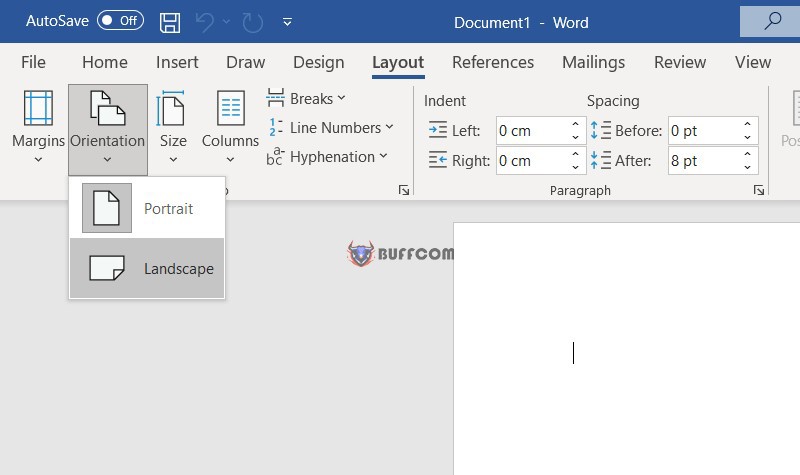
Before drawing a diagram, the first thing you should do is to imagine an overview of the diagram you will make to choose a suitable paper orientation. In Word, there are 2 main paper orientations:
- Portrait: The default paper orientation in Word.
- Landscape: It will be suitable if your mind map is arranged horizontally and has many objects.
To choose landscape orientation, go to Layout -> Orientation -> Landscape.
Draw Diagrams in Word
Step 1: Insert Additional Block Shapes of the Diagram
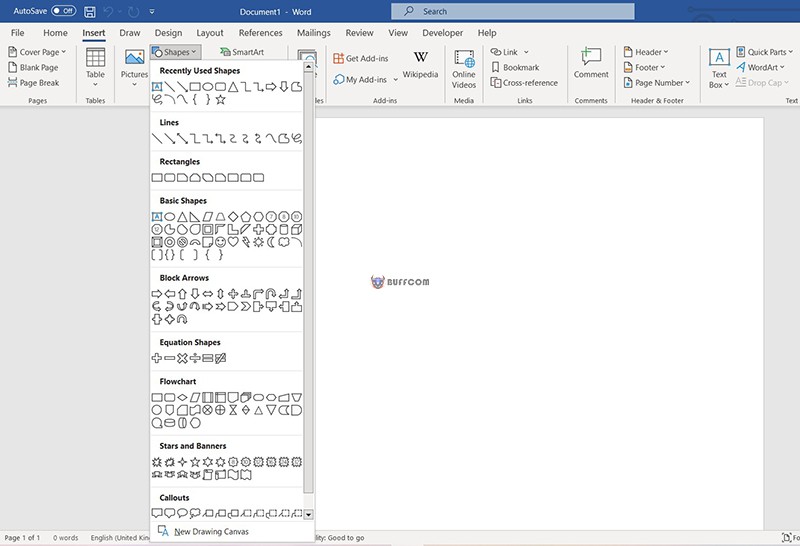
In the Word interface, select Insert -> Shapes.
Draw Diagrams in Word
This is a collection of shapes, blocks, icons… to help you quickly draw mind maps.
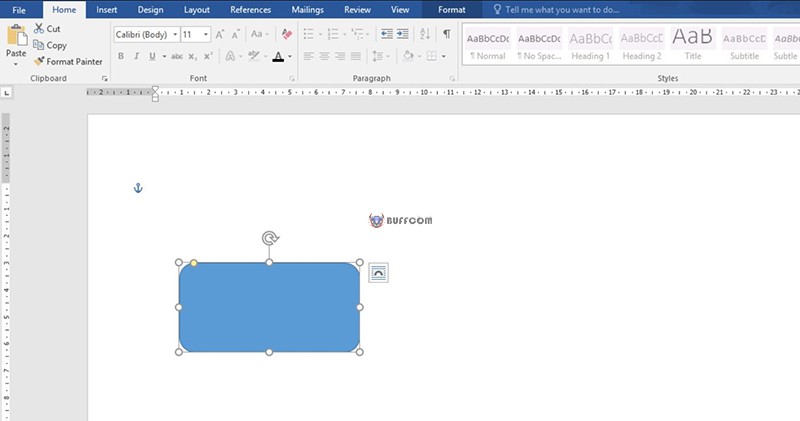
Select the shape you want to insert, your mouse cursor will show a plus sign +. Hold the mouse and drag to draw the shape. After inserting, you can adjust the size of the object by clicking on the icon and adjusting its size, height, and position using the two-way arrow, and adjust its position by clicking on the object and dragging the mouse to the desired position.
Draw Diagrams in Word
Step 2: Enter Information into the Diagram in Word
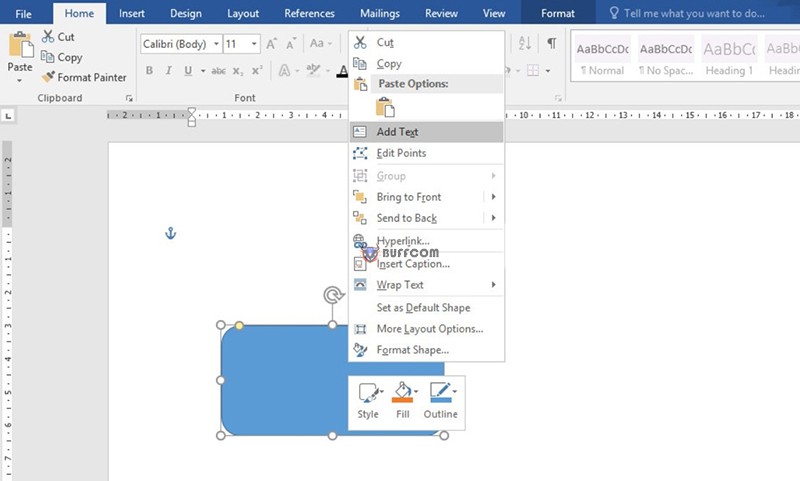
Right-click and select Add Text. Add text to the Shapes.
Draw Diagrams in Word
Step 3: Distinguish the Hierarchy of Objects in the Diagram
To distinguish between the hierarchy of objects in the diagram, you select the object -> Format Tab appears, you just need to click on the “Shape Fill” command to select the color to fill into the icon.
In addition, you can edit the object by using other commands in the Format tab to edit Shape Styles, WordArt Styles.
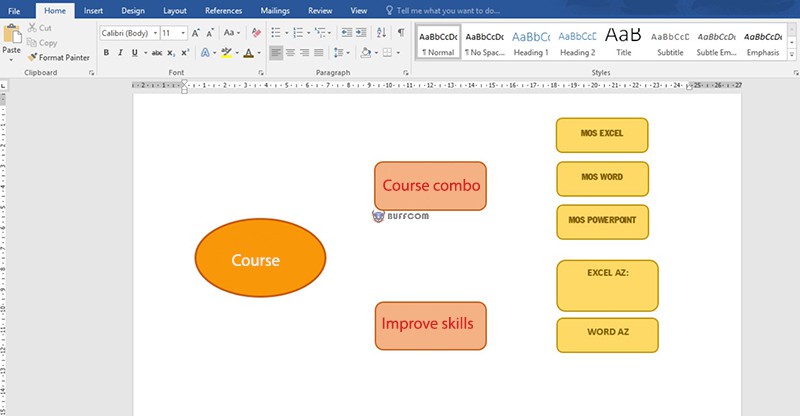
Draw Diagrams in Word
Step 4: Add More Lines and Arrows
After completing step one, continue to the Shapes option and select other icons that you need to use for drawing. This can be a straight line, curved line, arrow… With so many icons and symbols, you can draw whatever you want to create in your own creative style.
Drawing a Mind Map in Word
With just a few simple steps, you can quickly create a beautiful mind map according to your preferences and creativity in only four steps:
Step 1: Insert additional block shapes for the mind map
Step 2: Enter information into the mind map
Step 3: Differentiate the hierarchy of objects in the diagram
Step 4: Add more lines and arrows
If you are not familiar with this feature, follow the steps above. Good luck and hope you succeed in creating your mind map!
Additionally, if your job is closely related to Office software but you are not familiar with all the tips and tricks, please follow Buffcom.net for more information. If you need genuine Office software, please contact Buffcom.net to choose the right product for you!


