How to Enable Sandbox Feature on Windows 10 and Create Windows Sandbox Virtual Machine

A virtual machine is an incredibly useful tool that provides users with a diverse and secure working environment. In addition to virtual machine software like Vmware, there are many other tools available to support virtual machines. However, Microsoft has recognized the demand and has integrated a virtual machine directly into their operating system, allowing users to easily utilize it. Today, Buffcom.net will guide you on how to enable the Sandbox feature on Windows 10 and create a Windows Sandbox virtual machine.
Check your computer’s configuration
Enabling the virtualization feature of the CPU is required to use Sandbox. This feature can be set up in the BIOS. If you haven’t activated the CPU’s virtualization feature, access the BIOS and enable it.
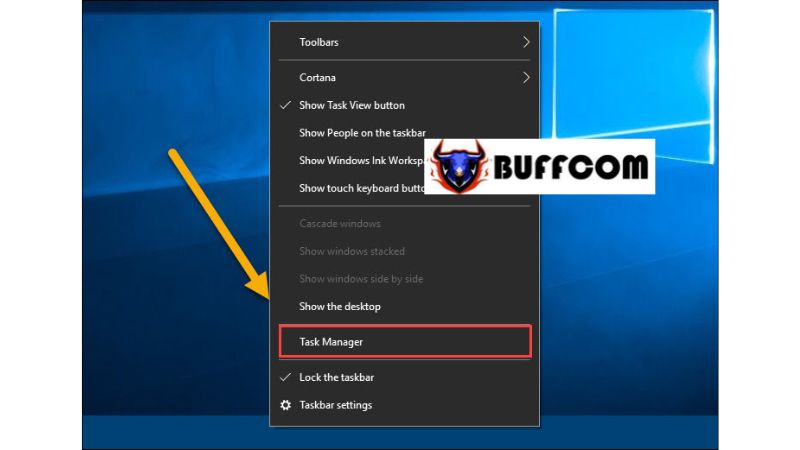
Step 1: Right-click on the Taskbar and select Task Manager.
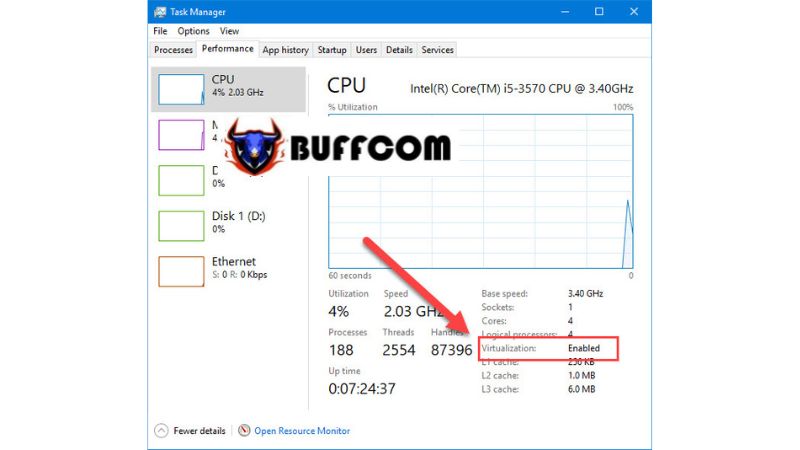
 Step 2: Switch to the Performance tab and look for the Virtualization line. If it shows “Enabled,” it means the virtualization feature is already activated.
 Enable the Sandbox feature on Windows 10
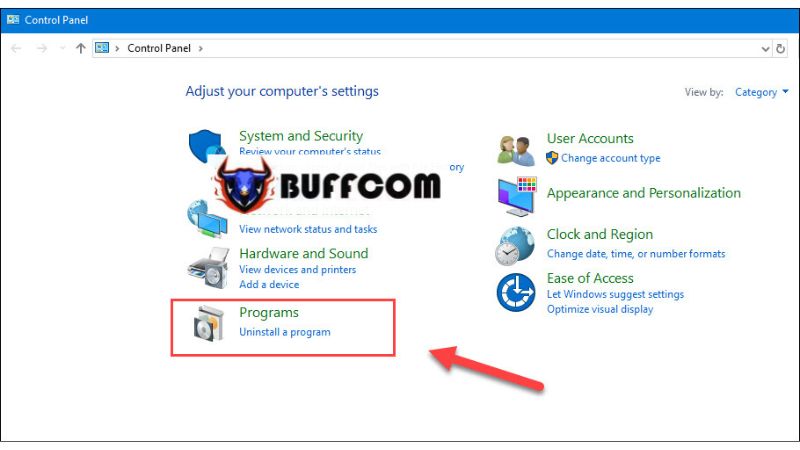
Step 1: Open the Control Panel by typing “Control Panel” into the Windows Start search box. Then select Programs.
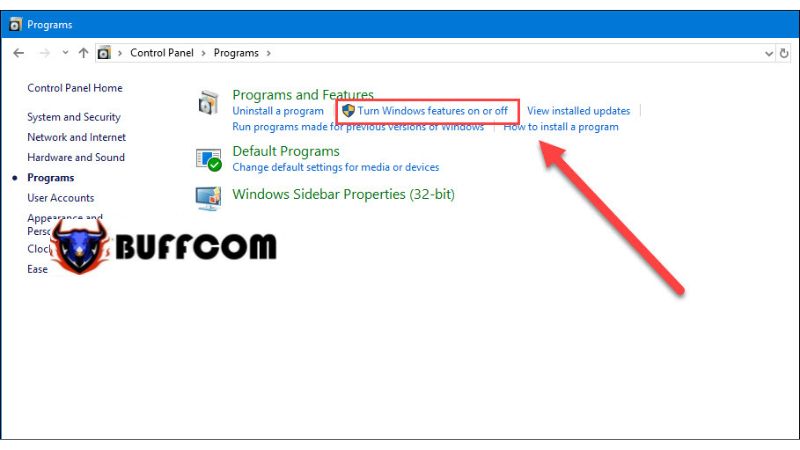
 Step 2: After opening Programs, click on “Turn Windows features on or off.”
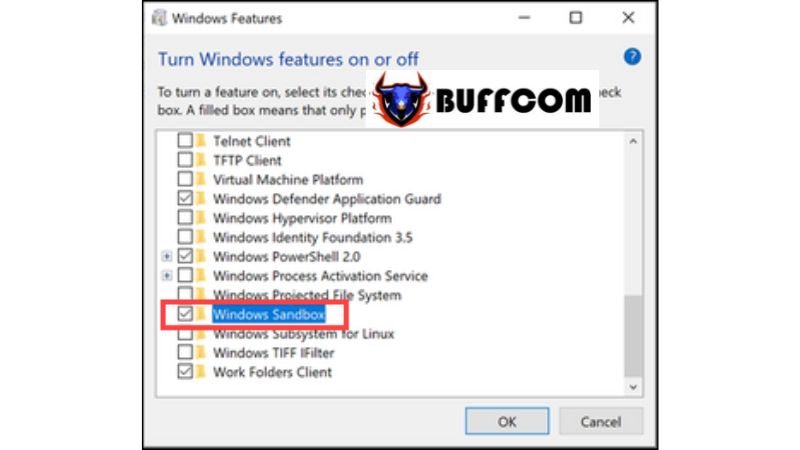
 Step 3: In the Windows Features window, locate Windows Sandbox and check the box next to it. Then click OK.
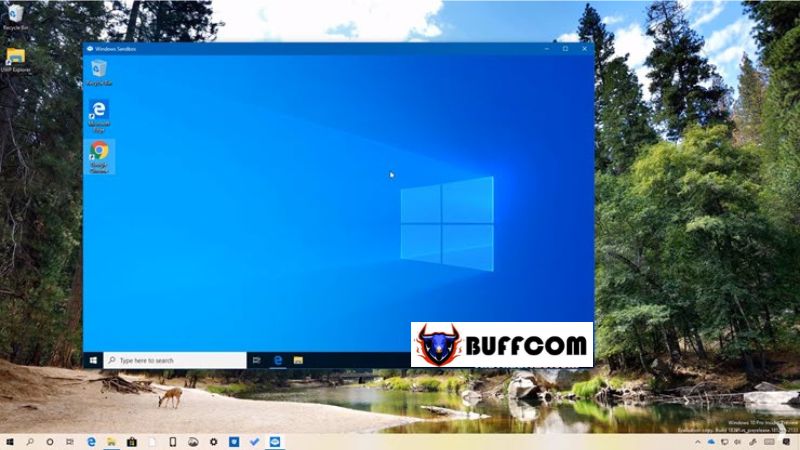
Step 4: Next, open the Start menu and type “Windows Sandbox” into the search box, and press Enter.
 Immediately, the Windows Sandbox will appear.
 How to use Sandbox
To effectively use Sandbox, the Edge browser is available by default. You can download anything through the browser. Additionally, to save time, you can directly copy data from the main Windows to Sandbox.
If you have used Vmware, you may know that you can drag and drop data directly. However, Sandbox does not support this feature.
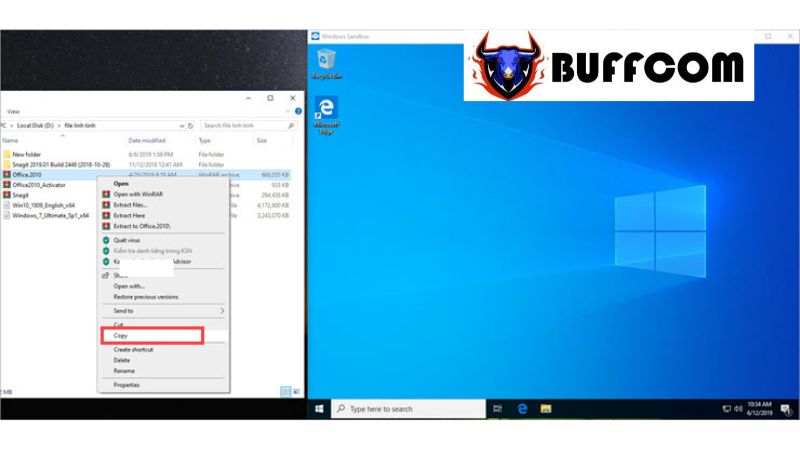
Step 1: Select the software you want to transfer to Sandbox and choose Copy.
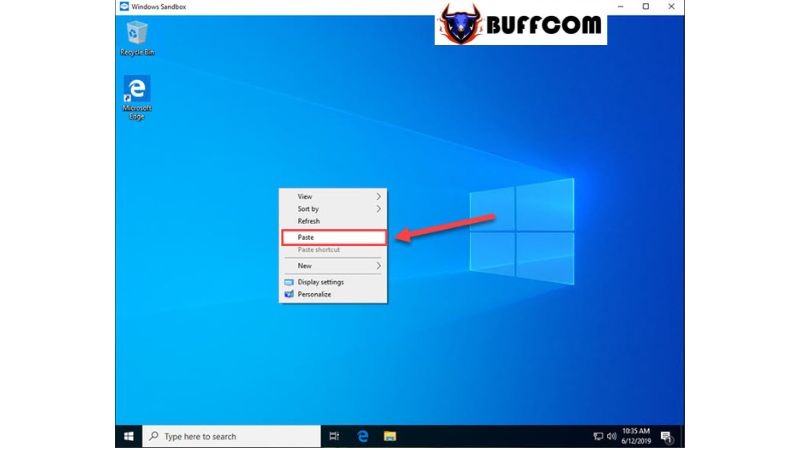
 Step 2: Paste it directly into the Sandbox window.
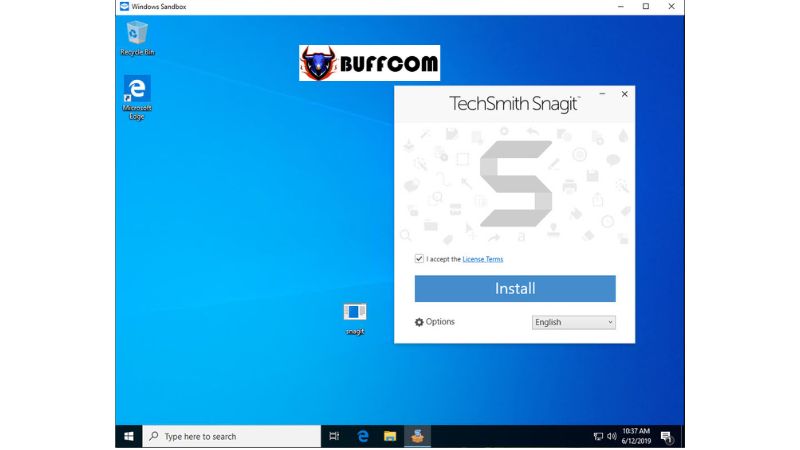
 Step 3: You can then start the software and use it just like on the original Windows 10.
 Sandbox storage capacity
Sandbox shares and directly utilizes the hard drive capacity of the C drive on your computer. However, Sandbox only supports a maximum of 40GB of storage. You cannot increase the storage capacity for Sandbox, which is a significant limitation.
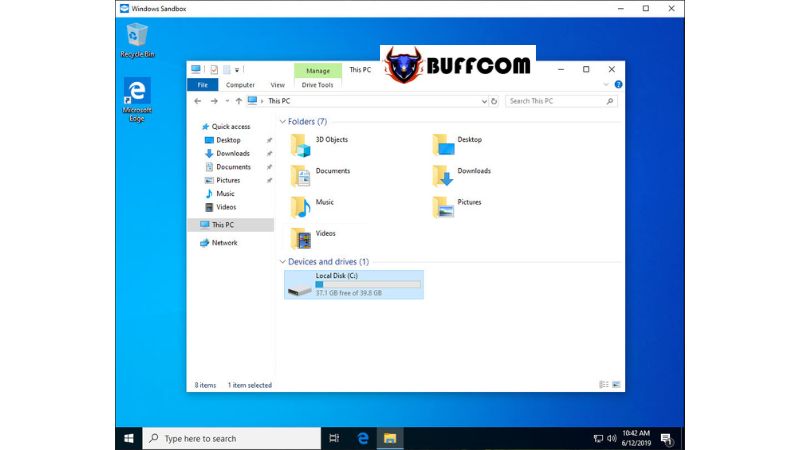
When you exit the Sandbox, all data will be erased. Restoring the Sandbox storage to its default size prepares it for future use. This way, you don’t have to worry about Sandbox running out of storage. Simply restart Sandbox, and the storage will revert to the default 40GB.
Enlarge or shrink Sandbox
Enlarge Sandbox:
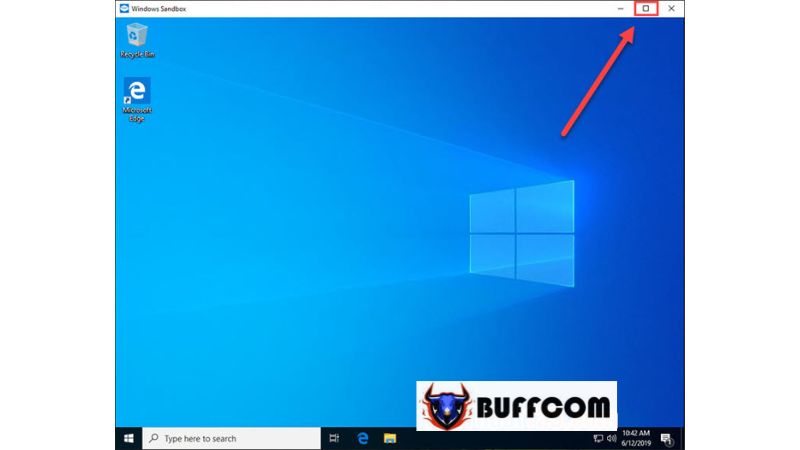
By default, Sandbox operates in windowed mode for quick and efficient operations. However, if you want to enlarge the Sandbox, it’s straightforward. Just click on the Expand icon on the Sandbox window.
Shrink Sandbox:
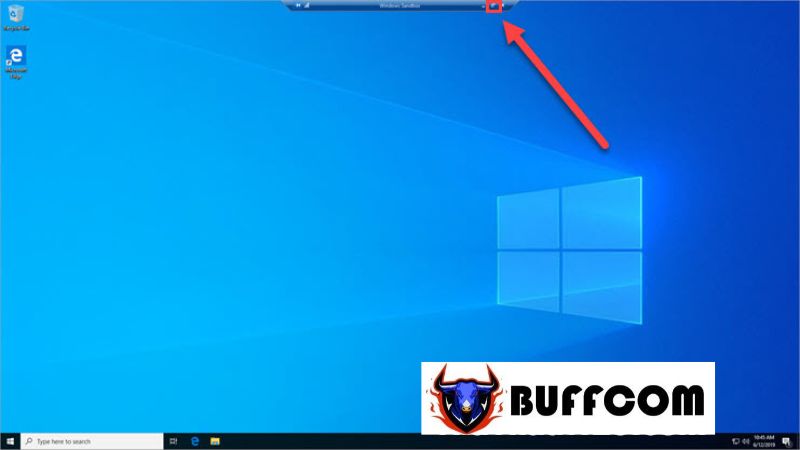
If you are in full-screen mode, you can return to the windowed mode by using the Shrink button on the toolbar.
 That concludes Buffcom.net’s guide on how to enable Windows Sandbox on Windows 10. Windows Sandbox is a useful tool for testing software and running potentially malicious code on your computer. If you are interested in genuine Windows product keys, please contact Buffcom.net for assistance!


