How to insert multiple images into cells in Excel
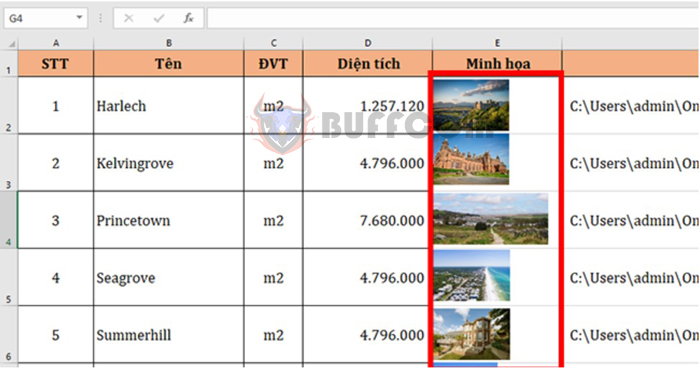
Inserting images is one of the basic operations that anyone who uses Excel must know. Especially for those who often need to summarize employees, inventory, they often have to insert images into cells. If the statistical data file is short, you can manually insert images. But if it is a long information table, this method takes a lot of time, you have to adjust the image for each cell to fit the cell size. The following article will guide you on how to insert multiple images into cells in Excel.
1. Manually insert images
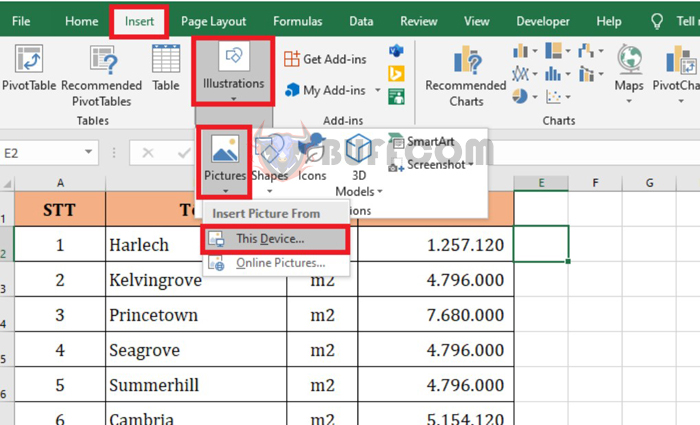
To manually insert an image, first place the mouse cursor in the cell where you want to insert the image. Then select Insert => Illustrations => Picture => This Device.
How to insert multiple images into cells in Excel
At this point, the Insert Picture dialog box appears. You navigate to the location where the image to be inserted is saved, then click Insert.

How to insert multiple images into cells in Excel
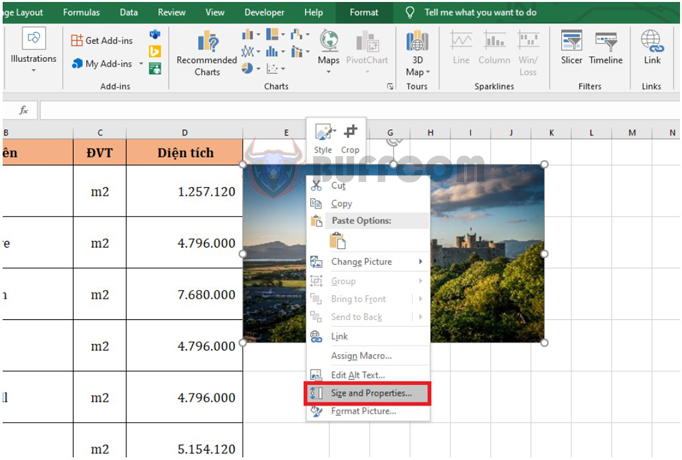
After the image has been inserted into Excel, right-click on the image and select Size and Properties.
How to insert multiple images into cells in Excel
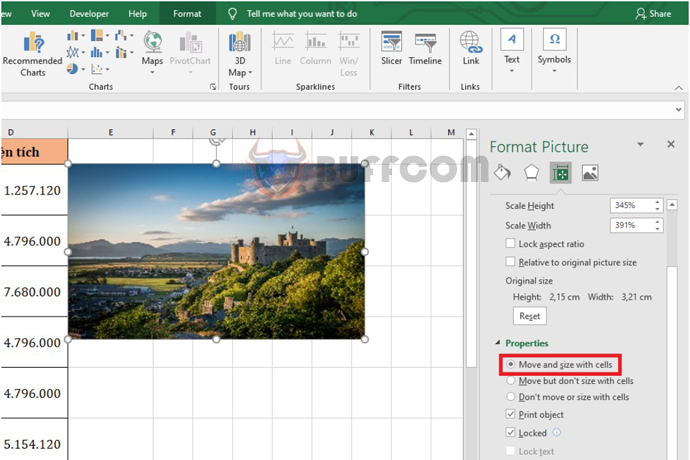
At this point, the Format Picture window appears. Click on the Properties section and check the Move and size with cells option to adjust the image size to fit the cell size.
How to insert multiple images into cells in Excel
Do the same for the remaining images and you will get the result that the image has been inserted as shown below.
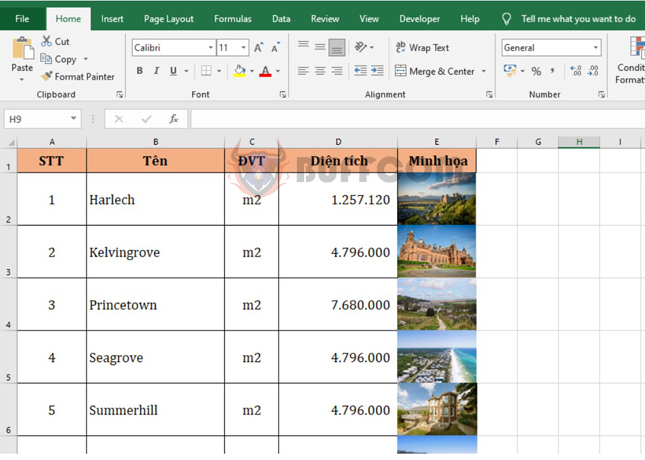
How to insert multiple images into cells in Excel
2. Insert multiple images
To insert multiple images into Excel cells, first place all images in a folder and name them in numerical order 1, 2, 3… Next, open that folder and copy the path to that folder.
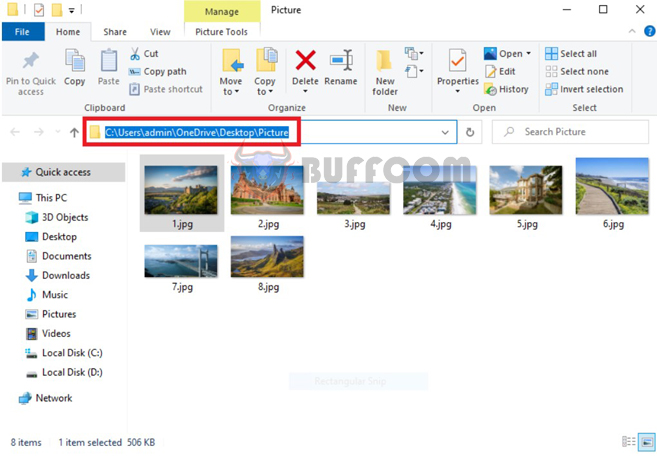
How to insert multiple images into cells in Excel
Next, open the Excel file that needs to insert images, then paste the path to the image folder into a cell outside the table. As in this case, I pasted the path in cell F1.
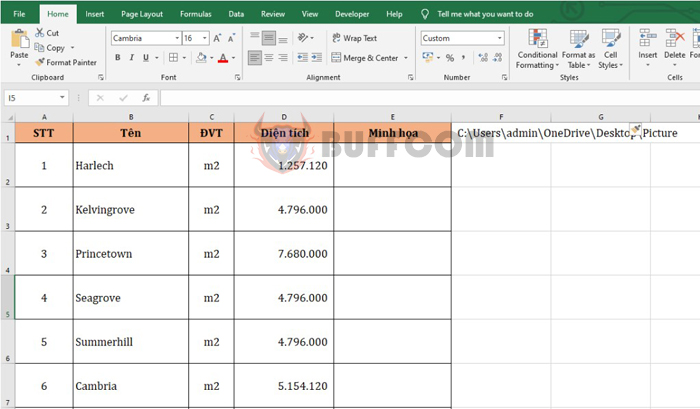
How to insert multiple images into cells in Excel
Now, in cell E2, enter the formula as follows:
=$F$1&”\”&A2&”.jpg”
Copy the formula for the remaining cells and you will get the result with the path to the image in the order of each item.
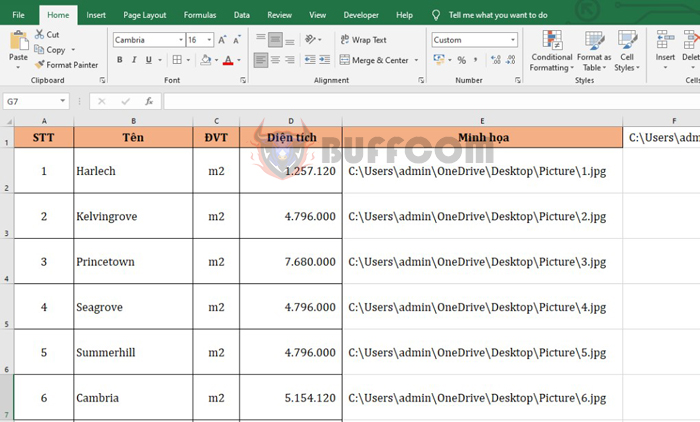
How to insert multiple images into cells in Excel
Now download the xlsm Macros file to insert multiple images h
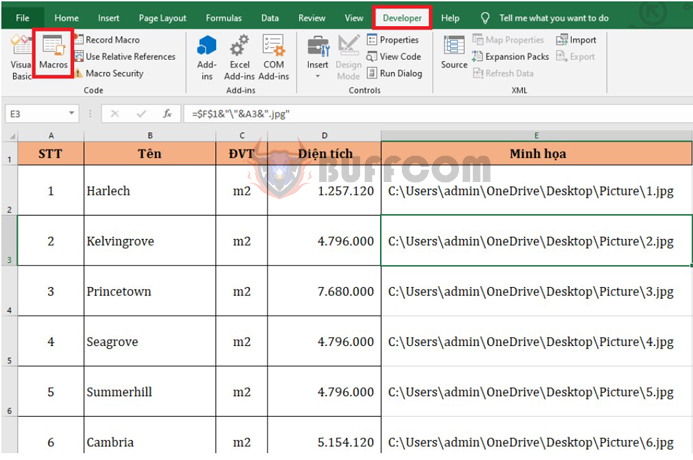
After downloading, double-click on that file. Then select the Developer tab on the toolbar => Macros.
How to insert multiple images into cells in Excel
At this point, the Macro dialog box appears. Select the link of the ChenAnhTuDong macro downloaded earlier and click Run.

How to insert multiple images into cells in Excel
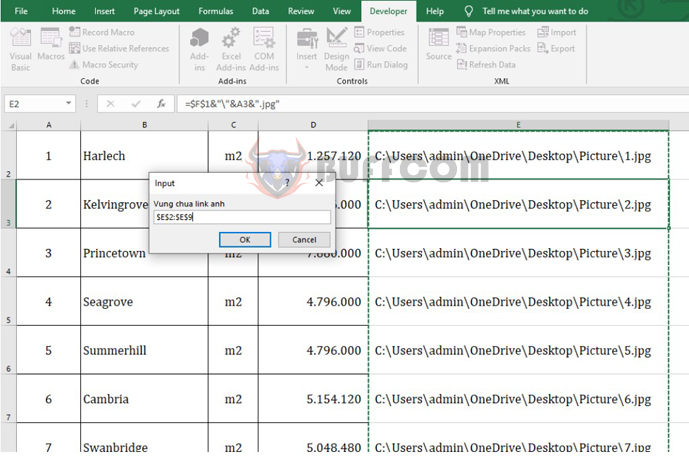
Next, select the area containing the image links and the area where the images will be placed and click OK.
How to insert multiple images into cells in Excel
With just that, all images have been inserted quickly and in order. Now you just need to align the images to fit.
In conclusion, inserting images in Excel can be a time-consuming task, especially when dealing with large amounts of data. However, with the techniques outlined in this article, you can easily and quickly insert multiple images into cells without the need for manual resizing and alignment. Whether you prefer the manual approach or the automated method using macros, these tips can help you streamline your Excel workflow and save valuable time. Give them a try and see how they can improve your productivity!


