How to move rows, move columns super fast in Excel
When working with Excel, you may need to rearrange the order and position of rows and columns. If you enter data incorrectly, you may want to reorder the position of those rows and columns. How can you do that? The article from Buffcom.net will guide you on how to move rows and columns quickly in Excel. Keep reading.
1. Moving columns in Excel
There are two ways to move columns in Excel: using the mouse or using keyboard shortcuts.
Method 1: Using the mouse to move
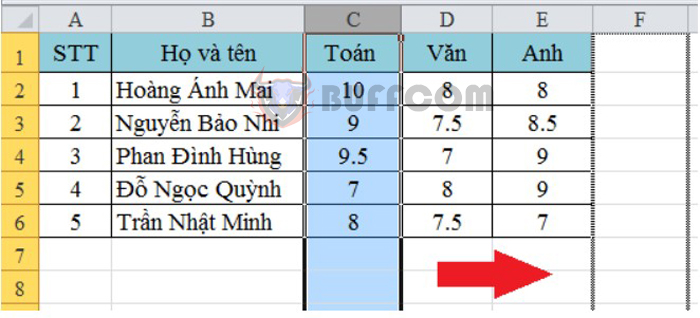
First, you need a data table like the one below.
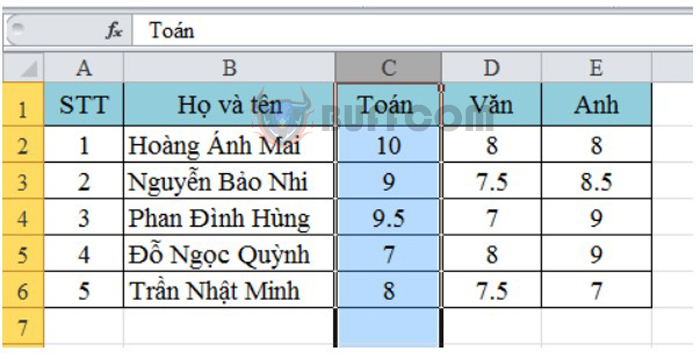
First, you need to select the column you want to move. Hover your mouse over the beginning of the column, then click on the column name to select the entire column.
How to move rows, move columns super fast in Excel
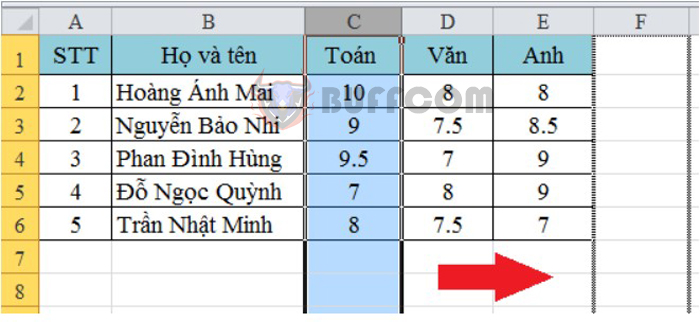
Next, move your mouse to the new location where you want to move the column. To do this, you need to position the mouse where the mouse pointer becomes an arrow. Then click and hold the mouse, drag it to the new location, and release the mouse when the dotted border appears at the new location.
How to move rows, move columns super fast in Excel
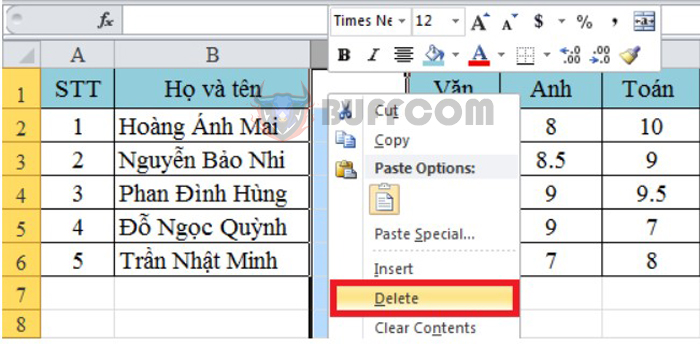
When you are in the correct location, release the mouse button, and the column you selected will move to the new position. However, the column at the old position will be left blank, so you just need to delete it. To do this, select the entire column as described above. Then right-click on the selected range and choose Delete.
By looking at the image below, you will understand better.
How to move rows, move columns super fast in Excel
Method 2: Using keyboard shortcuts to move
With this method, you can use Excel’s Cut and Paste function to move columns.
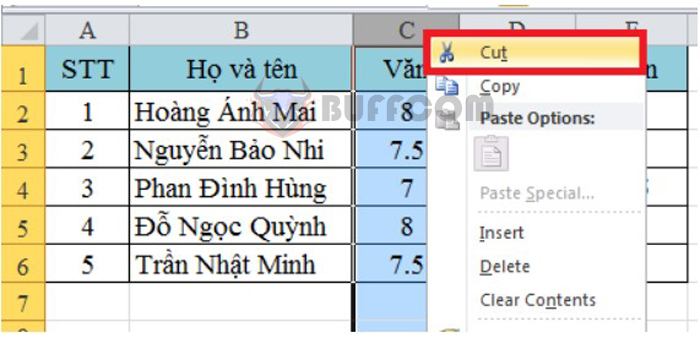
First, you also need to select the entire column that you want to move. Then, right-click on the selected data range and choose Cut from the options.
First, you need to select the column you want to move, which is similar to the instructions above. Similarly, you can use the Ctrl + X shortcut to perform this action.
How to move rows, move columns super fast in Excel
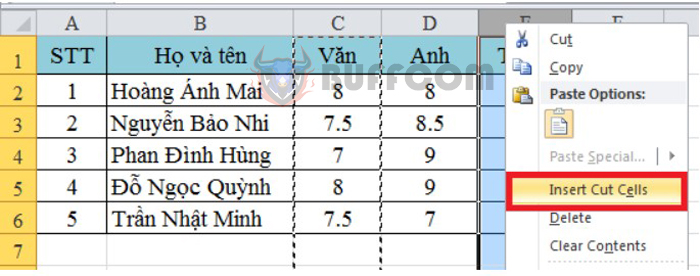
Next, select the new location where you want to move the data to. Right-click on the selected range, and choose Insert Cut Cells from the options as shown in the image below:
How to move rows, move columns super fast in Excel
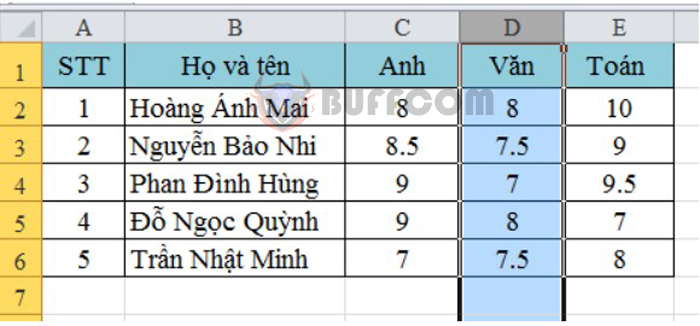
The result is that the column is moved to the desired location.
How to move rows, move columns super fast in Excel
2. Moving rows in Excel
To move rows in Excel, you also perform similar steps as moving columns. We also have 2 methods to perform this.
Method 1: Using the mouse to move
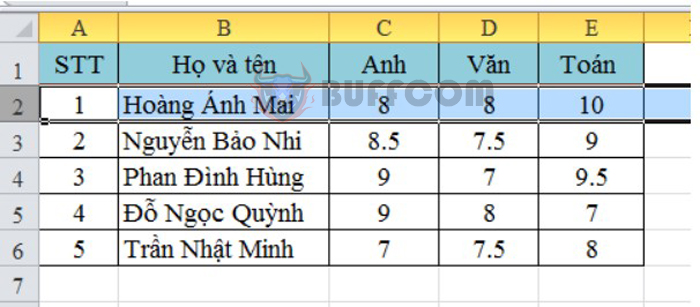
First, select the row you want to move. Hover your mouse over the beginning of the row, then click on the row name to select the entire row.
How to move rows, move columns super fast in Excel
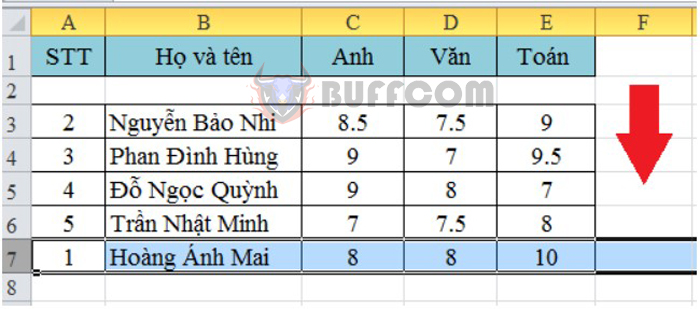
Next, move your mouse to the new location where you want to move the row. To do this, you need to position the mouse where the mouse pointer becomes an arrow. Then click and hold the mouse, drag it to the new location, and release the mouse when the dotted border appears at the new location.
How to move rows, move columns super fast in Excel
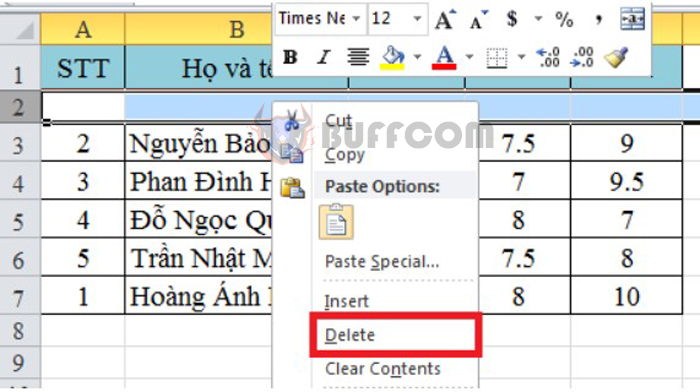
When you are in the correct location, release the mouse button, and the row you selected will move to the new position. However, the row at the old position will be left blank, so you just need to delete it. To do this, select the entire row as described above. Then right-click on the selected range and choose Delete.
How to move rows, move columns super fast in Excel
Method 2: Using keyboard shortcuts to move
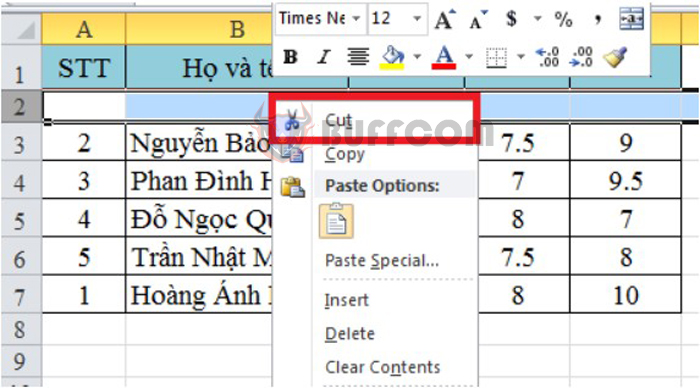
With this method, please highlight the entire row that needs to be moved. Then, right-click on the highlighted range and select “Cut” from the dropdown menu. Alternatively, you can use the keyboard shortcut Ctrl + X to perform the action.
How to move rows, move columns super fast in Excel
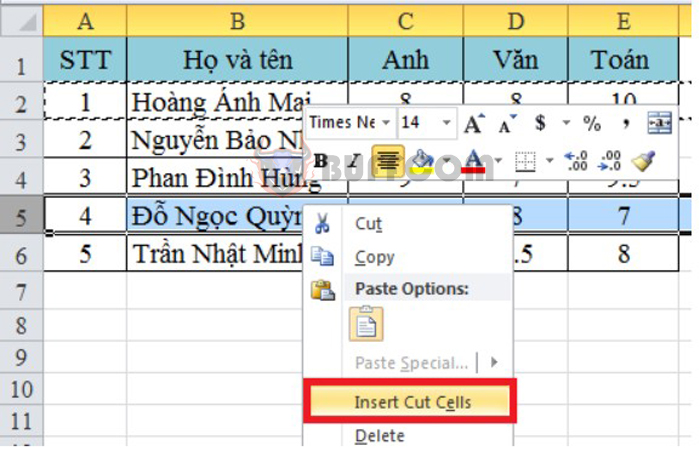
Next, please highlight the position where you want to transfer the data. Then right-click on the highlighted range and select the “Insert Cut Cells” option from the dropdown menu as shown below:
How to move rows, move columns super fast in Excel
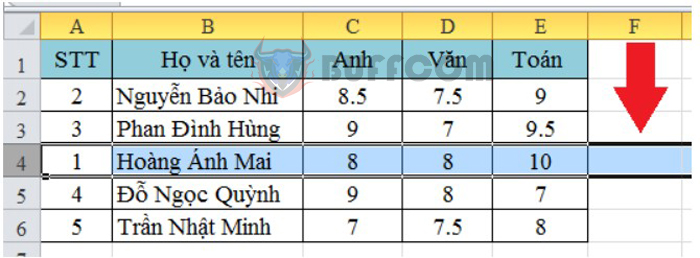
The result on the screen is that the row that was highlighted will be moved to the position you have selected.
How to move rows, move columns super fast in Excel
This article has introduced to you how to move rows and columns in Excel. We hope this article has provided useful information for you. Wish you success in implementing it!


