How to quickly and easily insert images into an Excel spreadsheet
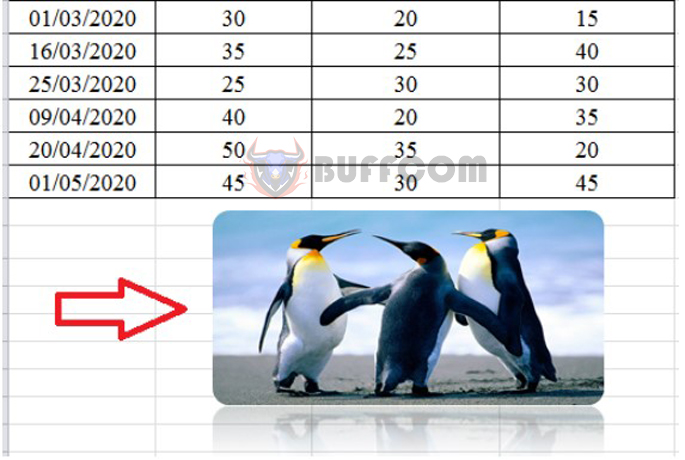
How to quickly and easily insert images into an Excel spreadsheet: Inserting images into Excel is a basic feature and is used in all versions of Excel with similar operations. You can insert any image into a worksheet to illustrate content, or you can insert an image as a background for the worksheet. Depending on the user’s needs and the worksheet, you should choose the appropriate way to insert images into the worksheet. This article will guide you on how to insert images into an Excel worksheet.
1. How to insert an Excel background image
Step 1:
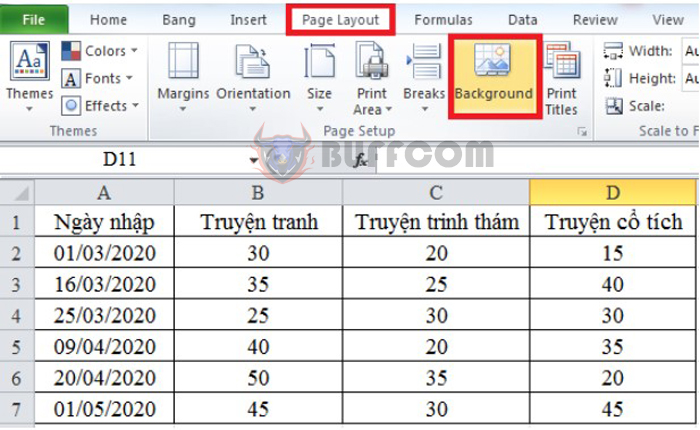
First, in the Excel window, you need to have a data sheet where you want to insert the background image. Next, click on the Page Layout tab on the toolbar. Then choose the Background option to insert the background image into the worksheet.
How to quickly and easily insert images into an Excel spreadsheet
Display the interface to select the background image you want to insert into the worksheet. With Excel 2010 and above, users will have more options, such as online images or images from the OneDrive storage service.
With Excel 2010 and below, you will only have one option, which is to insert an image already available on the computer.
Step 2:
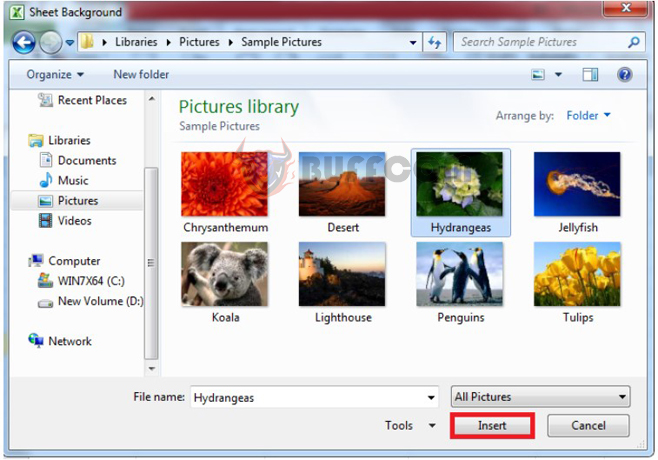
Here, click on the image you want to insert and then click the Insert button to insert the image into the worksheet
How to quickly and easily insert images into an Excel spreadsheet
Then the worksheet has been inserted with the background image as shown below.

How to quickly and easily insert images into an Excel spreadsheet
Step 3:
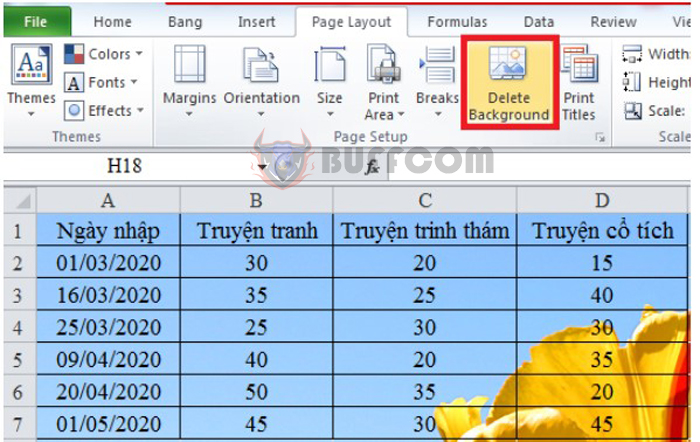
In case you want to delete the inserted background image, just click on Delete Background as shown below. Then the worksheet will return to its original shape.
2. How to insert an image into an Excel worksheet
Step 1:
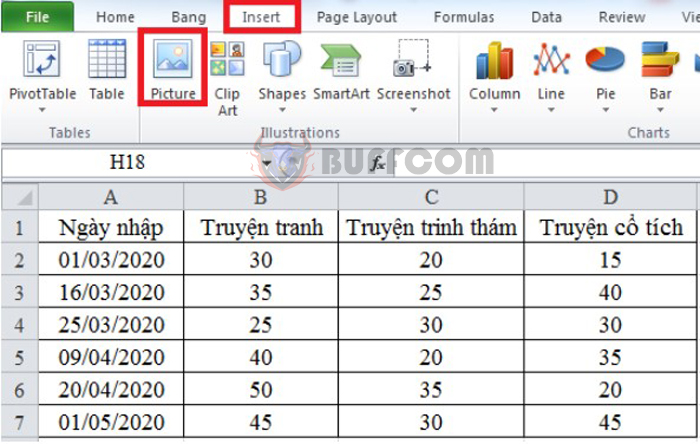
In the worksheet interface, click on the position where you want to insert the image, then click Insert on the toolbar. Then choose Illustrations> Pictures to insert an image into the worksheet. With Word 2010 and below, you just need to click Insert and then choose Picture. Then you will see the option to insert images already available on the computer or online images.
How to quickly and easily insert images into an Excel spreadsheet
Step 2:
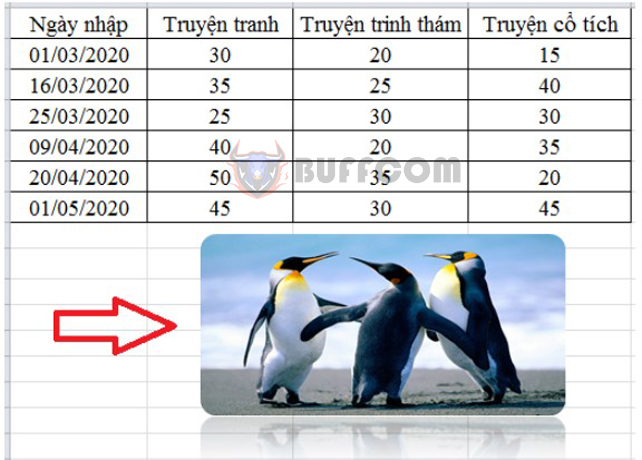
After inserting the image into Excel, there will be many items to format the image. To change, click on the Format item and the image change items will appear as shown below.
- How to quickly and easily insert images into an Excel spreadsheet
- Adjust: Change the brightness, color for the image.
- Picture Styles: Add effects to the image.
- Accessibility: Insert Alt tags for images.
- Arrange: Arrange the position of the image.
- Size: Resize the image.
Please customize the image to fit your needs and desires. After completing the necessary changes, click on the Close item to finish.
How to quickly and easily insert images into an Excel spreadsheet
To summarize, inserting images into Excel worksheets is a straightforward process. Users can choose to insert images as a background or as an illustration within the worksheet. Once inserted, users can customize the image by adjusting its size, position, and adding various effects. With this guide, users can enhance the visual appeal of their Excel worksheets by incorporating images to make them more engaging and informative.

