How to quickly show or hide crop marks in Word?
To quickly show or hide crop marks in Word, follow these steps:
Method 1:
- Click on the Office button (Word 2007) or the File tab (Word 2010 and later) in the top left corner of the Word window.
- Select Word Options (Word 2007) or Options (Word 2010 and later).
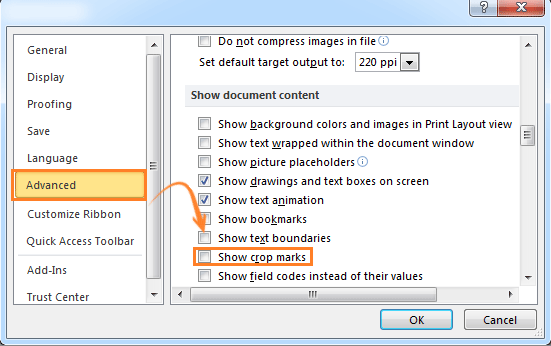
- In the Word Options dialog box, click on Advanced.

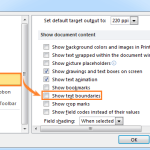
- Scroll down to the “Show document content” section.
- Check the box for Show crop marks to show the crop marks, or uncheck it to hide them.
- Click OK to apply the changes.

Method 2:
- Click on the File tab.
- Click on Options.
- In the Word Options dialog box, click on Advanced.
- Scroll down to the “Show document content” section.

- Check the box for Show crop marks to show the crop marks, or uncheck it to hide them.
- Click OK to apply the changes.
How to quickly show or hide crop marks in Word
Using either of these methods, you can quickly toggle the visibility of crop marks in your Word document.