How to repeat titles in Excel when printing
Today we want to share a small but important feature in Excel. In this article, you will learn how to repeat headers in your Excel tables when printing, and you will definitely impress your boss when submitting reports. Let’s find out together!
Do you often have to print large reports with complex data in Excel? You can easily read the report in Excel by freezing the header, but when you print it, the header row is only printed on the first page. Are you tired of flipping back and forth just to see which category a column or row belongs to? So how do you repeat headers in Excel when printing?
Let’s find the solution with Buffcom.net in this article.
Ways to Repeat Headers in Excel When Printing
Repeat Header Rows on Printed Pages
Your report seems long and you need to print it. To be more careful, you preview the print and discover that only the first page has header columns at the top. Don’t worry, you can customize the settings in Page Setup to repeat the top row on each printed page.
1. Open the report you will print.
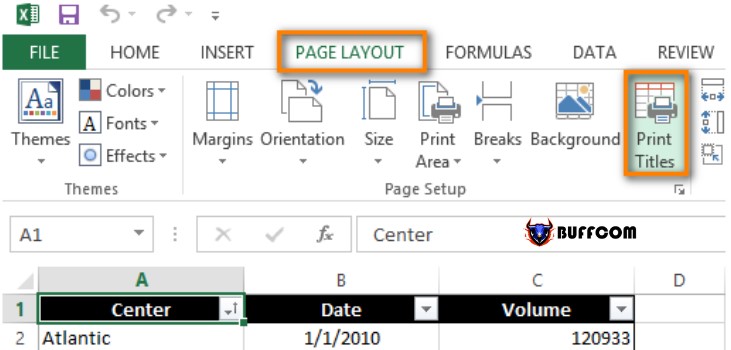
2. Switch to the PAGE LAYOUT tab.
3. Click Print Titles in the Page Setup group.
How to repeat titles in Excel when printing
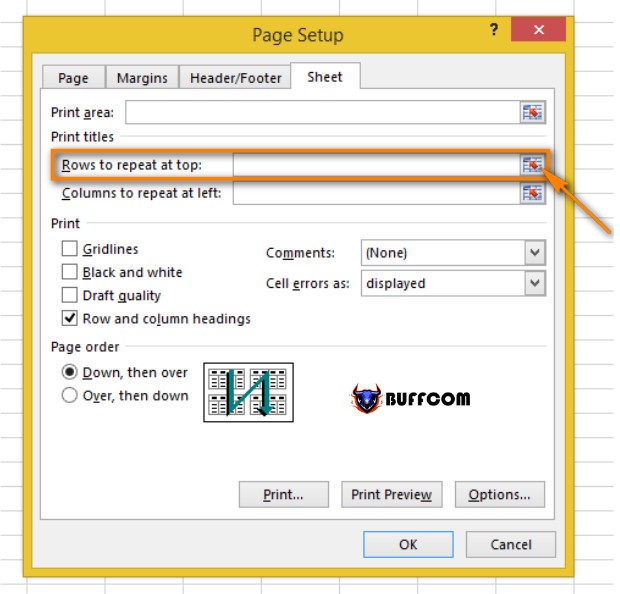
4. Make sure you are on the Sheet tab of the Page Setup dialog box.
5. Find the Rows to repeat at top content in the Print titles section.
6. Click the Collapse Dialog icon next to the “Rows to repeat at top” field.
How to repeat titles in Excel when printing
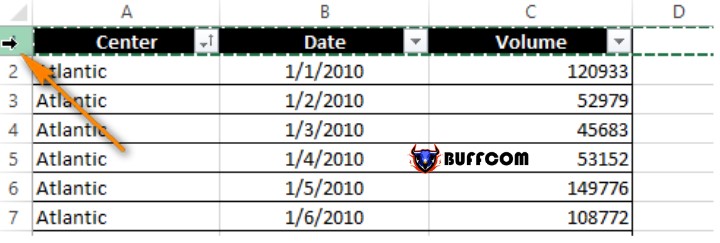
The Page Setup dialog box will be minimized and you will return to the worksheet.
You may notice that your cursor turns into a black arrow. This operation helps you select the entire row with just one click.
How to repeat titles in Excel when printing
7. Select one or more rows that you want to print on all pages.
Note: To select multiple rows, click the first row, hold down the mouse, and drag to the last row you want to select.
8. Press Enter or select Collapse Dialog to return to the Page Setup dialog box.
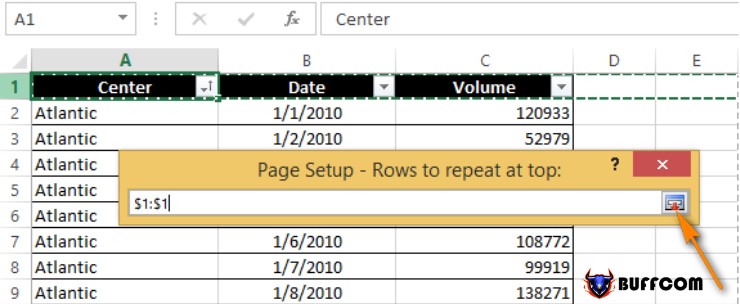
How to repeat titles in Excel when printing
Now your selection is displayed in the Rows to repeat at top field.
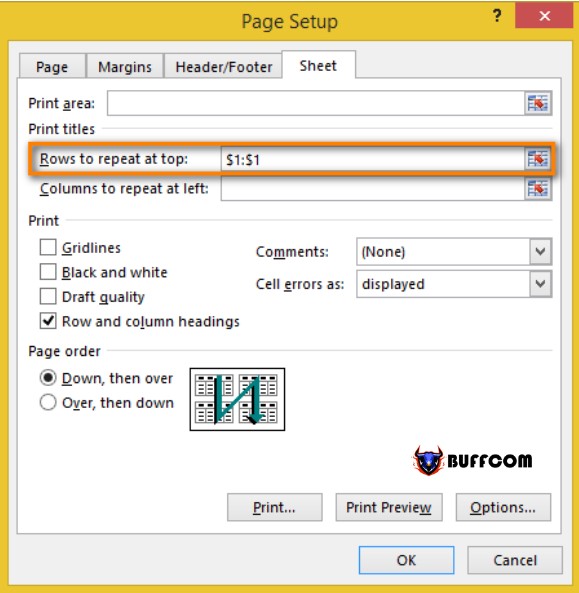
How to repeat titles in Excel when printing
Note: You can skip steps 6 through 8 and enter the range with the keyboard. However, note how you enter it – you need to use absolute referencing (with the dollar sign $). For example, if you want to print the first row on all pages, the reference will look like this: $1:$1.

How to repeat titles in Excel when printing
9. Click on Print Preview to see the results.
Ding! Now you know exactly the meaning of the columns in the report pages without having to flip through them.
In the column header on all pages
When your spreadsheet is too wide, you’ll only have the column header on the left side of the first page. If you want to make your document easier to read, follow these steps to print the column with the header rows on the left side of each page.
1. Open the worksheet you want to print.
2. Follow steps 2-4 as described in the Repeat header rows on printed pages section.
3. Click on Collapse Dialog on the right of the Columns to repeat at left box.
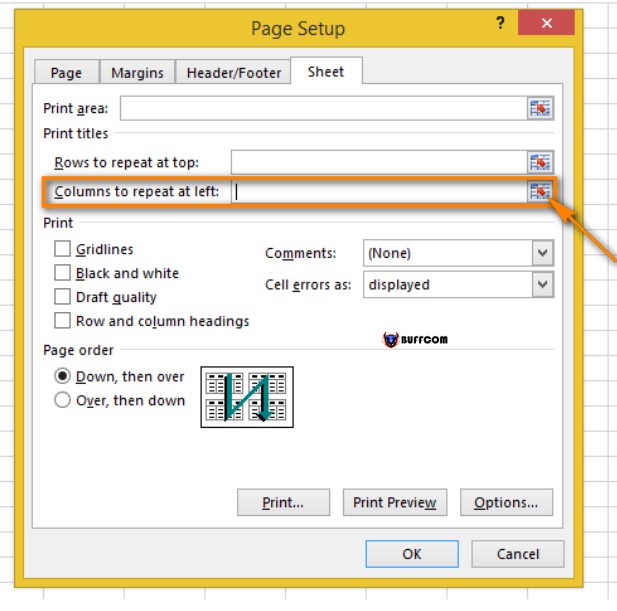
How to repeat titles in Excel when printing
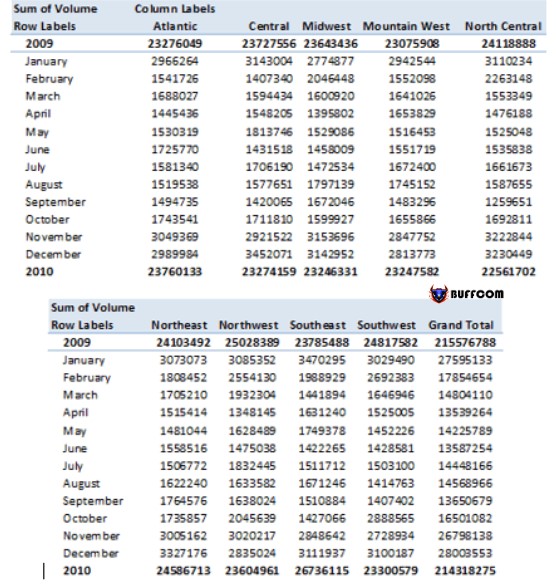
4. Select one or more columns that you want to repeat on each printed page.
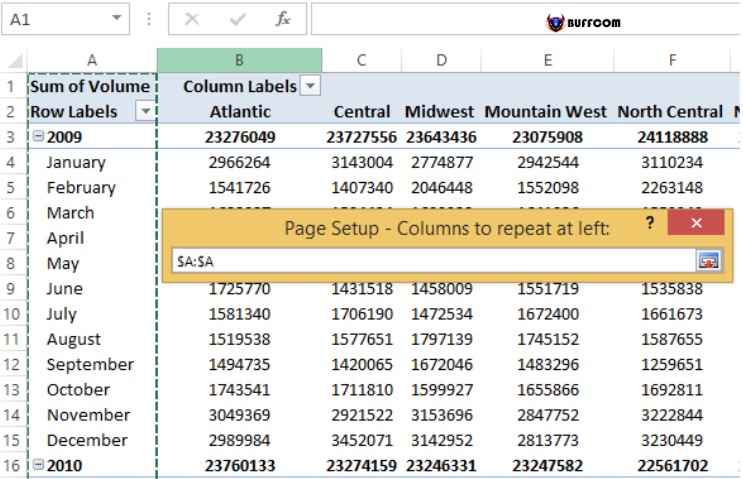
How to repeat titles in Excel when printing
5. Click Enter or Collapse Dialog again to verify that the selected range is displayed in the Columns to repeat at left box.
How to repeat titles in Excel when printing
6. Press Print Preview in the Page Setup dialog box to review the document before printing.
Now you no longer have to flip back and forth between pages to find the meaning of the values in each row.
Print row and column headings
Excel usually displays columns with letters (A, B, C) and rows with counting numbers (1, 2, 3) on the worksheet. These letters and numbers are called row and column headings. In contrast to the header rows and columns which are only printed on the first page by default, the headings are not printed at all. If you want to see these letters and numbers appear on the printout, follow these steps:
1. Open the worksheet you want to print along with row and column headings.
2. Find the Sheet Options group on the PAGE LAYOUT tab.

How to repeat titles in Excel when printing
3. Select the Print box under the Headings section.
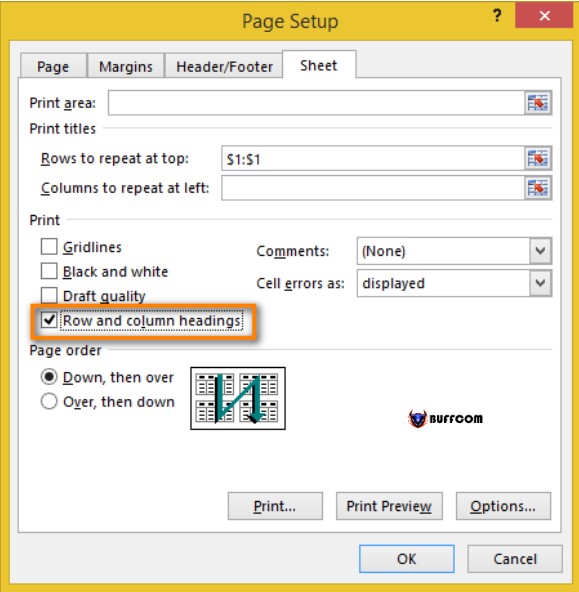
Note: In case you’re still in the Page Setup window on the Sheet tab, simply check the Row and column headings box in the Print section. This action also makes the heading rows and columns appear on your printed pages.
How to repeat titles in Excel when printing
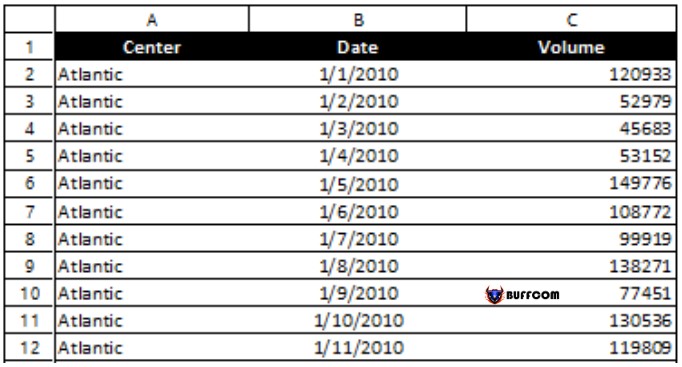
4. Open Print Preview (FILE -> Print or Ctrl+F2) to check the changes.
How to repeat titles in Excel when printing
The Print Titles command can really simplify your life. Having header rows and columnson each page allows you to understand the information in the report more clearly. You won’t get lost in long and winding report pages if there are header rows and columns on each page. Give it a try and share your feedback with Buffcom.net!

