Tip to convert image to text in Word
Tip to convert image to text in Word. During the process of typing data from an image to a Word file, it can be time-consuming and tiring to manually input all the data. If you’re looking for a faster way to convert data from an image to Word, then you’re in luck! This article will provide you with a tip on how to convert an image to text in Word in just a few simple steps.
Convert image to text in Word
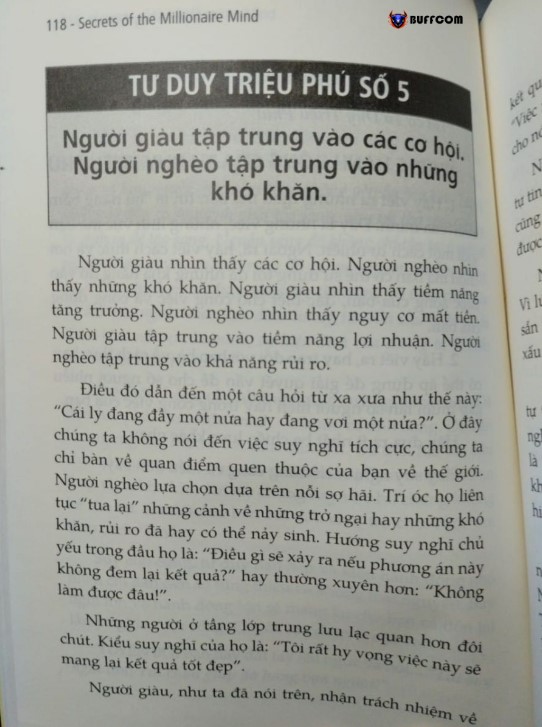
Step 1: First, prepare an image containing the content you want to convert to text, like the example below:
Tip to convert image to text in Word
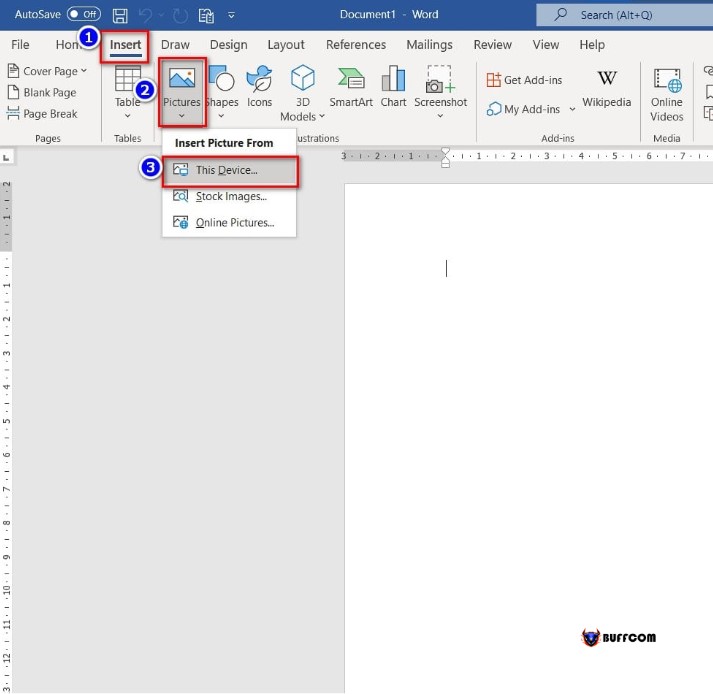
Step 2: Open a new Word file and insert the image by going to the main Word interface, selecting Insert => Picture => This Device.
Tip to convert image to text in Word
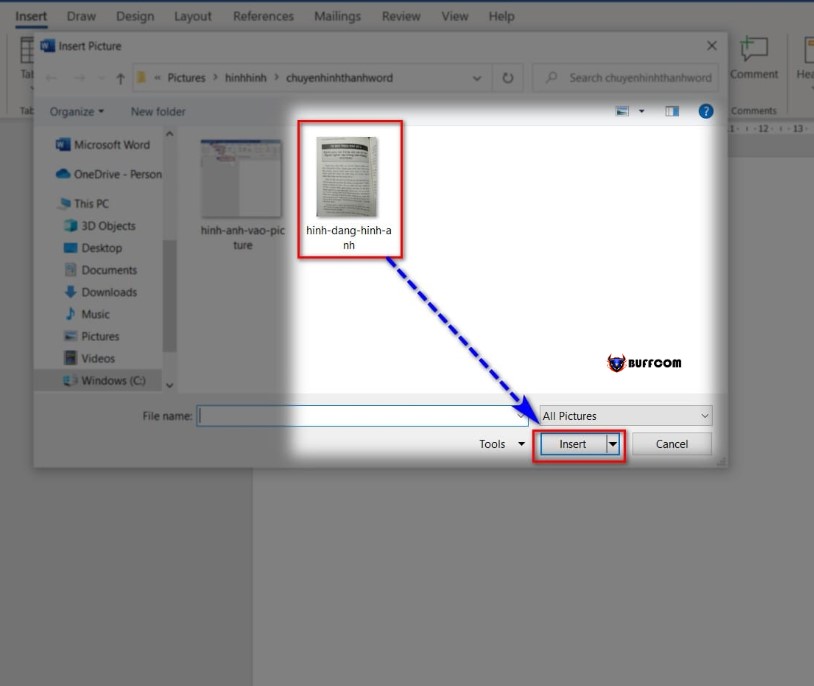
Step 3: Select the folder where your image is saved, choose the image you want to convert, and click on Insert to insert it into the Word file.
Tip to convert image to text in Word
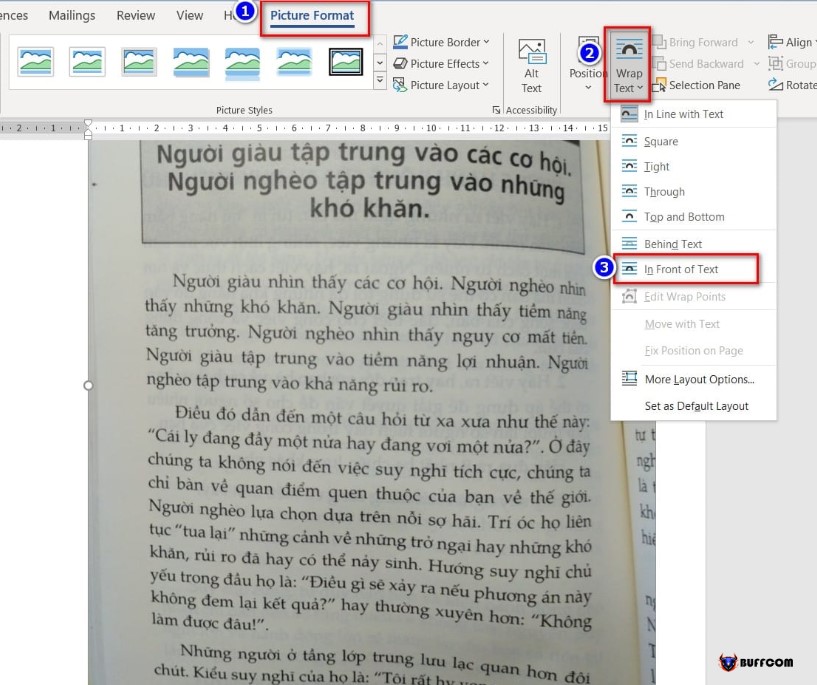
After inserting the image into the Word file, the position of the image may not be aligned or centered with the page. To adjust the position of the image, select the Picture Format tab, then choose Wrap Text. Next, select In Front Of Text.
Tip to convert image to text in Word
Once you have made the selection, you can move the image to any position you desire.
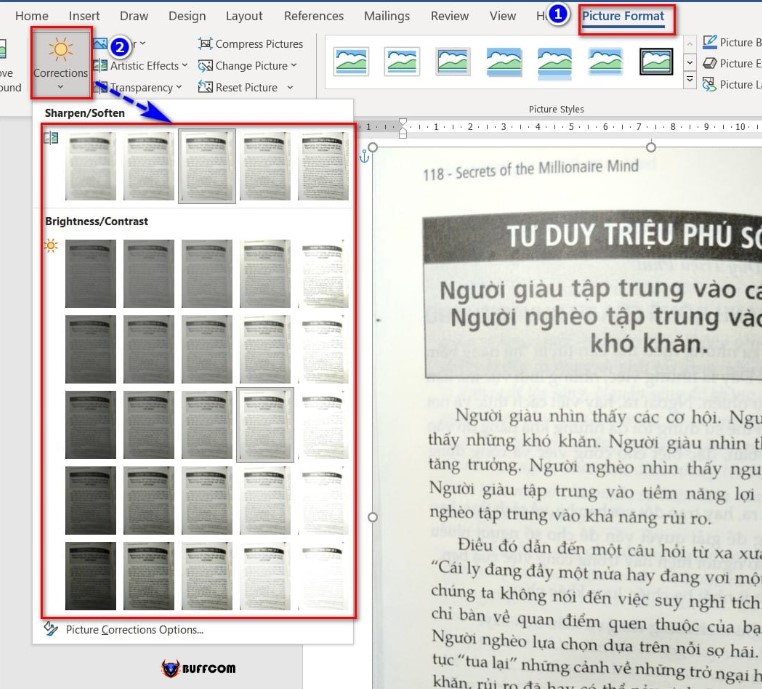
If you want to make the image brighter, go to the Picture Format tab and select Corrections. You will see different options for brightness and contrast. Choose the desired level of brightness.
Tip to convert image to text in Word
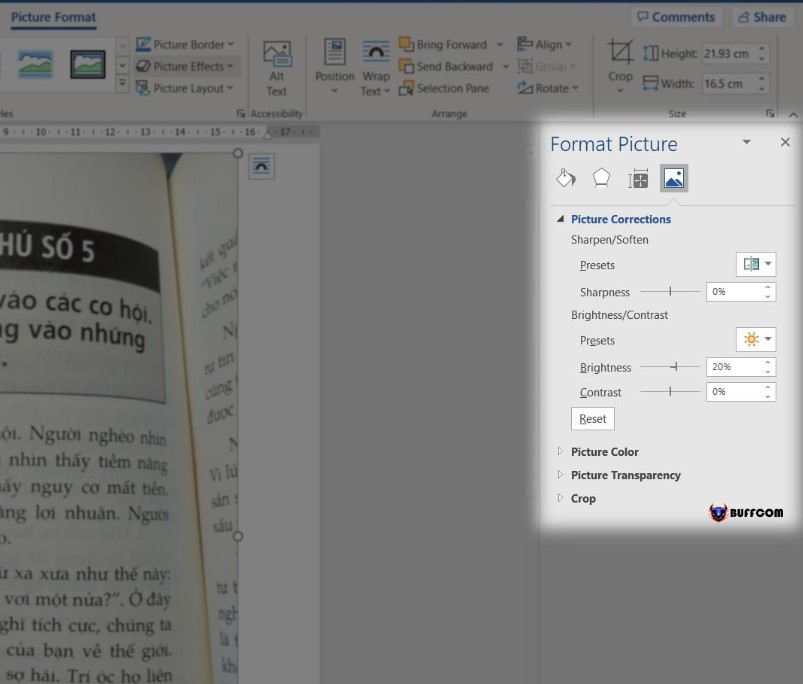
Alternatively, you can select Picture Corrections Options in the Corrections tool to adjust the color and lighting of the image. This will open the Format Picture menu where you can adjust the brightness and contrast settings to your liking.
Tip to convert image to text in Word
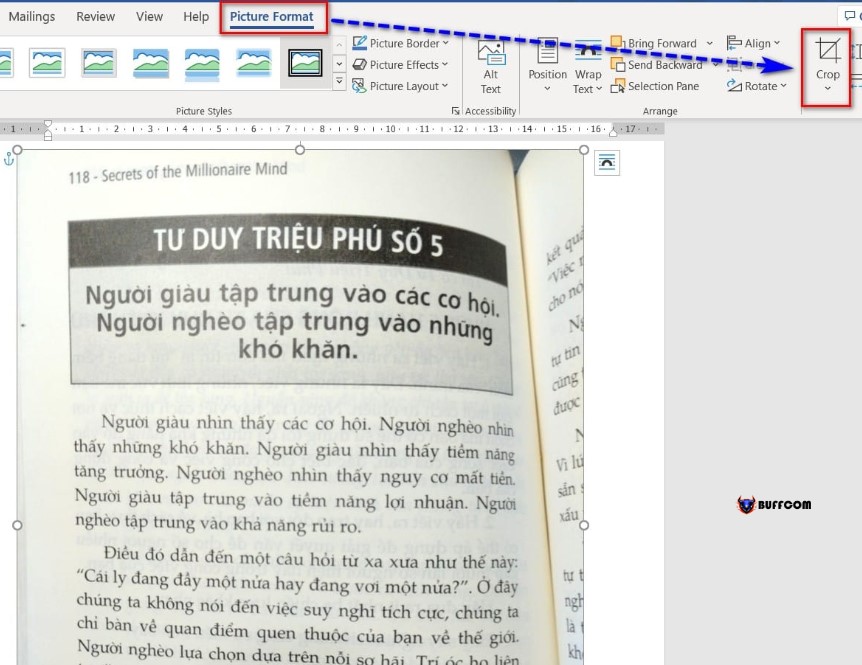
If you want to crop the image, select Crop in the Picture Format tab. Then, adjust the size of the image by selecting the image and moving the plus sign to the desired position.
Tip to convert image to text in Word
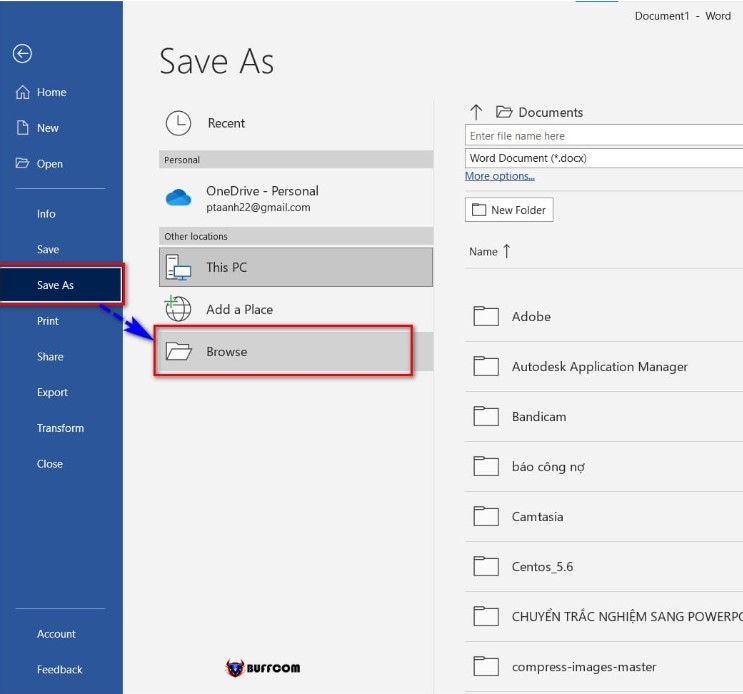
Step 4: After editing, you will save the file in PDF format by going to the File tab => Save => Browse.
Tip to convert image to text in Word
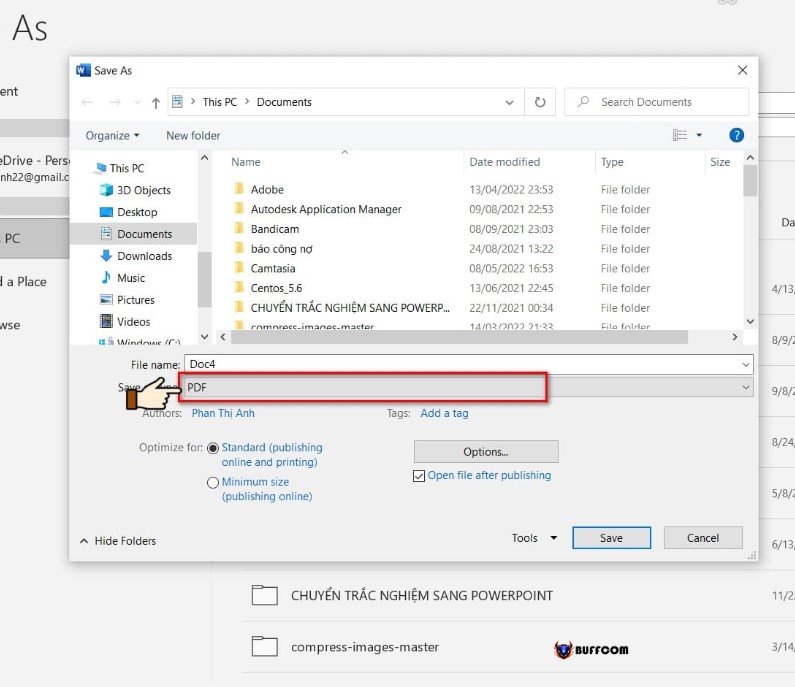
Step 5: In the Save as type box, select PDF format and click Save to save the file.
Tip to convert image to text in Word
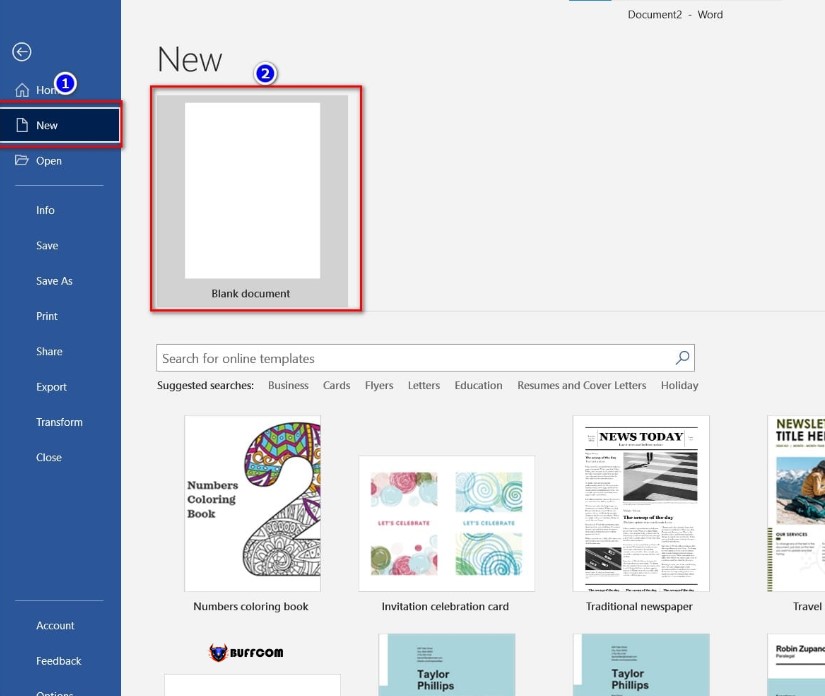
Step 6: Open a new Word file by going to File => New.
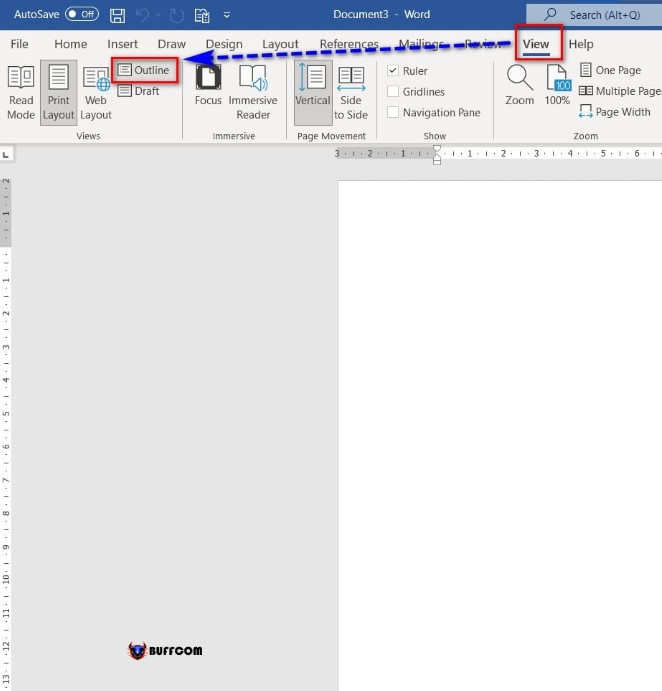
 Step 7: In the Word file interface, select the View tab => Outline.
Tip to convert image to text in Word
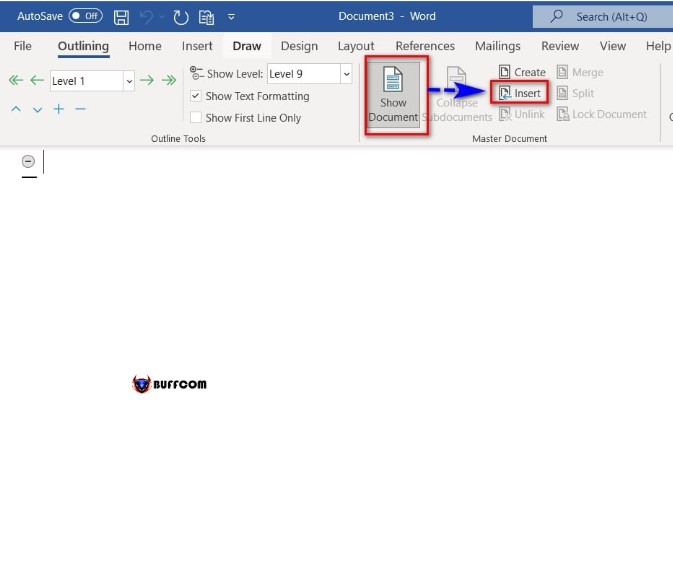
Step 8: Next, select Show Document => Insert.
Tip to convert image to text in Word
In the folder view, select the PDF file that you saved in the previous step and click Open to open the file.
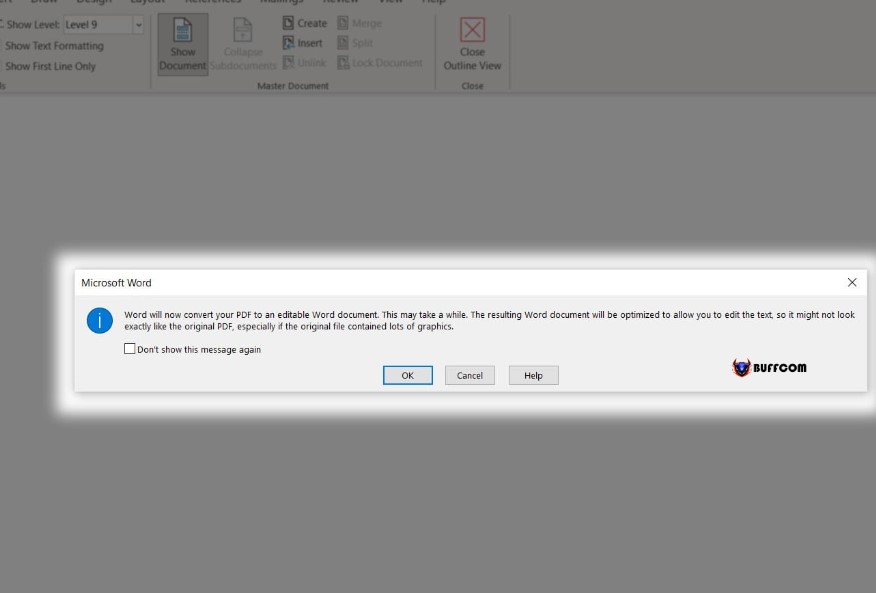
After clicking Open, a message will appear asking you to convert to a PDF file. Click Ok to convert.
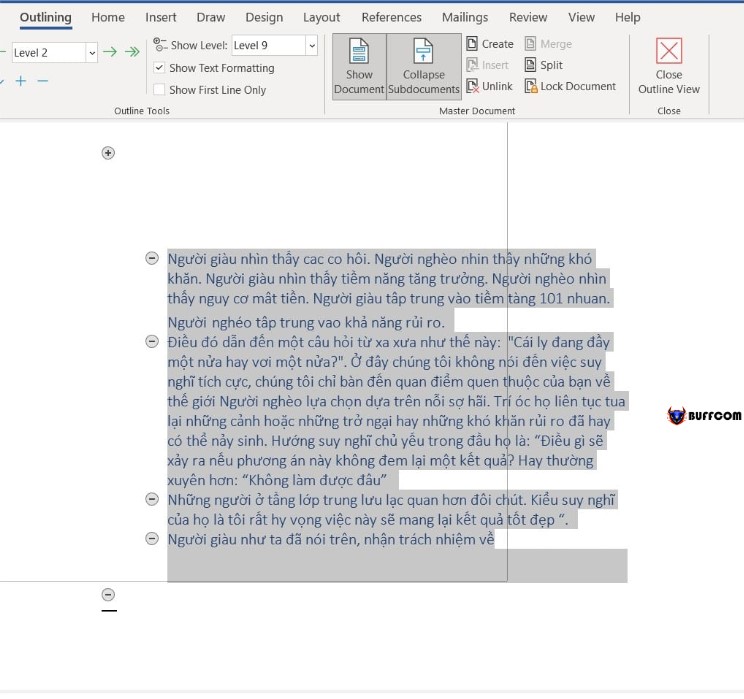
 Step 9: After converting the image to text, highlight the newly converted text, click Copy to copy the text content, and paste it into a new Word file.
 That’s how you convert an image to text in Word. I hope this article is helpful to you. If you find it useful, don’t forget to rate the article below! Best regards.


