How to unit test in Visual Studio 2019
Unit testing is an essential practice in software development that helps ensure that individual units of code (e.g., functions, methods) work as expected. Visual Studio 2019 provides a robust unit testing framework for .NET projects, making it easier to write and run tests. In this guide, we’ll walk through the steps to create a unit test project and write a unit test for a specific unit of work in an MVC project.
1 — Create a Unit Test Project
To start unit testing in Visual Studio 2019, you’ll need to create a new unit test project within your existing solution.
Step 1: Add a New Project
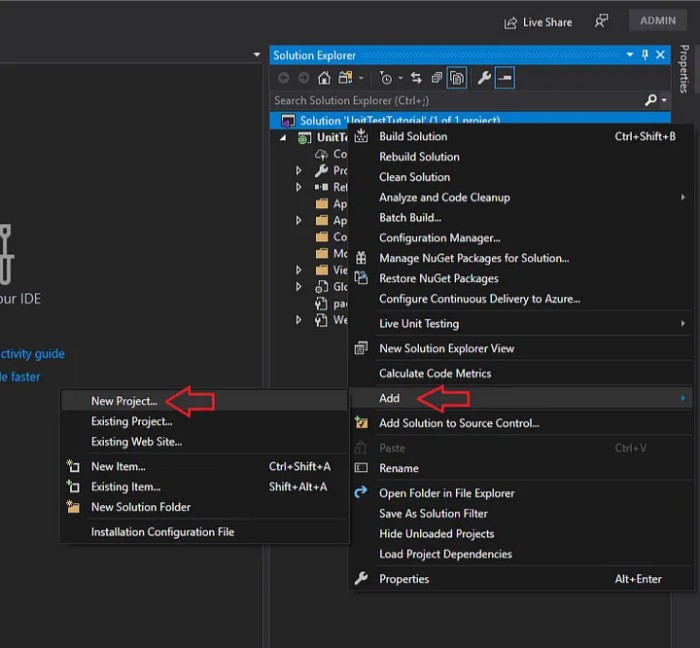
- Right-click on the solution in the Solution Explorer panel.
- Select “Add” from the context menu.
- Click on “New Project” in the sub-menu.
Step 2: Select the Unit Test Project Template
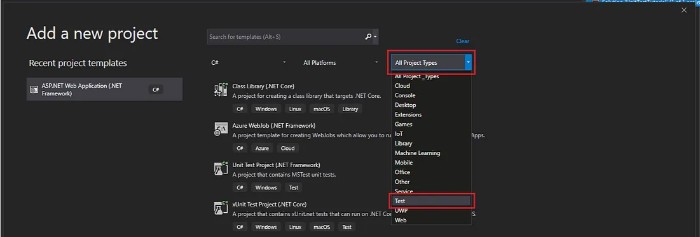
- In the “Add a new project” window, scroll down to find “Unit Test Project (.NET Framework)”.
- Click “Next” to proceed.
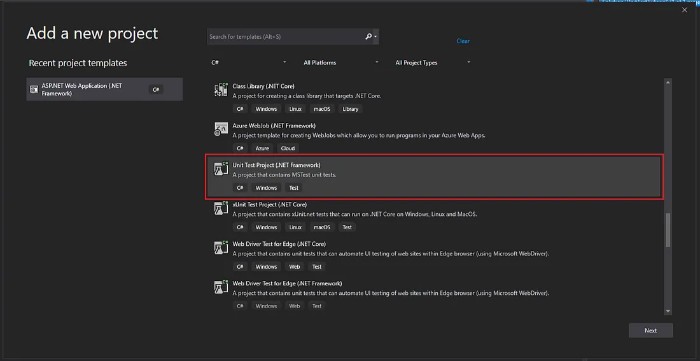
Alternatively, you can filter the list by selecting the “Test” project type to narrow down your options and quickly find the unit test project template.
Step 3: Configure the New Project
- Provide a Project Name. This name should be descriptive of the tests you’ll be writing.
- Choose the Location where the project will be saved. It’s a good practice to save the project in the same root directory as your solution.
- Specify the .NET Framework version if you’re using .NET Framework.
Once all required information is provided, click “Create”.
Step 4: Verify Project Creation
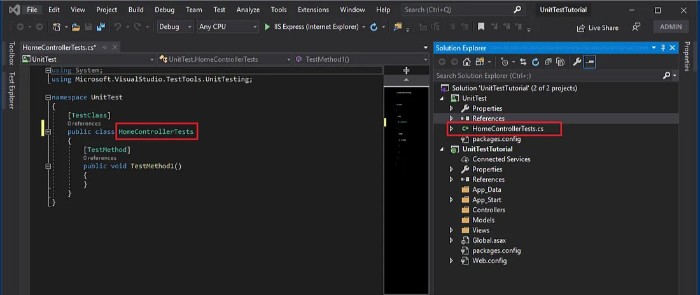
After the project is created, you should see a new project (e.g., “UnitTest”) added to your solution in the Solution Explorer pane. Additionally, Visual Studio will generate a default unit test class file named “UnitTest1.cs”.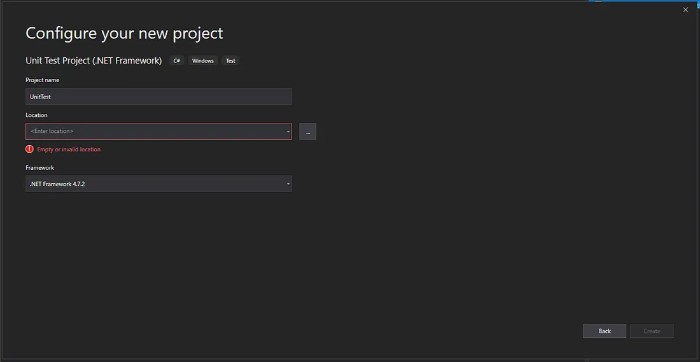
2 — Rename and Set Up the Unit Test Class
It’s a best practice to rename the default unit test class to something more descriptive of the tests you’ll be writing.
Step 1: Rename the Default Unit Test Class
- In Solution Explorer, right-click on “UnitTest1.cs” and select “Rename”.
- Enter a new name that reflects the unit being tested. For example, if you are testing the
HomeControllerin an MVC project, you might rename it to “HomeControllerTests.cs”.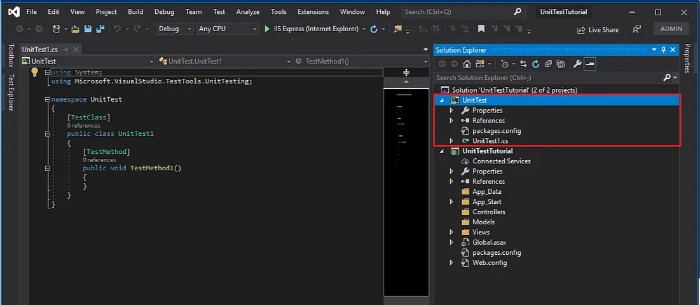
3 — Write a Unit Test
Now that you have set up the unit test project and renamed the test class, you’re ready to write your first unit test.
Step 1: Add the Necessary References

How to unit test in Visual Studio 2019
Ensure that your unit test project references the main project you’re testing (e.g., the MVC project). This allows you to access the classes and methods in the main project from your test project.
Step 2: Write the Test Method
Here’s an example of a unit test for an action method in an MVC HomeController:
using Microsoft.VisualStudio.TestTools.UnitTesting;
using YourMvcProject.Controllers; // Replace with your actual namespace
using System.Web.Mvc;
namespace YourUnitTestProject // Replace with your actual namespace
{
[]
public class HomeControllerTests
{
[]
public void Index_Returns_ViewResult()
{
// Arrange
var controller = new HomeController();
// Act
var result = controller.Index() as ViewResult;
// Assert
Assert.IsNotNull(result);
Assert.AreEqual("Index", result.ViewName);
}
}
}
In this example:
- Arrange: Set up any necessary objects or variables. Here, we create an instance of
HomeController. - Act: Call the method you want to test. In this case, it’s the
Indexmethod ofHomeController. - Assert: Verify the result. We check if the returned result is a
ViewResultand if it matches the expected view name.
4 — Run the Unit Tests
Once your unit test is written, you can run it within Visual Studio.
- Go to Test > Run > All Tests or press Ctrl + R, A to run all tests in the solution.
- Visual Studio will build the solution, run the tests, and display the results in the Test Explorer window.
Conclusion
By following these steps, you’ve set up a unit test project, written a unit test, and run the test in Visual Studio 2019. Unit testing is crucial for maintaining code quality and ensuring that changes do not introduce new bugs. As you continue to develop, regularly write and run unit tests to verify the correctness of your code.


