How to update Excel to the latest version

How to update Excel to the latest version: Updating Excel to the latest version is necessary to use new features or fix existing issues in the current version. Follow the steps below to update Excel to the latest version.
Step 1
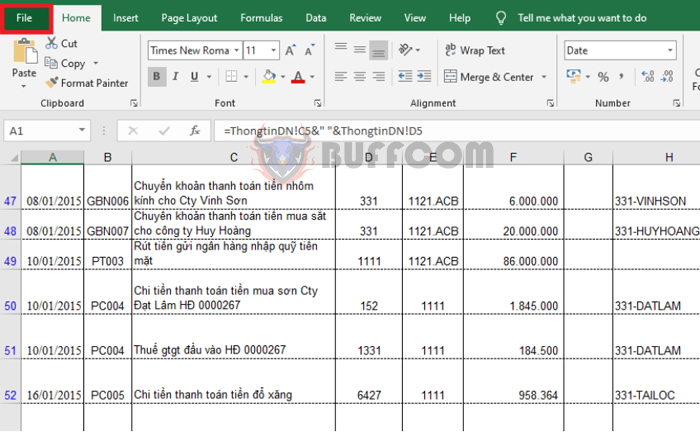
To update Excel to the latest version, first, open any Excel file. Then select the File tab on the toolbar.
How to update Excel to the latest version
Step 2
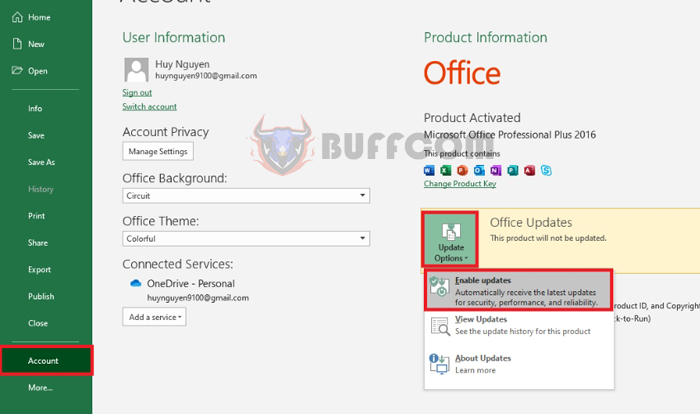
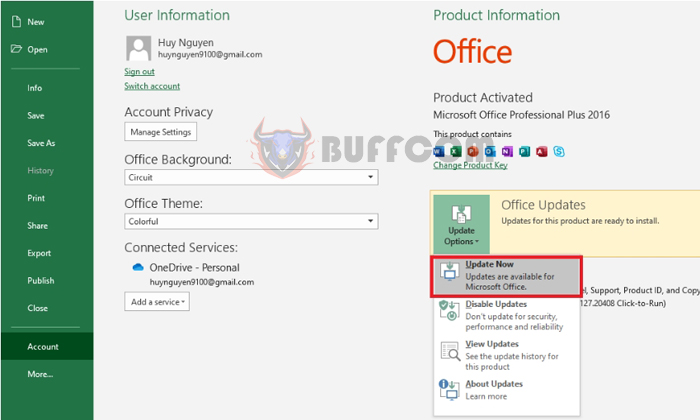
Next, select the Account option at the bottom left of the screen. Now, in the Office Updates section on the right-hand side of the screen, select Update Options. A scroll bar will appear, and you need to select Enable updates. This will turn on the automatic update feature for Excel.
How to update Excel to the latest version
Step 3
After enabling the automatic update feature, you can choose to update immediately by clicking on the Update Now option.
How to update Excel to the latest version
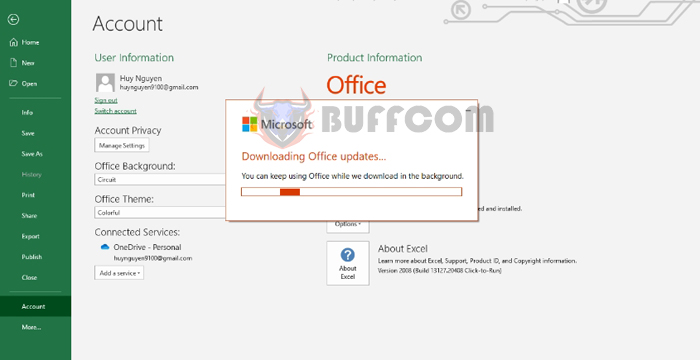
A message will appear indicating that Excel is downloading and installing the update.
You can still use Excel normally while the update is downloading.
 Step 4
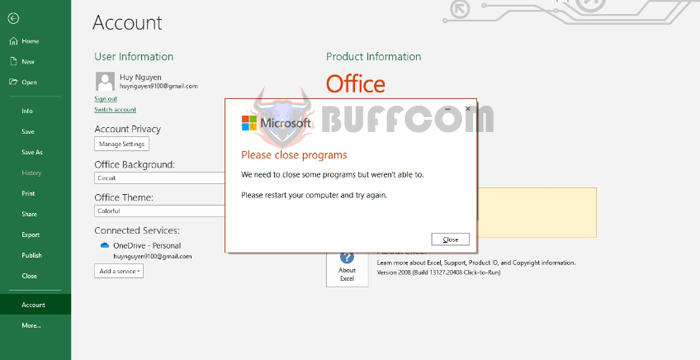
After the update is installed, Excel will display a message that it needs to close the program and restart the computer. You just need to restart your computer and then use Excel normally.
 Step 5
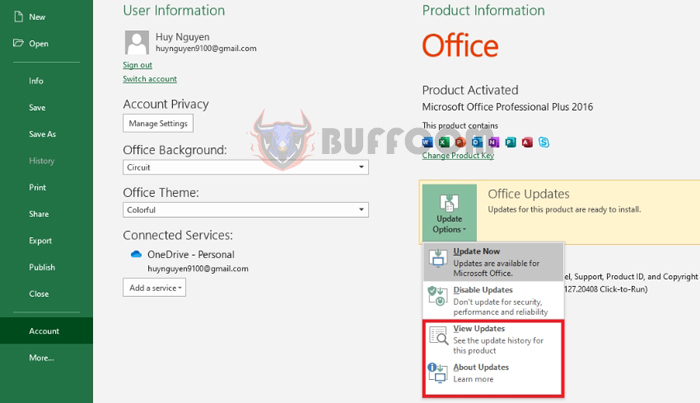
In addition, you can view the update history in the View Updates section and update information in the About Updates section. If you no longer want Excel to update in the future, you can turn off the automatic update feature in the Disable Updates section.
 That’s it! This article has provided you with the steps to update Excel to the latest version. We hope this article will be helpful to you in your work. Good luck!

