Missing System Cooling Policy on Windows 11? Try These Solutions!
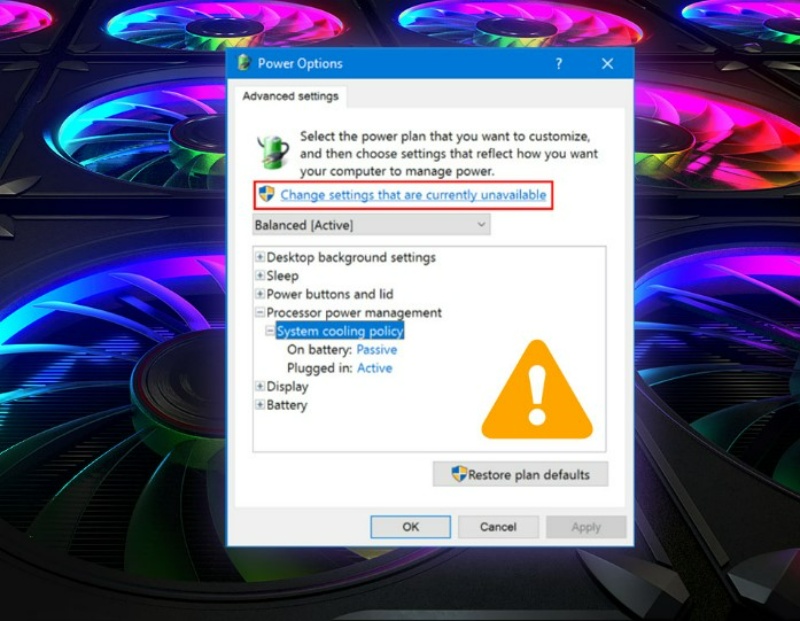
Are you a Windows 11 user struggling to maintain your computer’s temperature? Have you tirelessly searched for the system cooling policy option in your power settings, only to discover that it’s nowhere to be found? Don’t worry, you’re not alone!
Numerous Windows 11 users have encountered this issue, causing frustration, particularly for those engaged in high-performance tasks like gaming or video editing. In this article, we will delve into the possible reasons behind the absence of the system cooling policy option on your Windows device. Additionally, we will provide workarounds to help you effectively regulate the temperature and ensure optimal performance.
However, before we proceed, let’s first gain some understanding of the Windows System Cooling Policy.
Understanding System Cooling Policy on Windows 11
The System Cooling Policy feature in Windows 11 allows you to regulate the operation of your computer’s cooling system. It enables you to determine how the fans and other cooling components respond to temperature fluctuations.
In Windows 11, there are two available options for the system cooling policy:
- Active Cooling Policy: This policy aims to maintain a constant temperature for your computer’s components, regardless of the workload. It ensures that the cooling system operates at maximum speed continuously, which can result in increased noise and power consumption.
- Passive Cooling Policy: On the contrary, the passive cooling policy focuses on conserving power and reducing noise. It activates the cooling system only when necessary, primarily when the computer’s temperature surpasses a specific threshold.
Accessing the System Cooling Policy on Windows 11
To access the system cooling policy settings on your Windows 11 device, follow these steps:
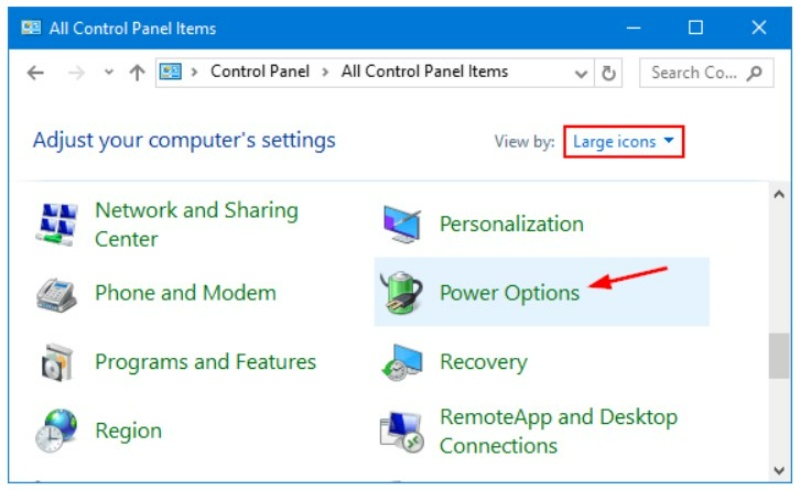
- Open the Control Panel and select “Power Options.”
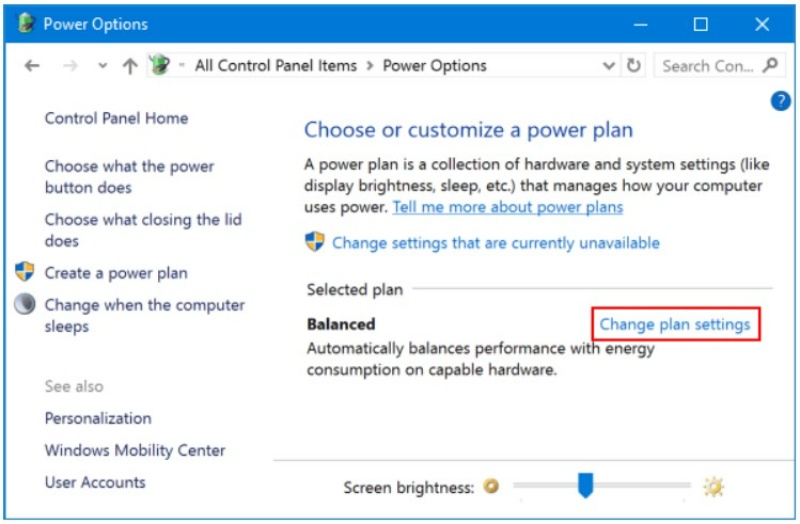
- Click on “Change plan settings” for the desired power plan you wish to modify.
- Tap on “Change advanced power settings.”
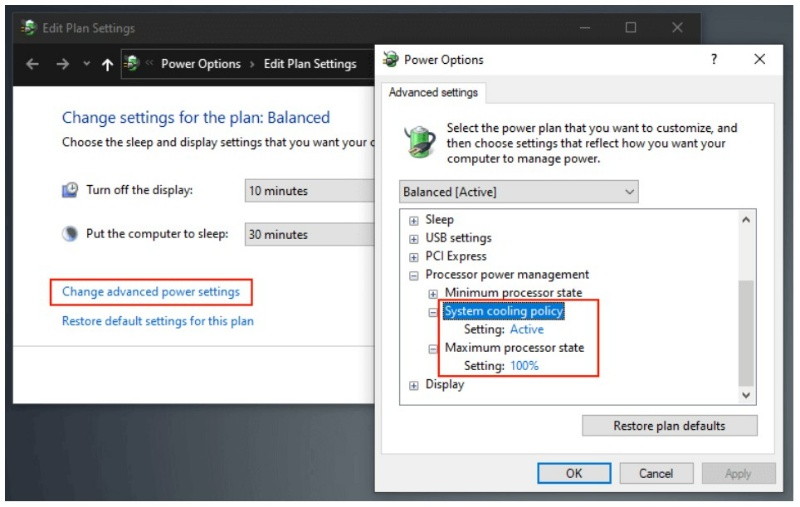
- Expand the “Processor power management” category.
- Expand the “System cooling policy” category.
- From the drop-down menu, select the preferred cooling policy.
- Click on “Apply” and then “OK” to save the changes.
By adjusting the system cooling policy, you can effectively manage the temperature of your Windows 11 computer, ensuring optimal performance while balancing power consumption and noise levels.
Missing System Cooling Option on Windows? Try These Fixes!
Whether you’re a gamer, video editor, or simply a casual user, having control over your computer’s cooling system is crucial for optimal performance and longevity. Let’s explore some solutions to help you restore the system cooling policy and get your computer back on track!
Solution 1: Check Hardware Compatibility
Before attempting any other fixes, ensure that your computer meets the hardware requirements for the system cooling policy option. This option is only available on computers with active cooling, which means they have fans or other cooling components controlled by the computer’s firmware or operating system. If your computer has passive cooling, such as a fanless heat sink, the system cooling policy option will not be available.
Solution 2: Utilize Windows PowerShell
You can use the Windows PowerShell app to retrieve the missing system cooling policy feature in Power Options. Follow these steps:
- Tap on the search icon on the Taskbar and type “Windows PowerShell.” Select the “Run as administrator” option to launch the app in admin mode.
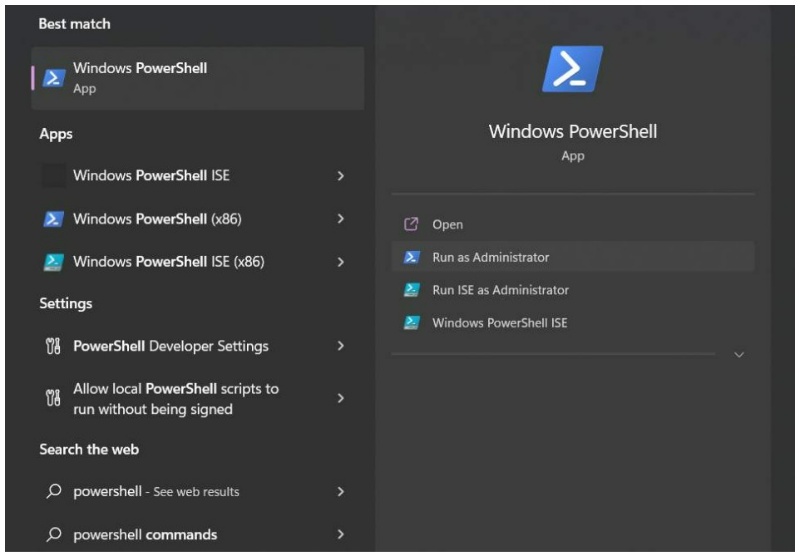
- In the PowerShell window, execute the following command:
powercfg -attributes SUB_PROCESSOR 94D3A615-A899-4AC5-AE2B-E4D8F634367F -ATTRIB_HIDE
That’s it! Return to the Control Panel and check if the issue has been resolved.
Solution 3: Edit the Registry
You can also restore the missing system cooling policy option in Power Options by making changes to the Windows Registry. Follow these steps:
- Press the Win + R key combination to open the Run dialog box. Type “regedit” in the textbox and press Enter.
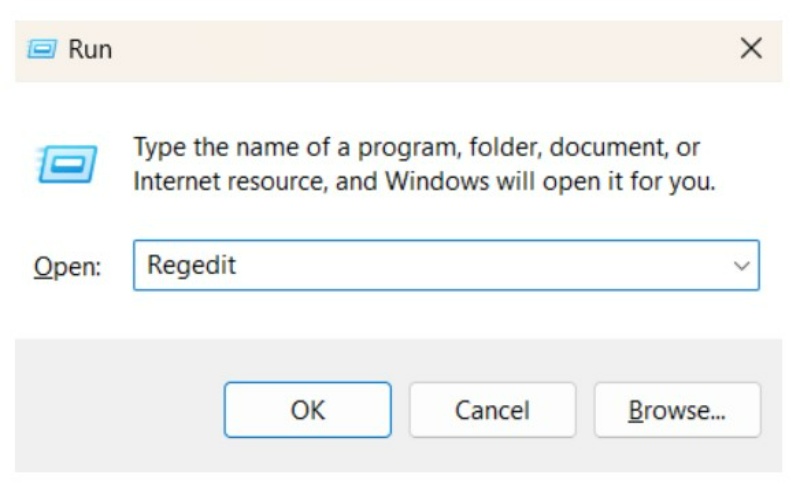
- In the Registry Editor window, navigate to the following folder location:
mathematica
HKEY_LOCAL_MACHINE\SYSTEM\CurrentControlSet\Control\Power\PowerSettings\54533251-82be-4824-96c1-47b60b740d00\0cc5b647-c1df-4637-891a-dec35c318583
- Double-click the “Attributes” value on the right-hand side of the window, change the value from “1” to “2,” and click “OK.”
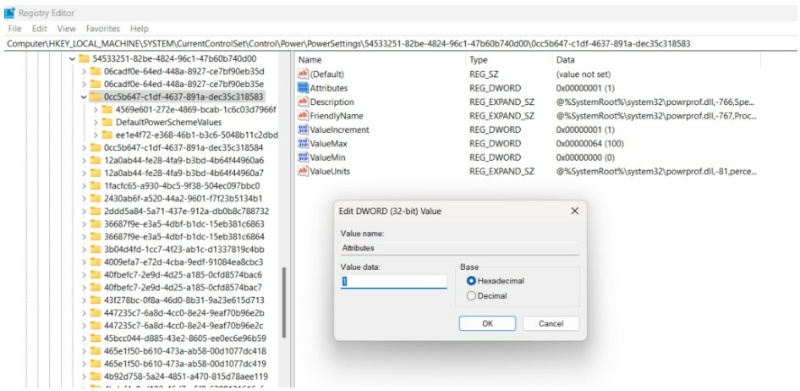
- Close the Registry Editor and open the Power Options menu from the Control Panel.
- Under “Choose or customize a power plan,” click “Change plan settings” next to the plan you want to modify.
- Click “Change advanced power settings.”
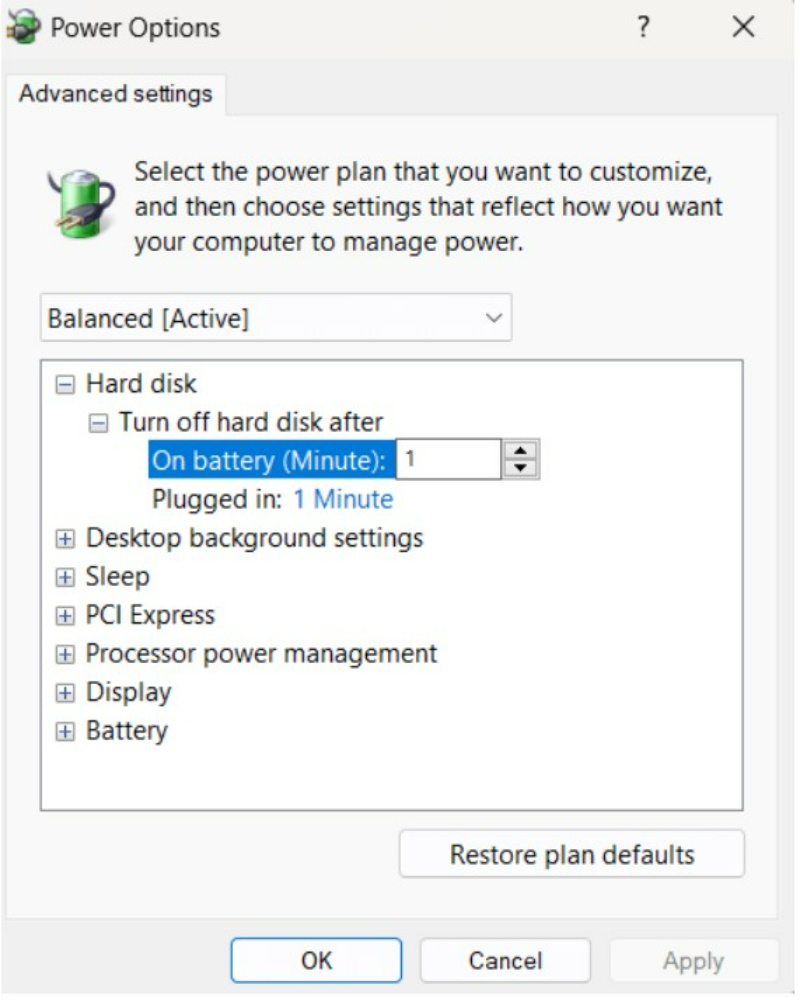
- Expand the “Processor power management” and “System cooling policy” categories.
- Adjust the “System cooling policy” option to “Active” or “Passive” based on your preference.
Once you’ve made the changes, click “Apply” and then “OK” to save your settings.
By following these solutions, you should be able to resolve the issue of the missing system cooling policy on your Windows system and regain control over your computer’s cooling system.


