Scheduling Computer Shutdown On Windows 10

If you’re a busy person and often forget to turn off your computer after work, then you will definitely find the feature of scheduling computer shutdown on Windows 10 useful. This is a very handy feature for computer users. You can schedule your computer to shut down once or on a daily, monthly basis at a specific time. So how can you use this feature? Let’s follow the instructions below.
GUIDE TO SCHEDULE COMPUTER SHUTDOWN ON WINDOWS 10
Schedule computer shutdown using commands.
First, press Win+R to open the Run dialog box, then enter the following command:
shutdown -s -t 600
Here, 600 represents the time in seconds. In this example, 600s means the computer will automatically shut down after 10 minutes. You can enter any desired time.
For example, if you want to shut down the computer after 1 hour (3600 seconds), enter shutdown -s -t 3600.
Once you’ve entered the command, click OK, and you will receive a notification about the scheduled shutdown time.
 To cancel the scheduled computer shutdown, enter the command: shutdown -a and click OK.
 Schedule periodic computer shutdown using Task Scheduler.
If you want your computer to automatically shut down daily, weekly, monthly, or at a specific time, the Task Scheduler feature is perfect for you.
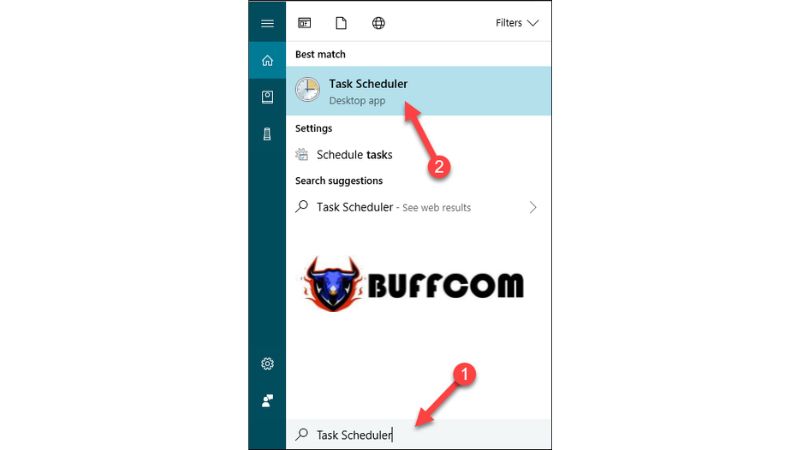
Step 1: Open the search function on Windows 10 and type “Task Scheduler,” then run the Task Scheduler application as shown below.
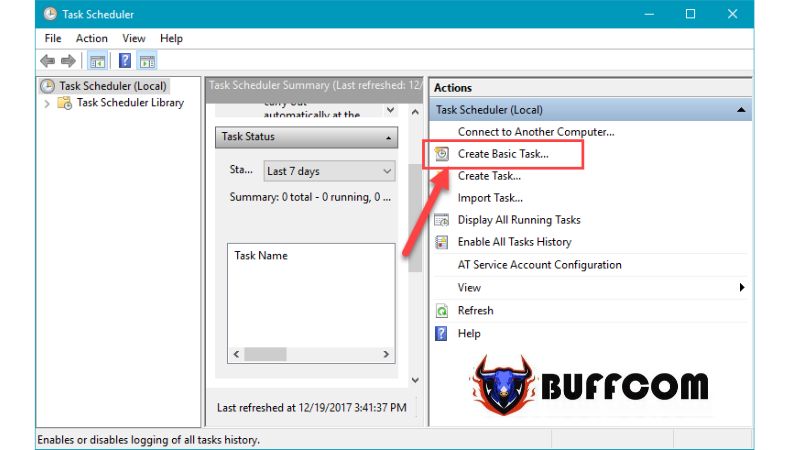
 Step 2: In the Task Scheduler interface, select “Create Basic Task…”
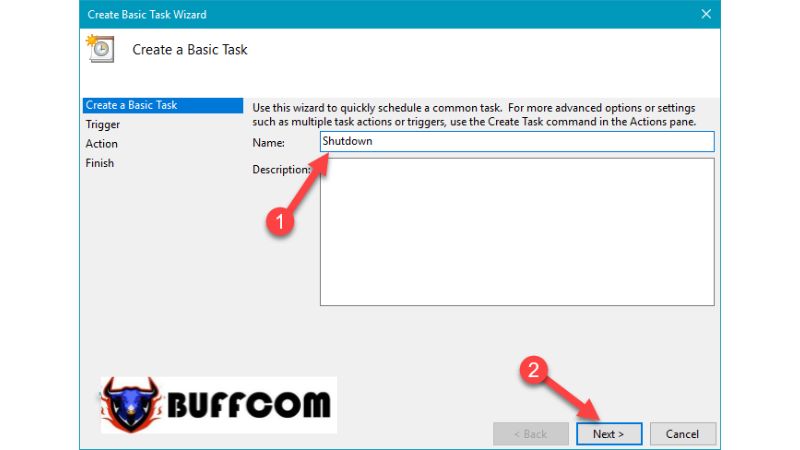
 Step 3: Name the task and click Next.
 Step 4: In this step, choose the timing for the automatic computer shutdown.
For example, I select “Daily” for daily shutdown. Other options include:
- Weekly: for weekly shutdown
- Monthly: for monthly shutdown
- One time: for a one-time shutdown
- When the computer starts: when the computer starts up
- When I log on: when you log in
- When a specific event is logged: when a specific event is triggered upon login.
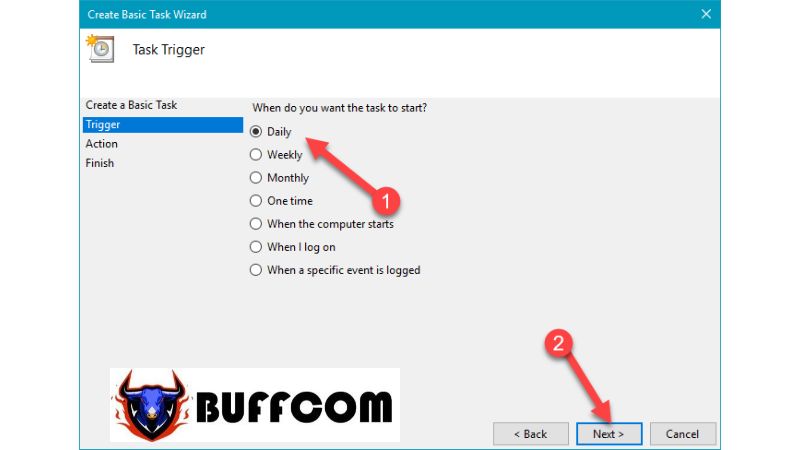 After making your selection, click Next.
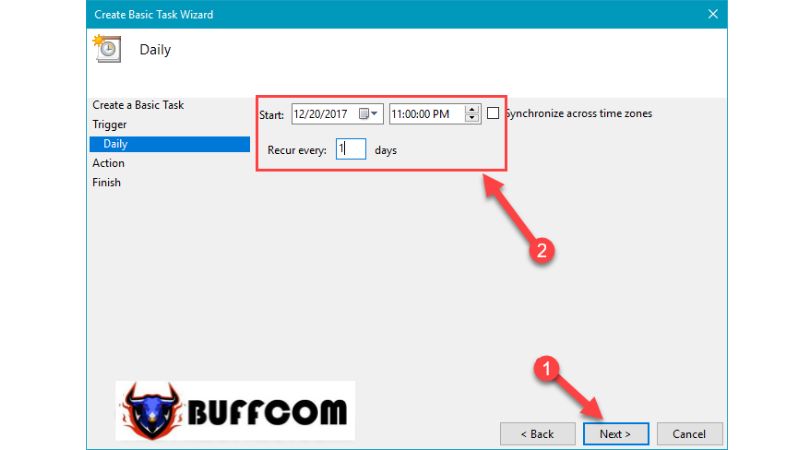
Step 5: Here, choose the start date and time for the computer shutdown. In the “Recur every” field, you can set how often the shutdown should repeat. For example, entering “1” means it will repeat every day, while “2” means every two days.
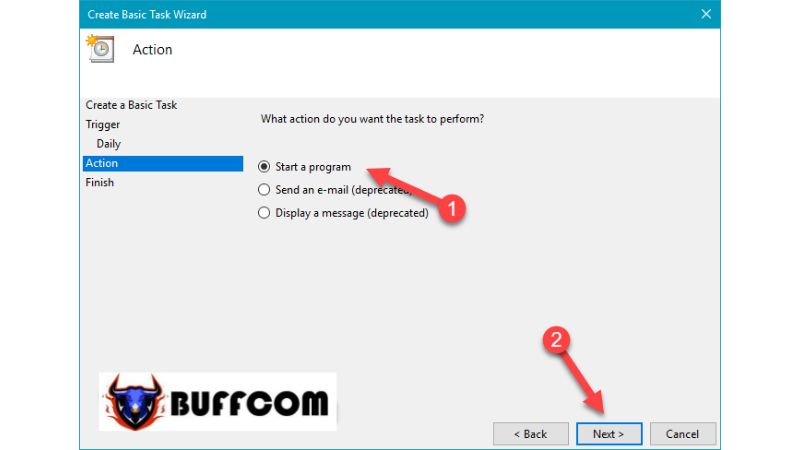
 Step 6: Select “Start a program” and click Next.
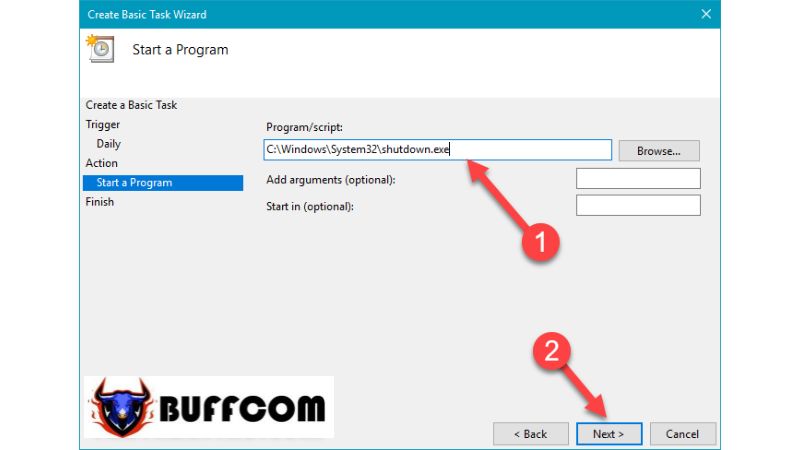
 Step 7: Browse to the Shutdown feature in Windows using the following path:
C:\Windows\System32\shutdown.exe
Then, click Next.
 Finally, click Finish to complete the process of scheduling the computer shutdown.
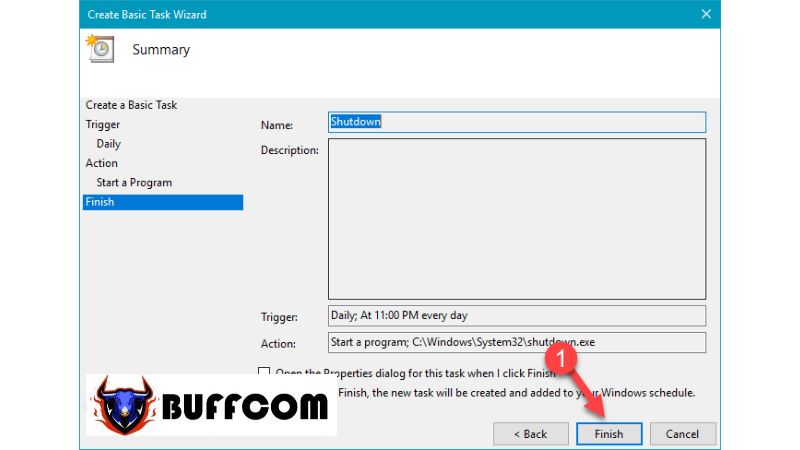 By following these steps, you have successfully scheduled the automatic computer shutdown.
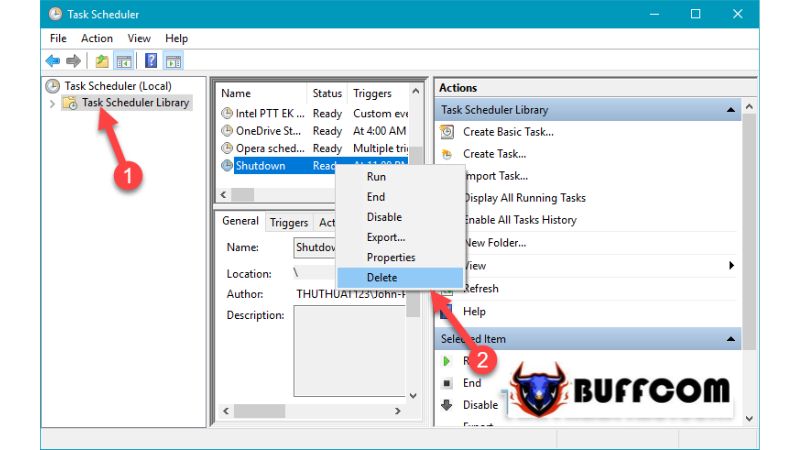
If you no longer want to schedule the computer shutdown after a certain period, you can access the Task Scheduler application, go to the list of tasks, right-click on the Shutdown task you created, and select Delete.
 That concludes the tutorial on how to schedule computer shutdown on Windows 10. We hope this article has been helpful to you. If you’re interested in genuine Windows product keys, please contact Buffcom.net for assistance!

