Simple way to check spelling in Excel documents
Simple way to check spelling in Excel documents: Making spelling errors while using Excel is difficult to avoid. That’s why Excel has a built-in tool to help us detect and correct those spelling errors. Please follow the article below to learn how to check spelling in Excel.
Step 1
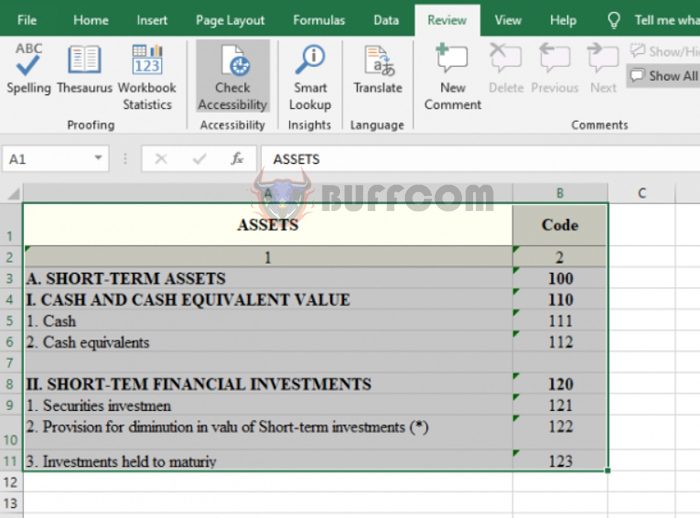
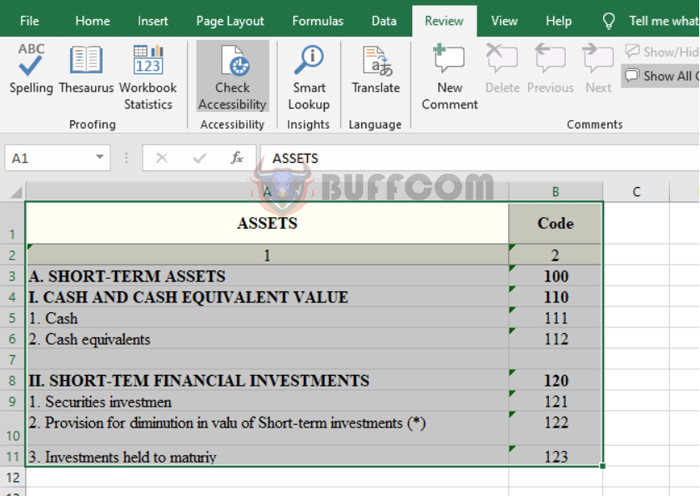
To check spelling, first, you need to open the Excel file with spelling errors. Then, select the entire data range that needs to be checked and choose the Review tab on the toolbar. Next, select the Spelling icon in the Proofing section.
Simple way to check spelling in Excel documents
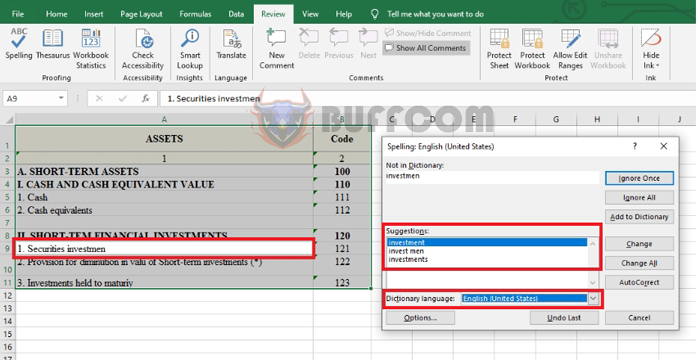
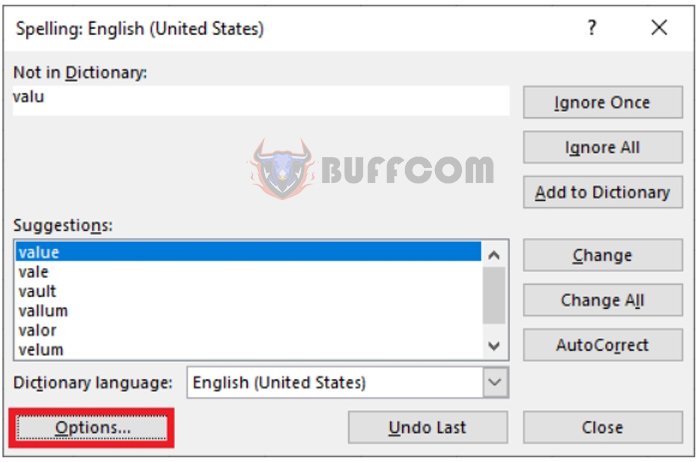
Step 2: At this point, the Spelling window will appear.
Select the language you want to check in the Dictionary Language section. Then, the cell containing the misspelling in the selected range will be left blank. The misspelled word will appear in the Not in Dictionary section. You can edit the word by selecting one of the suggestions in the Suggestions section. Then press Change to edit each word one by one. Or Change All to edit all misspelled words. Or if you want to skip that misspelled word, select Ignore Once. Or to skip all, choose Ignore All.
Simple way to check spelling in Excel documents
Step 3
You can also customize the spelling check options by clicking on the Options section.
Simple way to check spelling in Excel documents
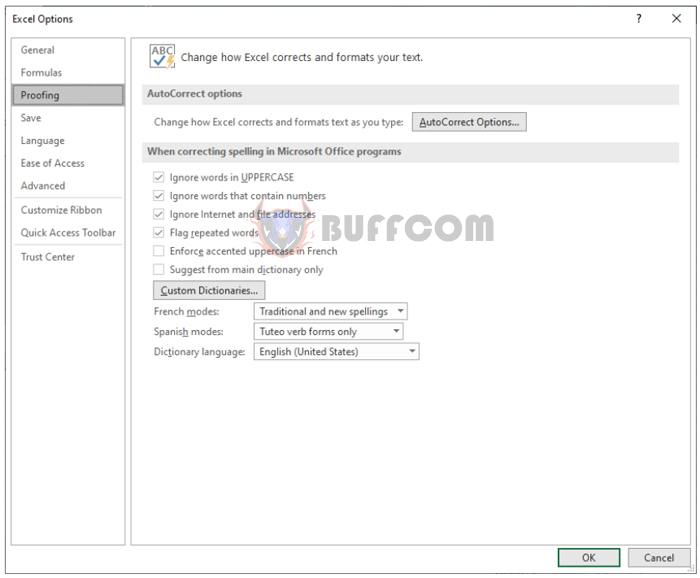
At this point, the Proofing section of Excel Options will appear. In the When correcting spelling in Microsoft Office programs section, you will have options such as:
- Ignore words in UPPERCASE: Ignore capitalized words.
- Ignore words that contain numbers: Ignore words containing numbers.
- Ignore Internet and file addresses: Ignore internet links and file addresses.
- Flag repeated words: Flag repeated words.
- Enforce accented uppercase in French: Capitalize accented words in French.
- Suggest from main dictionary only: Suggest edits only from the main dictionary.
Simple way to check spelling in Excel documents
Therefore, the above article has instructed you on how to check spelling in Excel. We hope the article will be useful to you in your work. Good luck!

