Step-by-Step Guide to Installing Windows Server 2016
Step-by-Step Guide to Installing Windows Server 2016. Before starting the installation, gather your installation media (DVD, USB, etc.). If you don’t have the Windows Server 2016 installation software, you can download it from the Microsoft website.
Step-by-Step Guide to Installing Windows Server 2016
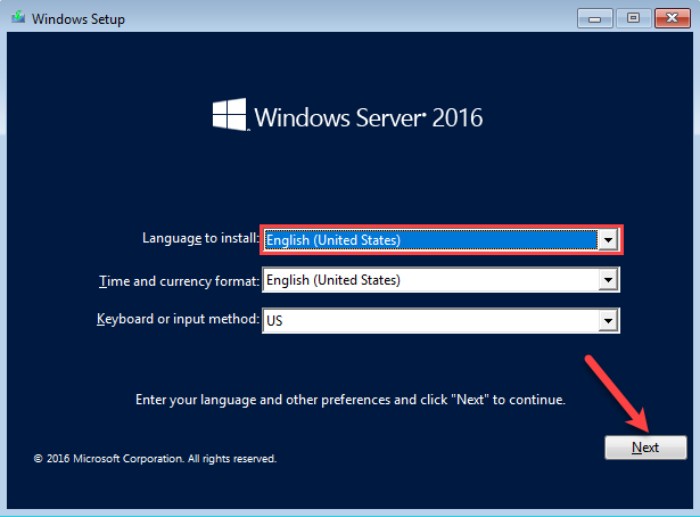
- Connect your Windows Server 2016 boot drive (DVD, USB) to your computer and boot it up. When the Windows Setup page appears, choose your language, time format, and keyboard, then click ‘Next.’
- Click ‘Install now’ to begin the installation process.
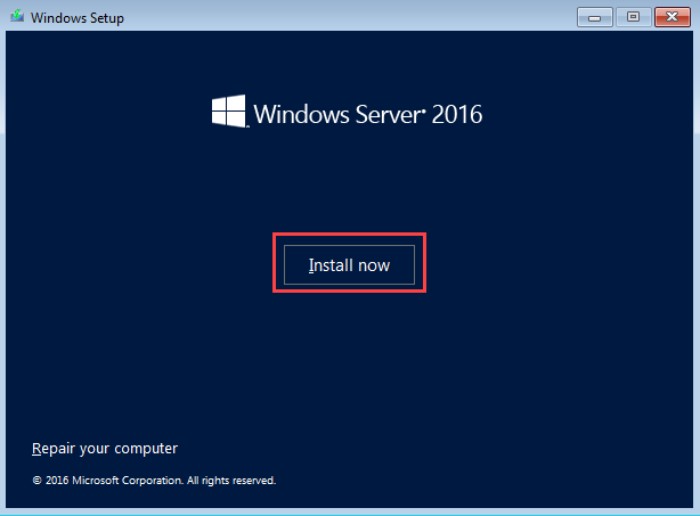
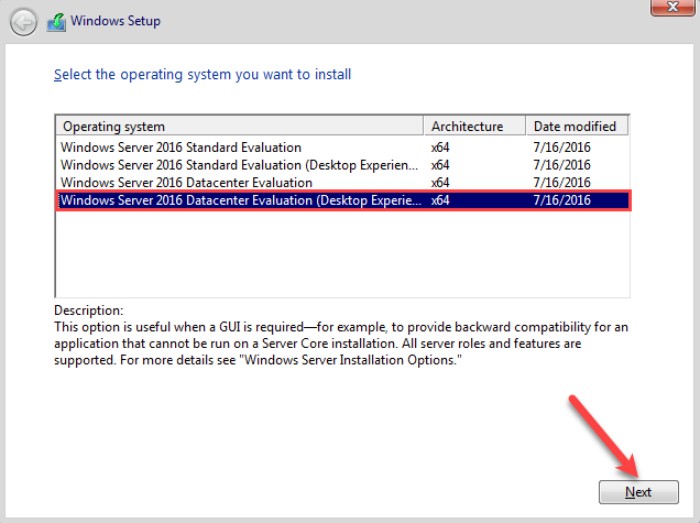
- Select the Windows Server version that fits your organization’s requirements and click ‘Next.’ Ensure you’ve picked the appropriate edition of Windows Server.
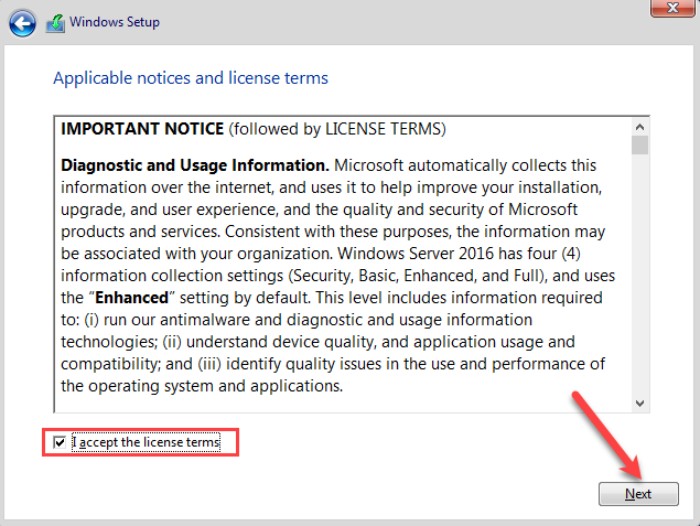
- Check the box to accept the license terms and click ‘Next.’ This license pertains to how you purchase your server license from Microsoft.
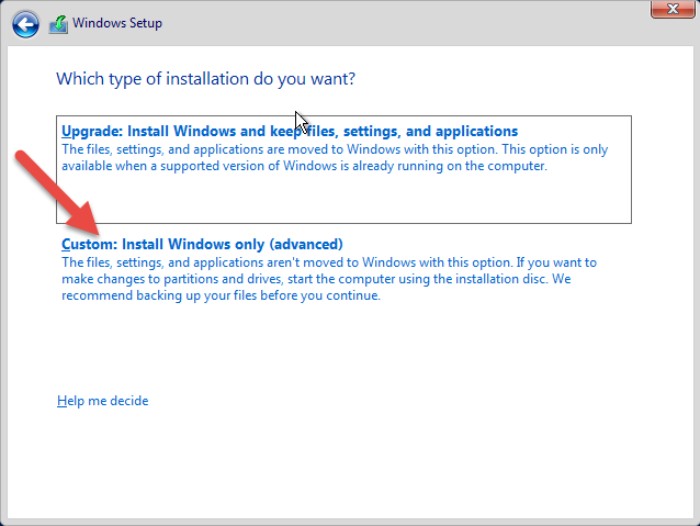
- Opt for ‘Custom: Install Windows only (advanced)’ for a clean installation, different from an upgrade. Upgrading retains settings and apps, while a clean installation doesn’t.
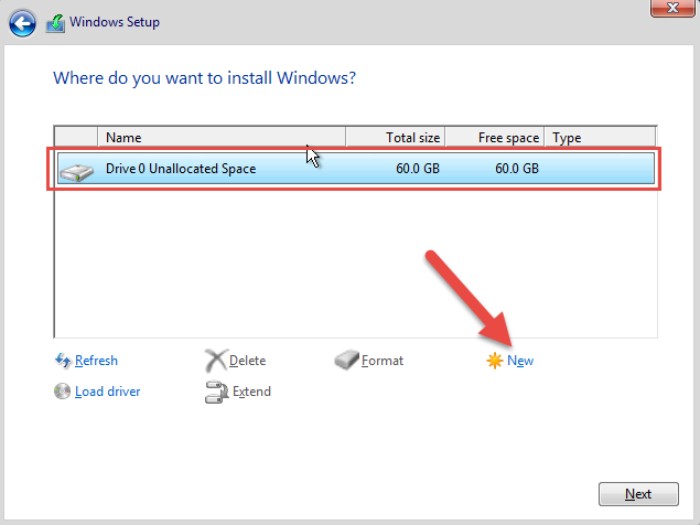
- Choose the hard drive for Windows Server installation and click ‘New’ to create partitions.
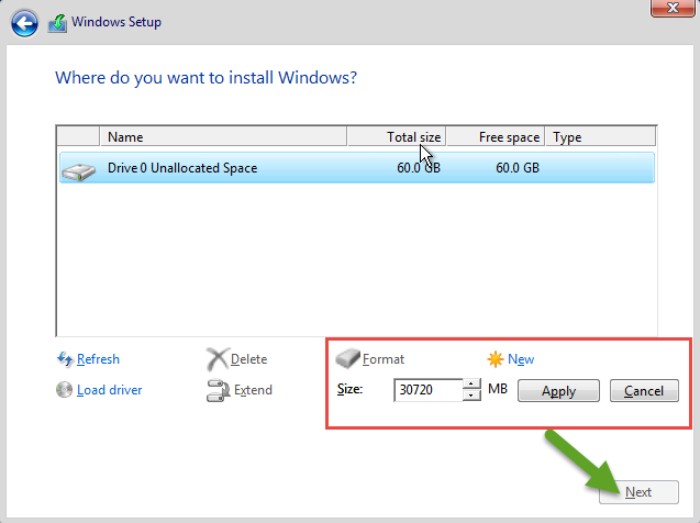
- After creating partitions, specify drive sizes in MB, click ‘Apply,’ and confirm permissions to create system drives. Click ‘OK’ to proceed. If adding more drives, repeat the process.
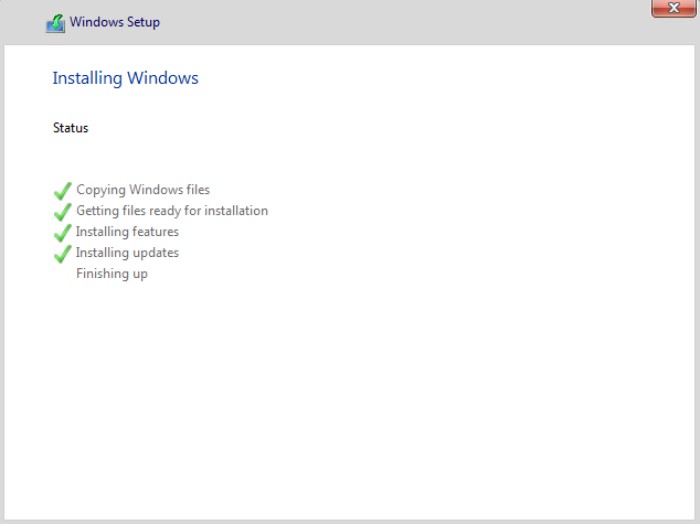
- After clicking ‘Next,’ the system will copy files from the external drive to the internal hard drive. This process takes time and involves several system restarts.
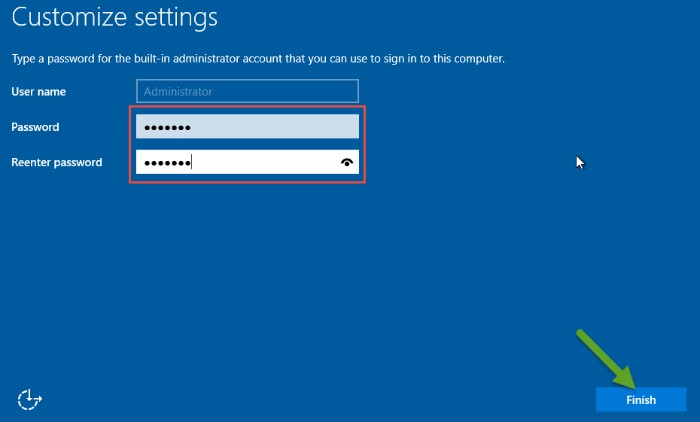
- Once the system completes copying files and restarts, finalize by entering required details. Enter a complex password twice and click ‘Finish.’ The default username is Administrator.
- Press Ctrl+Alt+Del to reach the login page, enter the password, and press Enter to sign in to Windows.

- After logging in, you’ll see the Welcome screen for Windows Server 2016.
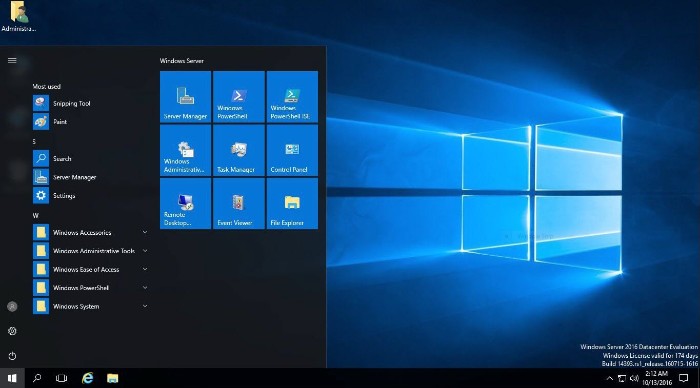
Conclusion: Step-by-Step Guide to Installing Windows Server 2016 is successfully installed and ready to use. Note that changes like edition modifications aren’t possible once installed. For queries, leave a comment below. For initial configurations, click the link provided.

