Tip for Excel: Three cell formats to fit header text
Tip for Excel: Three cell formats to fit header text. When working with an ordinary Excel sheet, the descriptive header text often causes the columns to become wider, pushing important data off the screen. This can be a frustrating experience when you have to scroll back and forth. However, there are solutions specifically designed for header text. In this article, I will demonstrate three cell formats that can help reduce the width of the header cells, allowing you to view all the data on a single screen.
Tip for Excel: Three cell formats to fit header text
Shrink to Fit:
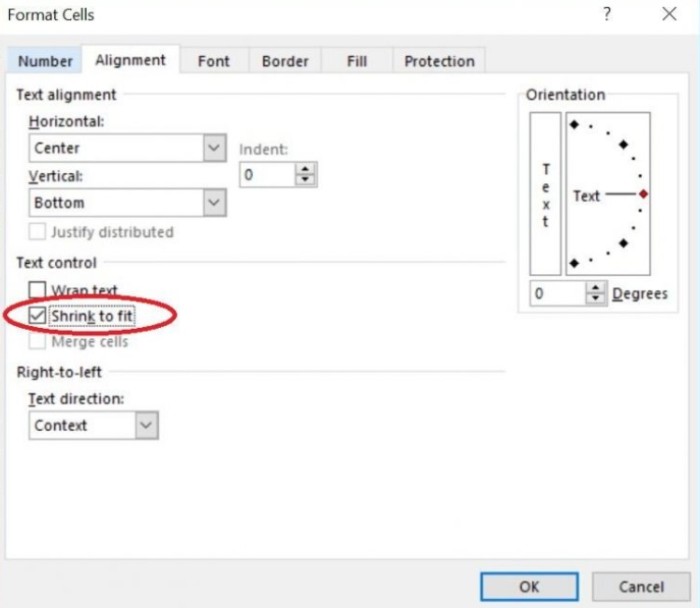
One option is to use the “Shrink to fit” format. This format reduces the width of the header cells to accommodate the text. To apply this format, select the header cells (e.g., B2:P2), and click on the Alignment dialog launcher (located on the Home tab). In the Alignment tab, enable the “Shrink to fit” option.

Tip for Excel: Three cell formats to fit header text
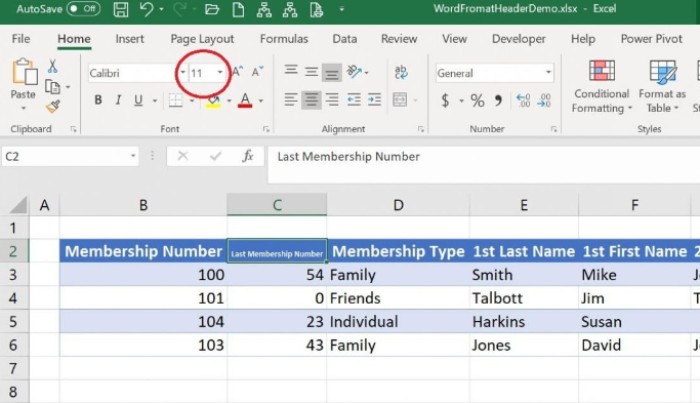
Alternatively, you can press Ctrl+1. By reducing the width of the column, you will notice a significant change in the header text’s appearance.
It is important to note that the text won’t increase if you expand the column width. Although this format has limited use, it is worth knowing that it is available.
Tip for Excel: Three cell formats to fit header text
Tip for Excel: Three cell formats to fit header text
Wrap Text:
Another format to consider is “Wrap Text.” This format allows the text to wrap to multiple lines within a single cell, adjusting to the cell’s width. Before applying this format, reduce the width of the column(s) to accommodate the text rather than the headers.

Tip for Excel: Three cell formats to fit header text
Most of the header text will disappear temporarily. Then, select the header cells (e.g., B2:P2), and click on the “Wrap Text” button in the Alignment group on the Home tab. Adjustments may be required for certain columns, such as widening columns D and M to keep specific words together (e.g., Membership and State). You can rearrange the words within a cell by inserting a “hard return.” To do so, select the cell and position the cursor before the desired word in the Formula bar.

Tip for Excel: Three cell formats to fit header text
Press Alt+Enter to push the word to the next line. If the header text spans multiple lines, increase the column width(s) accordingly. With the Wrap Text format, you can usually fit all the data on one screen.
Orientation:
If the Wrap Text format doesn’t suit your needs, you can try the “Orientation” format. This format rotates the font angle to make the header text more compact. Select the header cells (e.g., B2:P2), and click on the “Orientation” button in the Alignment group on the Home tab. You can choose from various angle options, such as Angle Counterclockwise. Adjust the column width(s) to accommodate the data instead of the headers. Experiment with different angles using the Orientation control or by entering a specific degree value. Once you find a suitable angle, you can view the header text in a condensed format. To remove the format, simply enter 0 in the Degree control.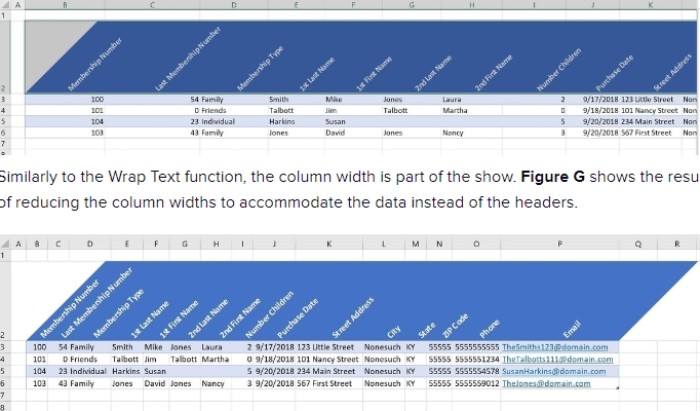
These three cell formats—Shrink to Fit, Wrap Text, and Orientation—can help you fit header text effectively. Depending on your specific requirements, you can choose the format that works best for your Excel sheet.

