Using Tab in Word to create dots (…….) quickly

Using Tab in Word to create dots (…….) quickly. During the process of using Word to work, there will certainly be times when you need to create dot lines in your text. To create these dot lines, you need to use the tab tool. This is a very necessary tool in the editing process, especially for single text files, contracts. So how to set up the (…….) automatically in the text without typing each dot manually. Let’s find out how to use tab in Word through the following article!
Guides on how to use Tab in Word
How to create a Tab in Word
Using the Tab tool in Word is extremely useful when you write and format your text. Without typing each dot manually, you can quickly fill in the evenly dotted (…….) by performing the following steps:
Step 1: To use the tab, first, you need to turn on the display of the ruler. The Ruler will be displayed right below the Office toolbar.
You can turn on Ruler display in two ways:
- Method 1: Click on the small square box icon at the top right of the Word page you are editing, and the Ruler will appear immediately.
turn on Ruler display by clicking the icon on the screen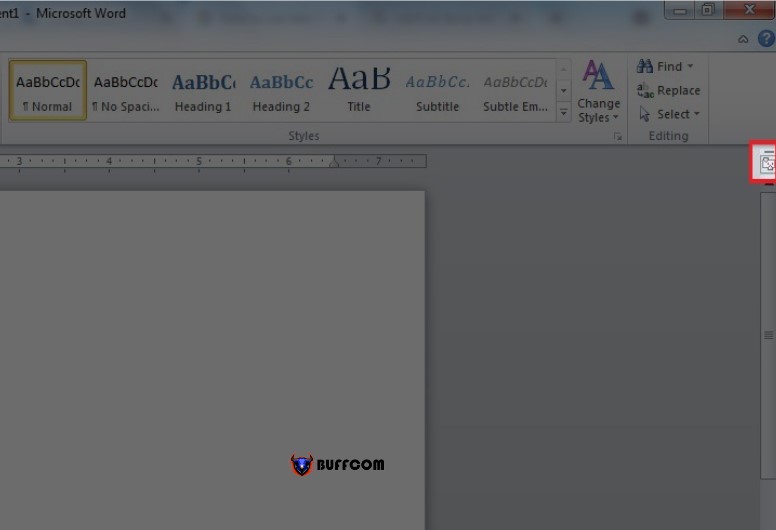
Using Tab in Word to create dots (…….) quickly
- Method 2: You can go to View> Check the Ruler box to display the ruler.
turn on Ruler display on the View tab to adjust the tab in Word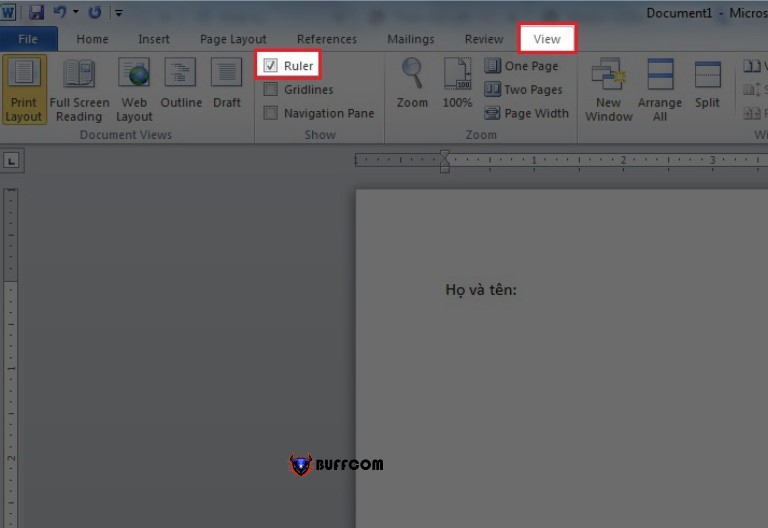
Using Tab in Word to create dots (…….) quickly
Using Tab in Word to create dots (…….) quickly
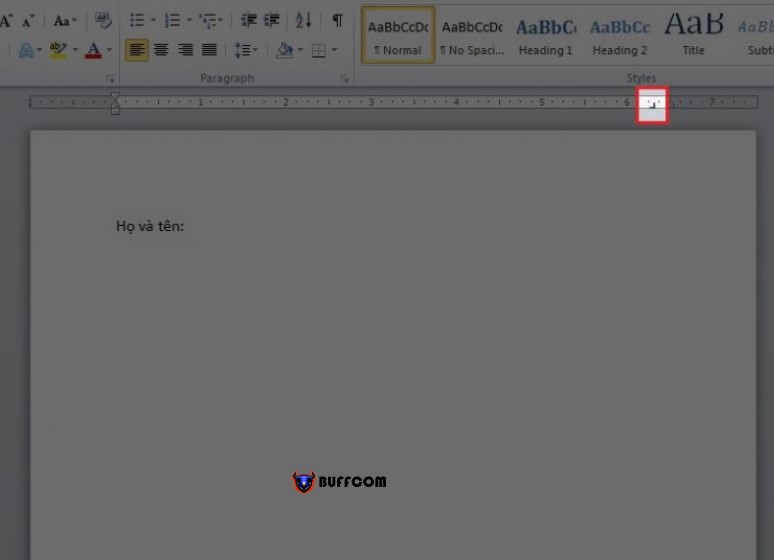
Step 2: Choose the type of Tab you want to use by continuously clicking on the small square box above the left as in the picture. Then click on a position on the ruler (where you want to place the Tab position).
Step 3: Next, you are in the Tabs dialog box in one of two ways:
- Method 1: Double-click on the Tab position on the ruler, and the Tabs dialog box will appear immediately
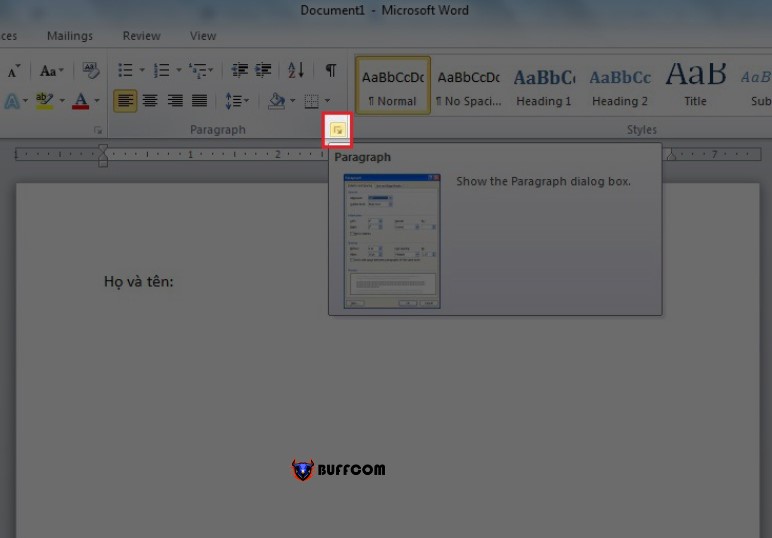
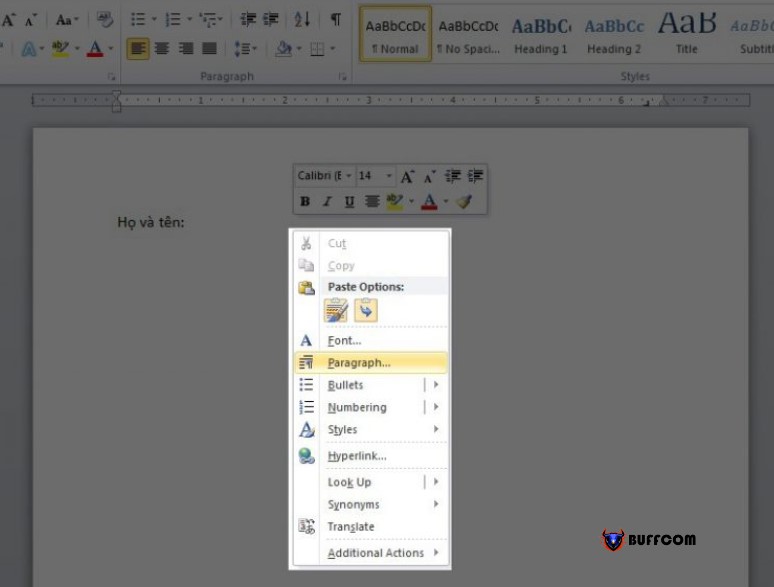
- Method 2: You can also go to Home> Choose Paragraph. Or right-click on the Word page and select Paragraph. Then, the Paragraph window appears, and you click on Tabs to open this dialog box.
Using Tab in Word to create dots (…….) quickly
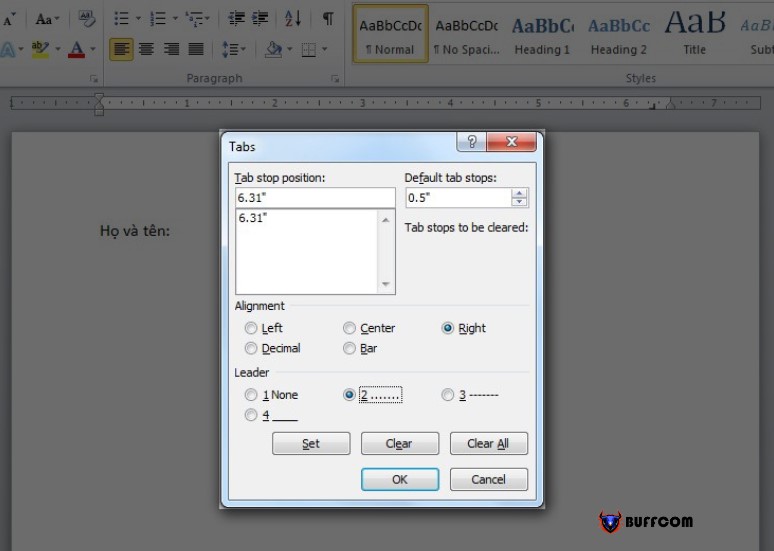
Step 4: The Tabs dialog box will appear, and you need to set the parameters to define the length of the tab stop (…) and its position in the Word document.
Using Tab in Word to create dots (…….) quickly
The necessary parameters to be set include:
- Tab stop position: The length of the tab stop (…) that appears when you use the Tab key (from left to right).
- Default tab stops: The distance from the end of the tab stop (…) to the next character.
- Alignment: The starting position of the tab stop (…) with options including Left, Center, Right, etc.
- Leader: Choose the type of Tab that you want to display. For example, check 1 for no display, check 2 for dots, check 3 for dashes, and check 4 for solid lines.
After selecting the desired parameters, click Set > OK to complete the process of setting up Tabs.
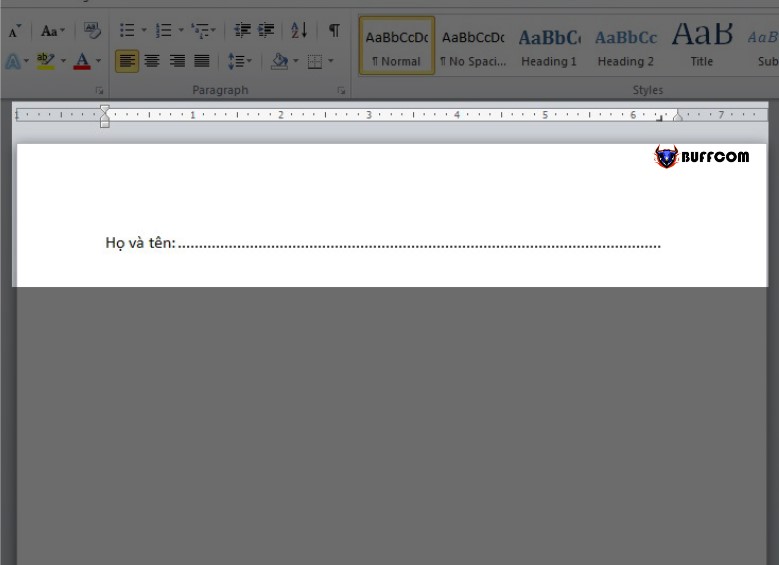
Step 5: Now, you can use the Tab key on your computer keyboard to create dot lines in your Word document.
Using Tab in Word to create dots (…….) quickly
How to delete Tabs in Word
A document may have to use many types of Tabs. Before creating a new type of Tab to use, you need to delete the old Tab to avoid affecting the presentation of your document.
Deleting Tabs in Word is straightforward. Simply hold the left mouse button and drag the Tab marker away from the ruler. Immediately, the Tab that you created will be removed from your Word document.
Thus, with the ways to use Tabs in Word and how to adjust Tabs in Word mentioned above, we hope that Buffcom.net will help you successfully create Tabs to support the scientific and quick drafting and presentation of your documents.

