8 Microsoft Word Tips for Creating Professional-Looking Documents ( P1 )
8 Microsoft Word Tips for Creating Professional-Looking Documents: As you may already know, Microsoft Word provides you with numerous tools for composing and formatting various types of documents. But which features should you use to create professional-looking documents? Here are some helpful tips.
Choose the appropriate font for the task
Whether you’re creating a business document or a university paper, select a readable font. If you intend to print the document, you can choose a serif font like Times New Roman or

Georgia. As the name implies, serif fonts have small decorative strokes, also called serifs or tails, which make the text appear more refined. They appear distinctively in print.
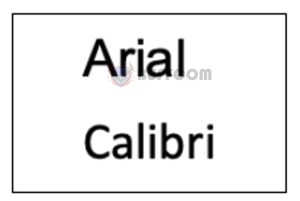
For digital documents, use a sans serif font instead of Arial or Calibri. These font styles lack serifs (the decorative strokes) which makes them easier to read on computer screens or mobile devices.
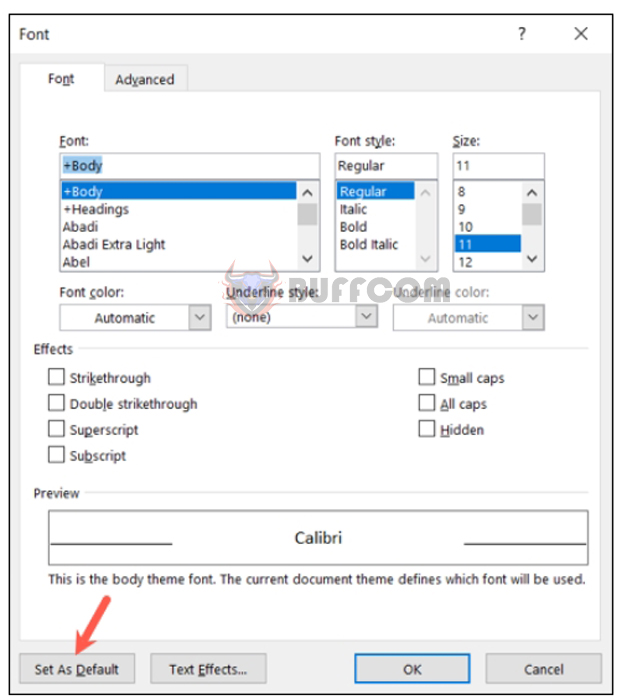
 To change the font style, along with the size and color, go to the Home tab and the Font section of the ribbon.
Make your selection, pick “Set as Default,” and “OK.”
 Adjust margins appropriately
If you have specific margin requirements, you can easily set them to the exact size you need. Otherwise, the standard is one inch for all four sides. Depending on the type of document you’re creating, you may want narrower margins to accommodate tables or diagrams. In that case, you can use the Narrow margin preset, which reduces the margin by half an inch on each side.
To adjust margins, go to the Layout tab and open the Margins drop-down menu to make your selection.
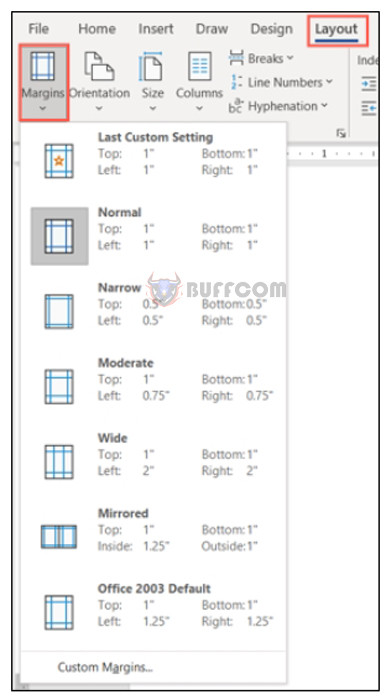 For precise margin sizes, choose Custom Margins at the bottom of the list. Enter the measurements at the top, including the gutter if desired, and click “OK” to save the changes.
 Note that you have additional options for Custom Margins in Word. You can use specific details regarding page orientation, paper type, and applying margins to the entire document, a certain section, or from a certain point onward.
Choose appropriate line spacing and paragraph formatting
Line spacing and paragraph indentation can impact the readability of your document, so this is another formatting option to keep in mind. You may be required to double-space, for example, in an academic essay, but if not, the default value in Word documents is 1.15, which works well for most document types.
You can adjust the spacing from the Paragraph section on the Home tab. Select all the text in your document or specific text if you prefer. Then, open the Line and Paragraph Spacing drop-down menu to make your selection.
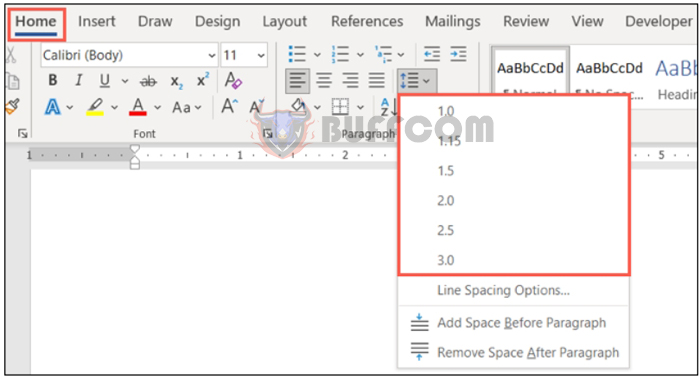 To customize your spacing, choose “Line Spacing Options” in the list. Use the Spacing section on the Indents and Spacing tab to change the before and after paragraph spacing. Then, you can use the Line Spacing drop-down box to choose Single, Double, or another option.
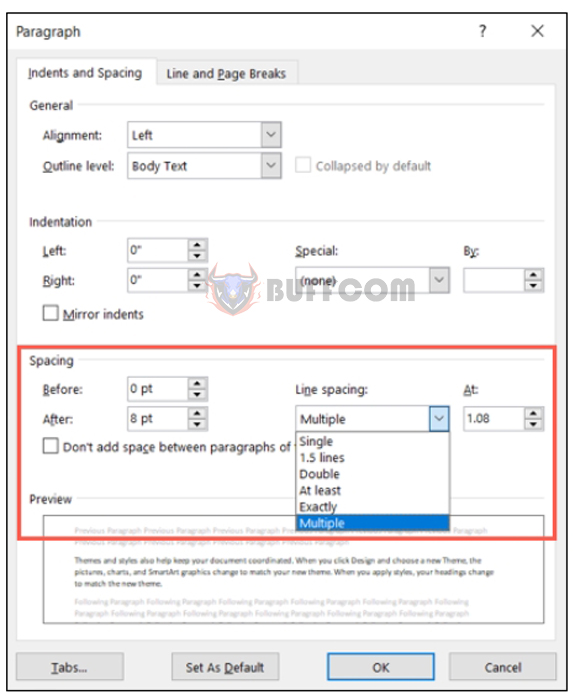 When making your changes, you can preview the document at the bottom. Once you’re satisfied with your selections, click “OK” to apply them. You can also use the “Set As Default” button to keep these settings for all future documents.
Adjust your paragraph indentation
Again, if you have specific requirements for how the indentation should appear, we’ll show you how to adjust it. However, many modern documents use left-aligned text. To separate paragraphs, simply insert an extra line between them.
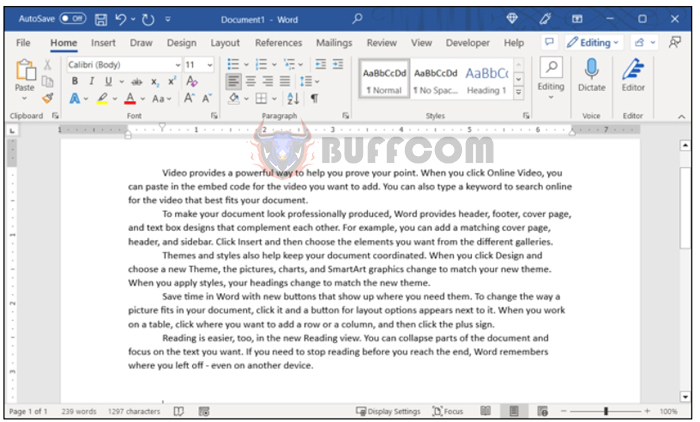
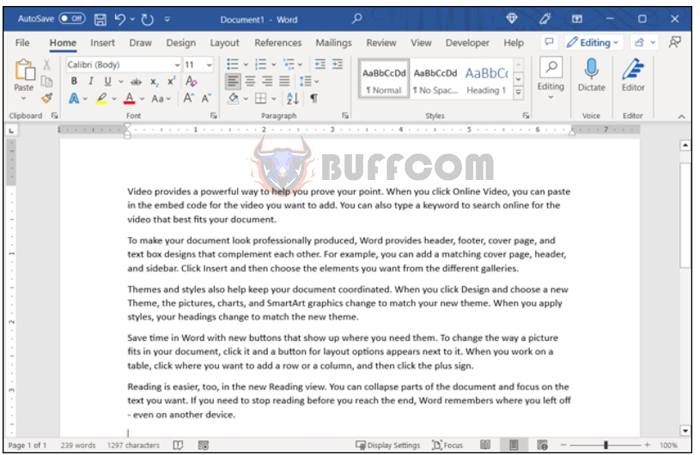 On the other hand, you may need to indent the first line of each paragraph with no extra spacing between paragraphs. This type of layout, called first line indent, is what you’d see in a book, for example
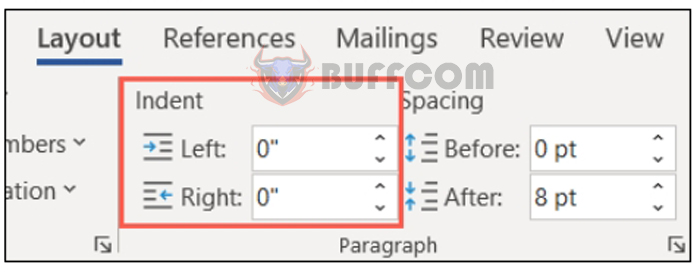
Go to the Layout tab and use the Indent settings in the Paragraph section to change your current indents.
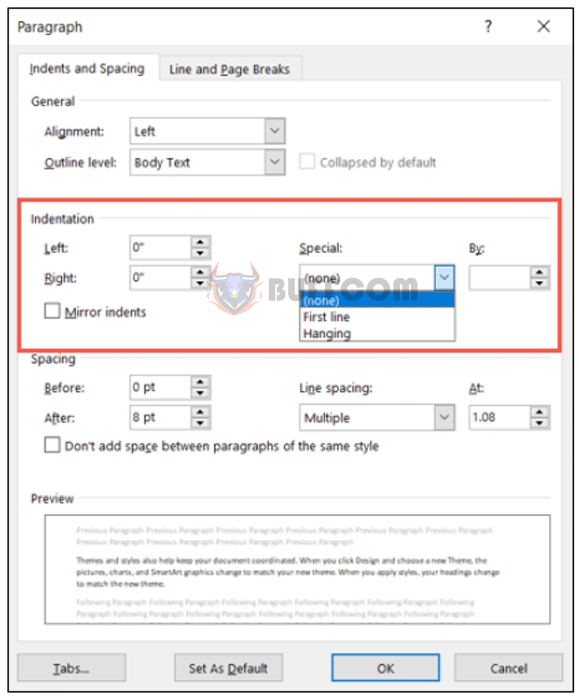
Alternatively, open the Paragraph launcher using the small arrow in the bottom right corner. You can then make your adjustments in the Indentation section of the Indents and Spacing tab. Add what you’d like for the left and right indents or pick a special option on the right like a First Line or Hanging indent.


