Creating folders in Outlook makes managing email less of a nightmare

How to create a folder in Outlook. Let’s learn how to organize your inbox by creating folders in Outlook, dividing them into subfolders and different categories!
If you receive a large volume of emails in Outlook, the folder creation feature will be very useful. It simplifies your inbox and helps you organize your emails more neatly. You can also create subfolders within each folder.

How to create a folder in Outlook
Moreover, Outlook provides the feature to categorize each email separately. In this article, Buffcom.net will guide you on how to create folders in Outlook, divide them into subfolders and categories to help make your Outlook account as organized as possible.
How to create folders in Outlook
To store emails in a different location other than the Inbox, you can create different folders in Outlook. The process of creating a folder is simple. You can name each folder and organize them in a hierarchical system by creating smaller subfolders.
Drag individual emails from the Inbox or another folder to your new folder to organize each email neatly. You can also right-click on an email and select Move, then choose any folder you want to move the email to.
To do this, follow the steps below:
Step 1: In the left-hand panel of Outlook Mail, select the Inbox folder.
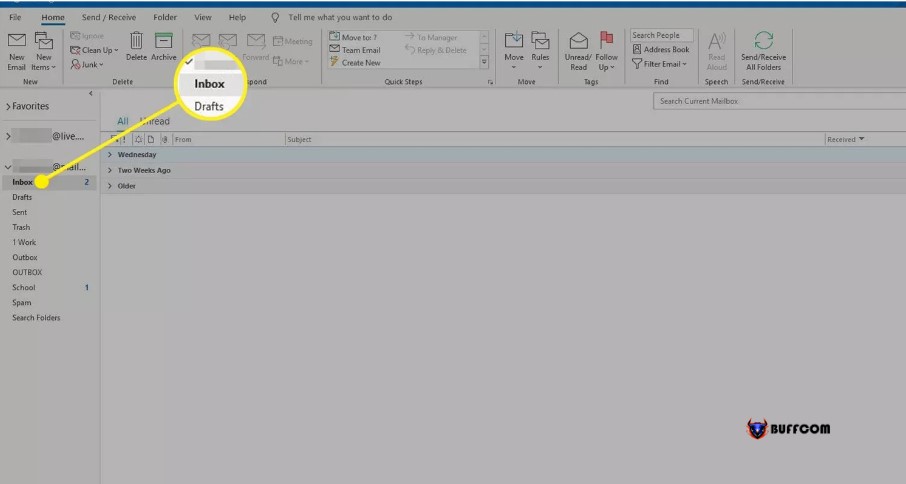
Step 2: Right-click and select New Folder.
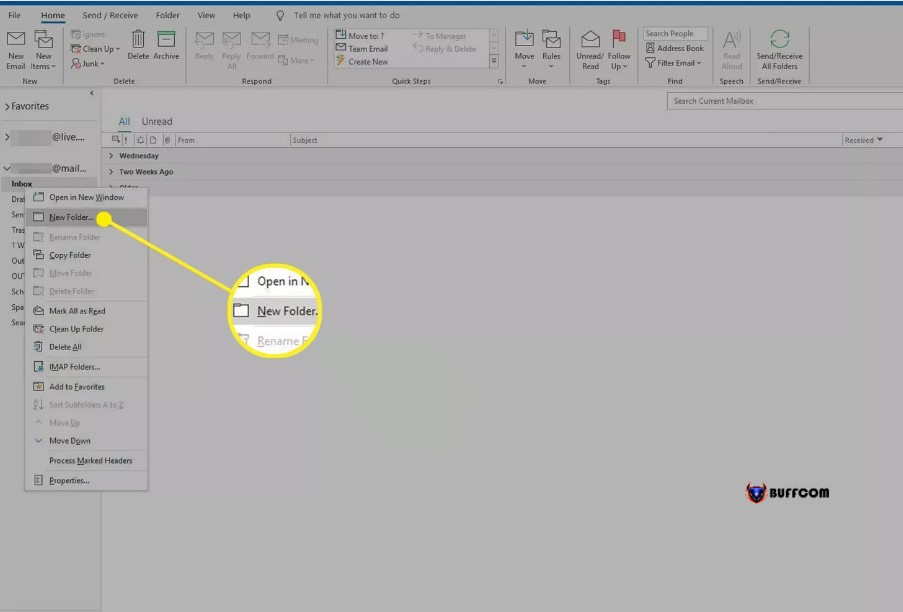
Step 3: Name the new folder.
Step 4: Press Enter.
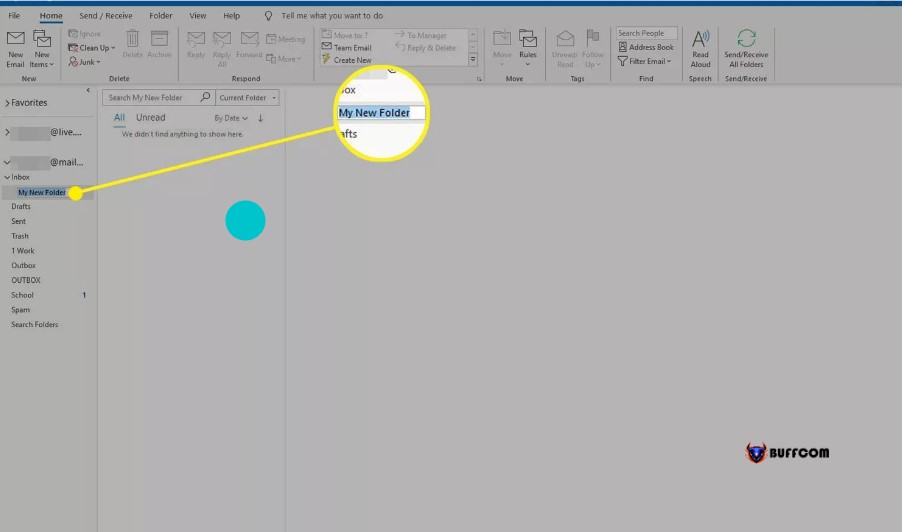
Step 5: To create a subfolder, select the folder you want to contain the subfolder and repeat the above steps.
Use the Categories feature to color-code emails
To organize emails, you can also apply the feature to categorize them into different categories. You can use default colors or personalize them by setting category priority. To do this on Outlook.com, select an email and choose Categorize > Manage categories. In the Categories dialog box, you can add or remove categories and add them to the Favorites list as desired.
To set category priority in Outlook, select Home > Categorize > All Categories. You will have the option to add categories, delete categories, rename categories, and assign shortcuts to categories.
To apply color categorization to an email:
Step 1: Open an email from your email list.
Step 2: Select Categorize from the Tag section in the Home tab.
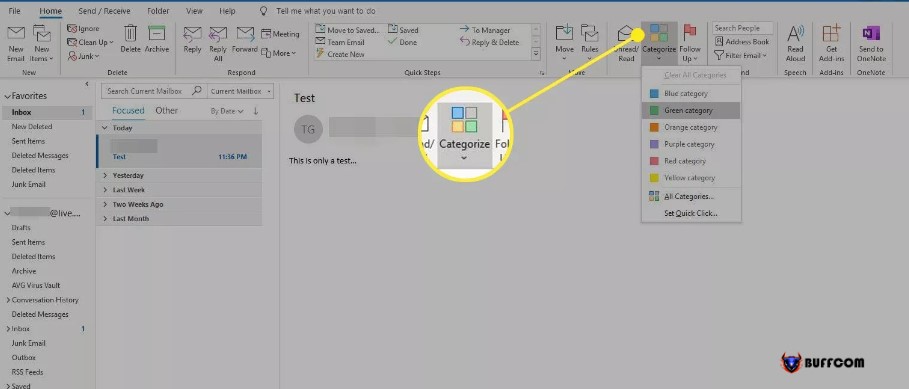
Step 3: Choose the category you want to apply to the email. The color palette will appear next to the selected email in the email list and its title.
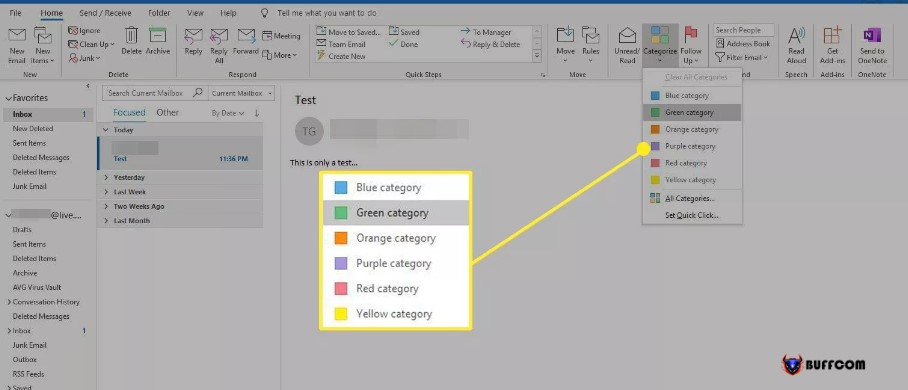 Alternative option:
Step 1: Right-click on the email you want to categorize in the email list.
Step 2: Select Categorize from the menu that appears.
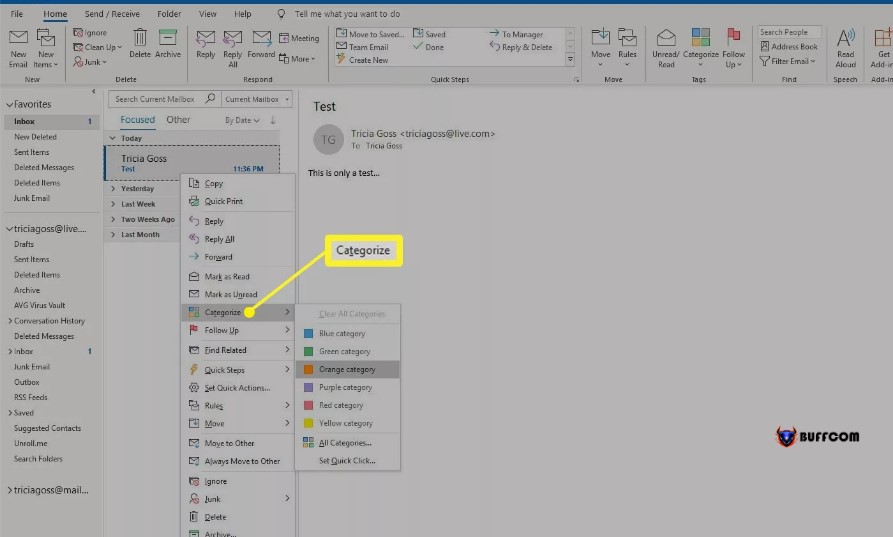
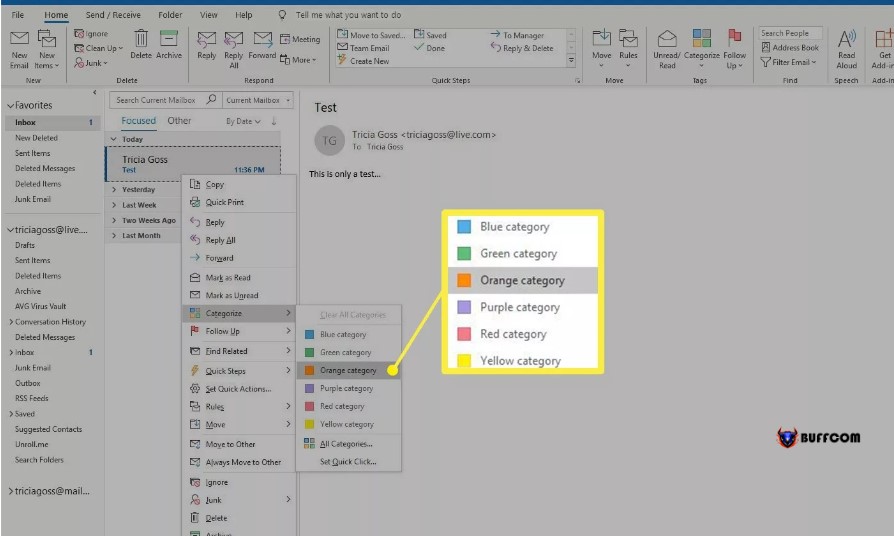
Step 3: Choose the category you want to apply to the email. The color palette will appear next to the selected email.
Creating a new folder in Outlook.com
You can drag and drop emails into different folders or right-click on them and select Move, then choose the folder you want to move the email to.
Step 1: Select New Folder. The New folder link is located at the bottom of the folder list. A blank text box will appear at the bottom of the folder list.
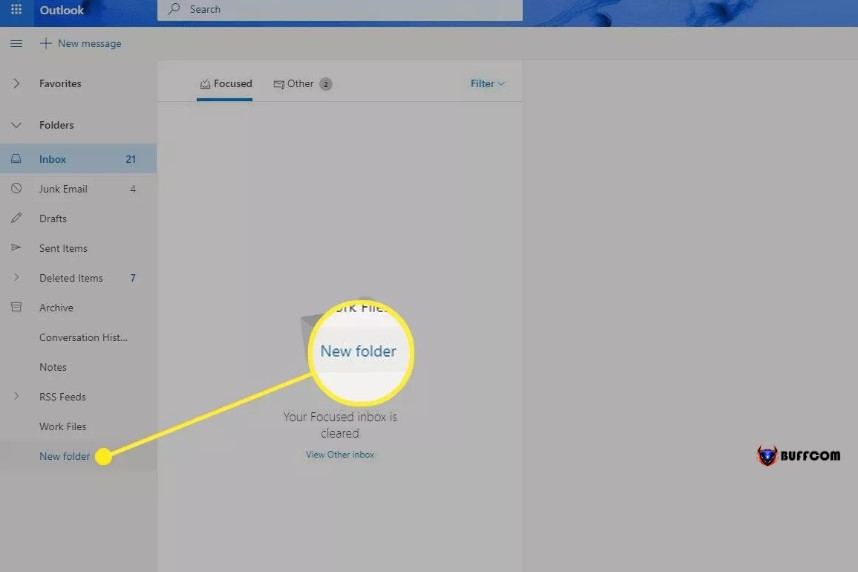
Step 2: Enter a folder name.
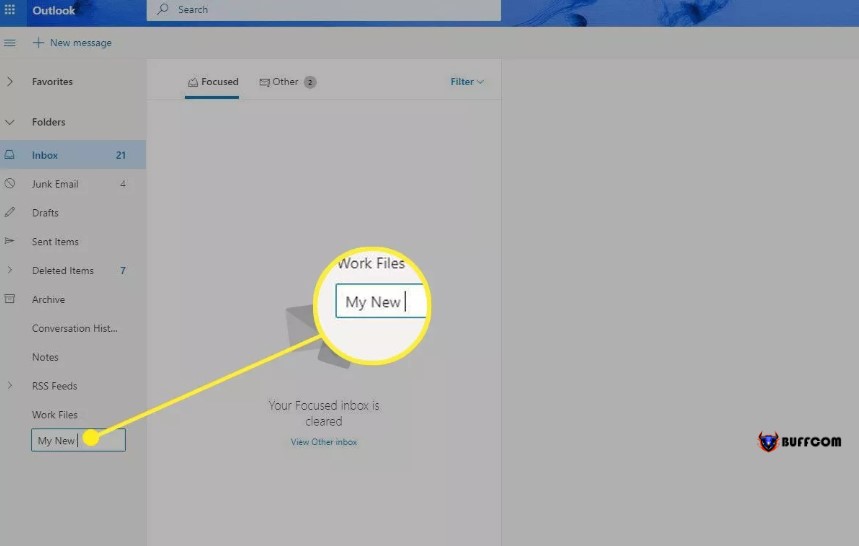
Step 3: Press Enter.
Creating a subfolder in Outlook.com
To create a subfolder for an existing folder in Outlook.com, follow these steps:
Step 1: Right-click on the folder in which you want to create a new subfolder. Be careful not to select the Favorite list.
Step 2: Select Create new subfolder from the menu that appears. A text box will appear under the folder you just right-clicked.
Step 3: Name the new folder.
Step 4: Press Enter to save the new subfolder.
Note: If you want to create a subfolder within a subfolder, repeat the above 4 steps.
That’s it! Buffcom.net has helped you make email organization and management easier by creating folders in Outlook that are incredibly simple to use and surprisingly effective. If you have any questions or feedback, please leave a comment below!


