Number The Pages And Create An Automatic Table Of Contents In Word

Number the pages and create an automatic table of contents for theses, dissertations, or scientific research papers is a crucial task that helps make your Word document look professional, clear, and easier to follow for readers. These two tasks are simple, but not everyone knows how to perform them. Therefore, in this article, Buffcom.net will guide you through the detailed steps on how to insert page numbers and create an automatic table of contents in Word..
Insert Page Numbers Starting from the First Page of the Document
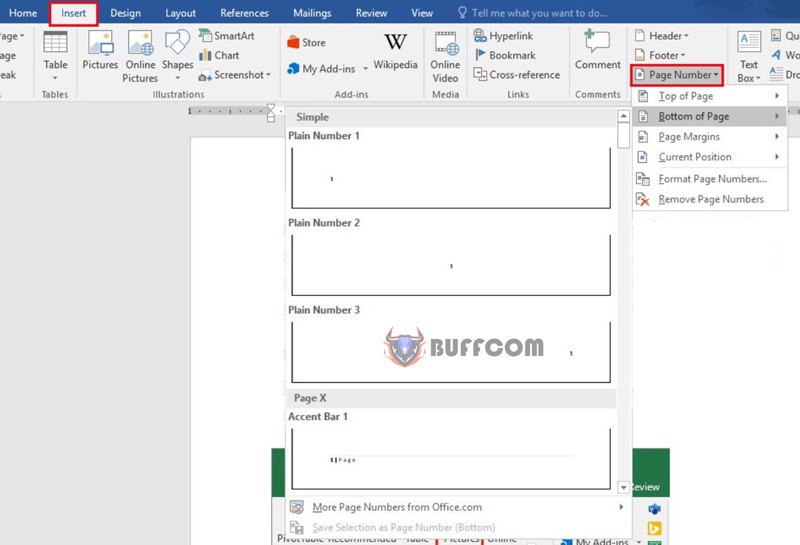
Step 1: First, choose Insert -> Page number.
Step 2: Choose the type of page numbering.
After choosing Page number, the toolbar will display the following options:
Top of Page: Numbers at the top of the page.
Bottom of Page: Numbers at the bottom of the page.
Page Margins: Numbers in the left or right margin.
Current Position: Numbers at the position of the mouse cursor.
Typically, users will choose Bottom of Page to make the presentation more scientific and tidy.
Number the pages and create an automatic table of contents
Step 3: Complete the task.
After completing the page numbering, click “X” to exit.
Create an Automatic Table of Contents in Word
Step 1: Mark the Table of Contents.
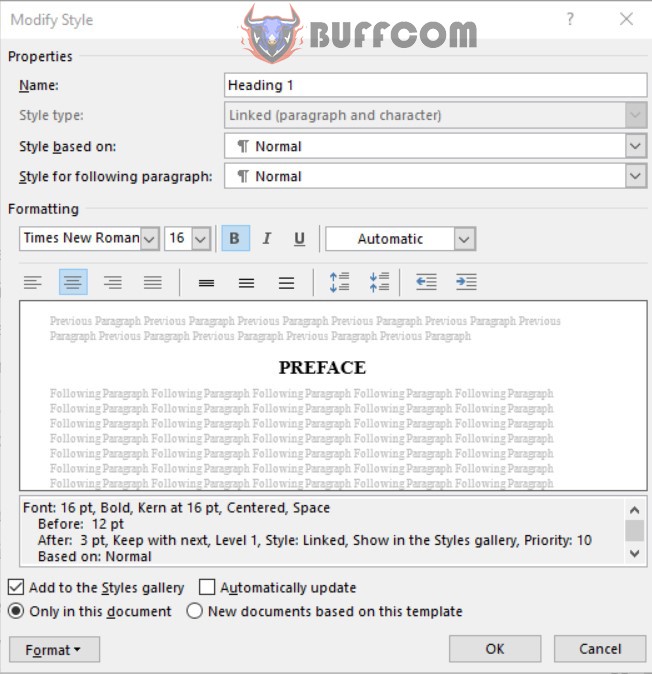
Under the Home tab, in the Styles section, choose the appropriate Heading to apply to the selected content to create a table of contents.
Choose the largest heading (book title, headline…) and set it to Heading 1.

Number the pages and create an automatic table of contents
Similarly, for smaller headings, select the lower headings: Heading 2, Heading 3, etc.
Note: You can customize the font for the heading by right-clicking on the heading -> Modify to edit the font format, font size, indentation, spacing, etc.
Number the pages and create an automatic table of contents
If you want to use this heading format for all future documents, choose New Documents based on this template. Click OK to save the settings.
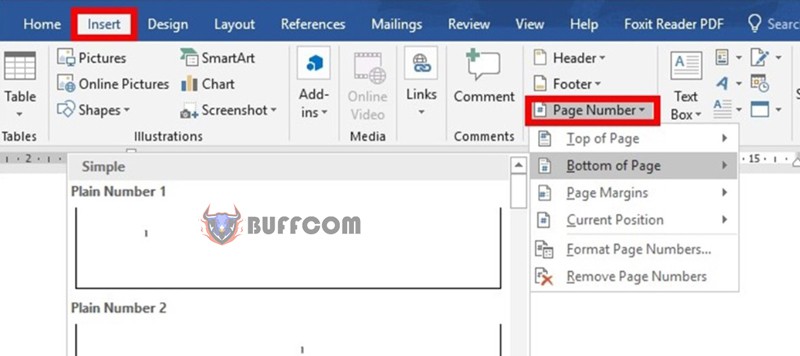
Step 2: Insert Page Numbers.
To easily find pages according to the table of contents, you just need to select Insert -> Page Number -> choose the type of page numbering.
Number the pages and create an automatic table of contents
Step 3: Create an Automatic Table of Contents.
First, you need to break the page to create a location for the table of contents (usually at the beginning or end of the document).
Place the mouse pointer in the location where you want to break the page.
Select the Layout tab -> Breaks -> Next page.
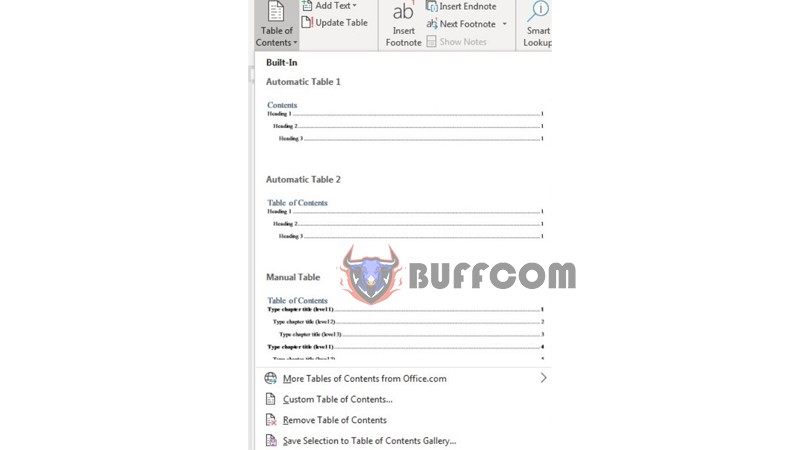
Then, choose References -> Tables of Contents.
You can create a table of contents in 2 ways:
Choose from the available table of contents in Word.
Number the pages and create an automatic table of contents
To create a table of contents in Word, click on “Insert Table of contents…” and a dialog box will appear.
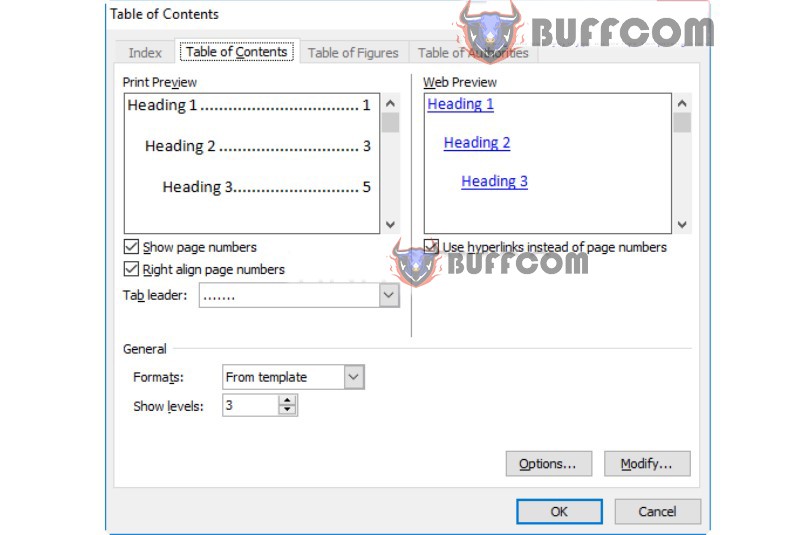 You can choose your editing preferences and then click “OK” to complete the table of contents creation process in Word.
Once the automatic table of contents is created, you can link to the contents of the table of contents by pressing “Ctrl + click” on the table of contents.
So, you have completed your table of contents. Let’s take a look at the final result:

Number the pages and create an automatic table of contents
Conclusion on page numbering and creating automatic table of contents in Word
Thanks to Buffcom.net’s article, you can easily create page numbers and automatic table of contents in Word, right?
Summary of the steps to create an automatic table of contents in Word:
Step 1: Mark the table of contents with headings
Step 2: Number the pages
Step 3: Create the automatic table of contents
Summary of the three steps for numbering pages:
Step 1: Insert page numbers
Step 2: Choose the type of page numbering
Step 3: Complete the process
If you are still unsure about using your software efficiently, follow Buffcom.net to find useful information! You can also purchase Microsoft Office software at Buffcom.net.


