Tips for splitting data in one column into multiple columns in Excel
Tips for splitting data in one column into multiple columns in Excel: Splitting data in one column into multiple columns is quite common among those working in the statistics field. However, not everyone knows how to do it. Follow the steps below to learn how to split data in one column into multiple columns in Excel.
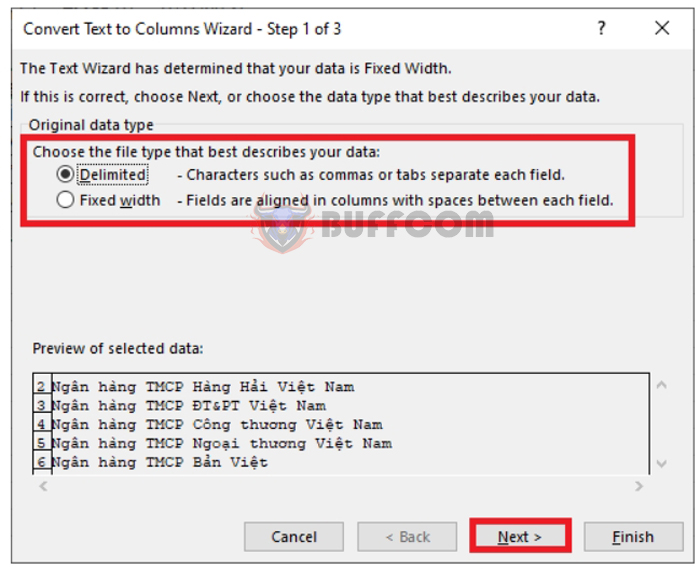
For example, suppose we have a data table that needs to be split into multiple columns, as shown in the figure below. The requirement is to split the bank names into one column per letter.
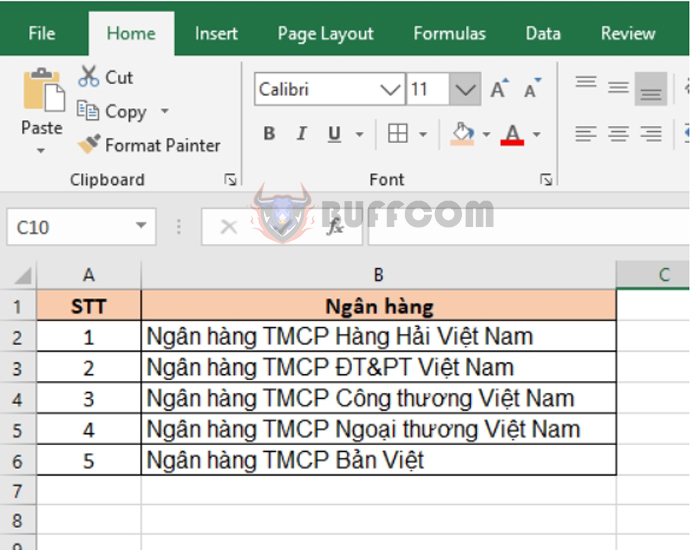 To do this, first select the bank name column. Then select the Data tab on the ribbon. Next, select Text to Columns under the Data Tools section.
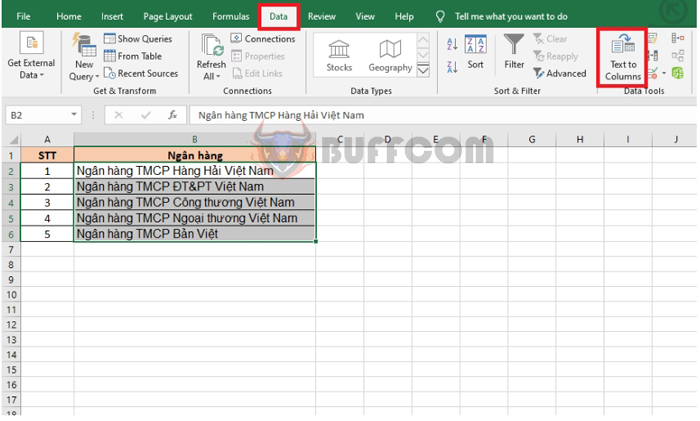 At this point, the Convert Text to Columns Wizard – Step 1 of 3 window appears. Under the Choose the file type that describes your data section, there are two options:
- Delimited: Split the column with separating characters. For example, tab, hyphen, comma, space, etc.
- Fixed width: Split the column according to the width of the data. For example, if there are 2 columns of data, even though each row has a different length, they will be split evenly into 2 equal parts.
In this case, we need to split according to the spaces between the letters, so we choose Delimited. Next, click Next to go to the next step.

Tips for splitting data in one column into multiple columns in Excel
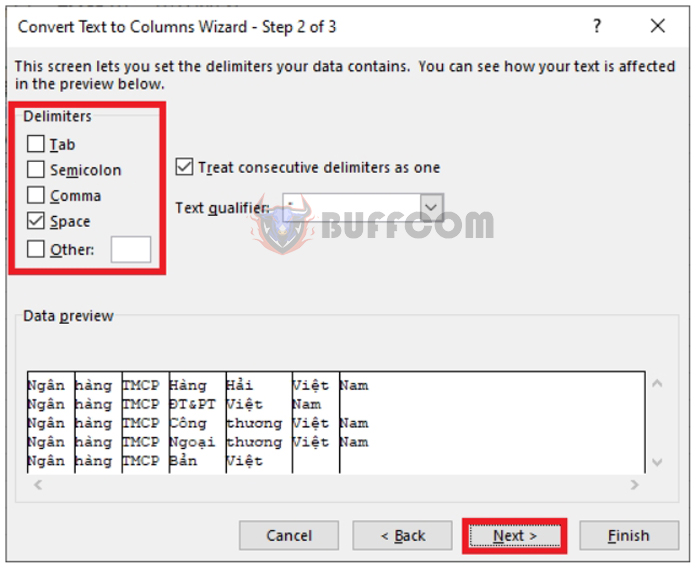
Next, in Step 2, under Delimiters, there are options to choose from:
- Tab
- Semicolon
- Space
- Other
In this case, we choose Space to split the letters according to the space between them. If you need to split according to other requirements, tick those options. Then click Next to move on to the next step.
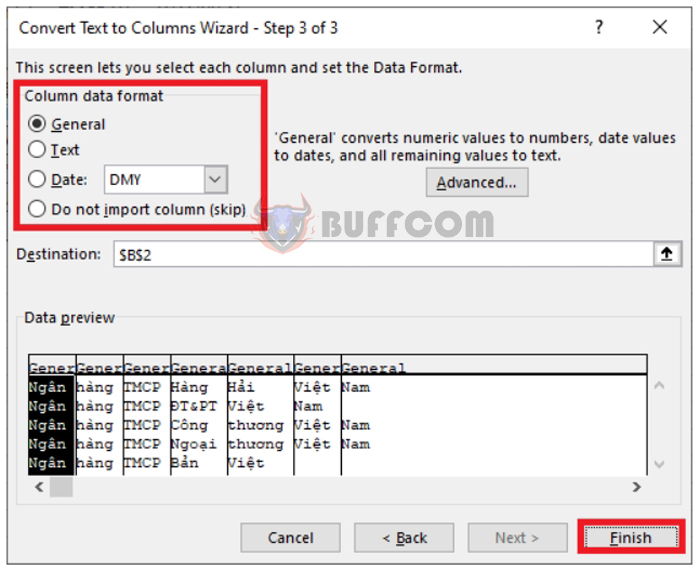
 In Step 3, under Column data format, you can choose the format for the cells that are split. Finally, click Finish to split the data.
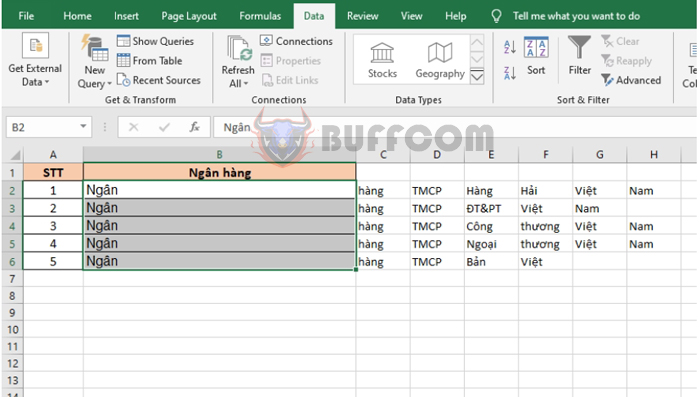
 The result is the data has been split into multiple columns as follows:
Tips for splitting data in one column into multiple columns in Excel
Therefore, the above article has instructed you on how to split data in one column into multiple columns in Excel. Good luck!


