How to Use Themes Tool to Adjust Colors and Fonts in Excel
How to Use Themes Tool to Adjust Colors and Fonts in Excel: Themes is a tool that helps to edit consistent colors and fonts for the entire Excel worksheet. Follow the steps below to learn how to use this tool.
Step 1
To use the Themes tool to edit colors and fonts for the entire worksheet, first, open the Excel file that you want to edit. Then, select the Page Layout tab on the ribbon toolbar. Under the Themes section, you have the following options to edit:
- Colors: Color schemes
- Fonts: Font types
- Effects: Visual effects
How to Use Themes Tool to Adjust Colors and Fonts in Excel
Step 2
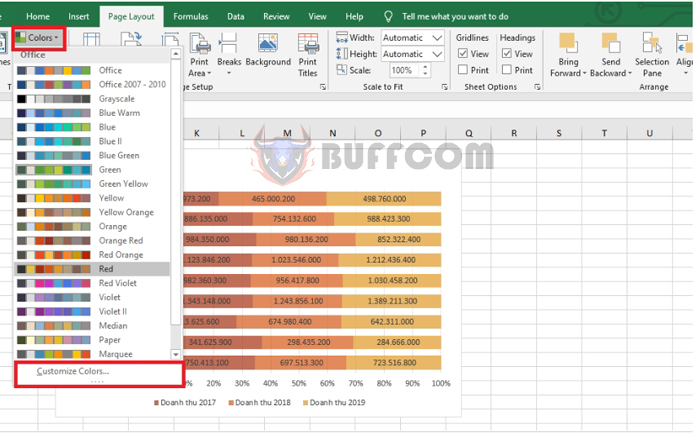
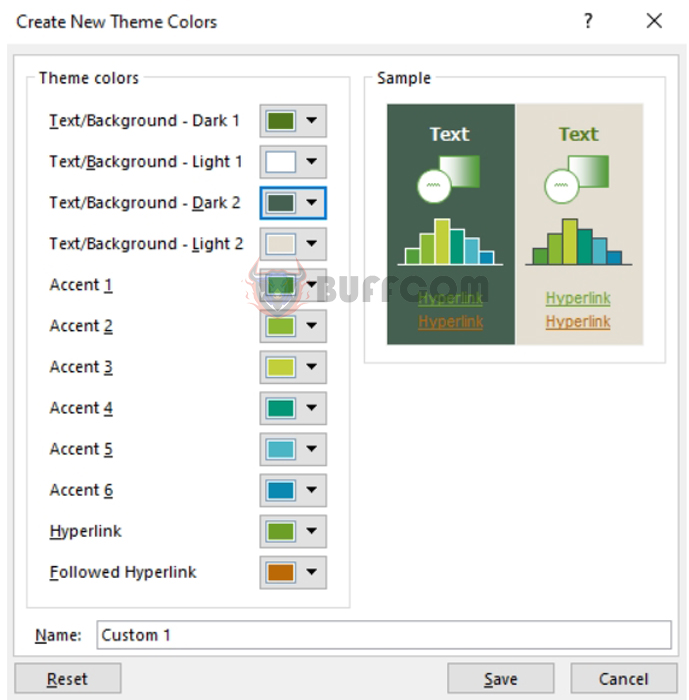
To edit colors, select Colors. A scroll bar will appear with color palettes for you to choose from. If you cannot find the desired color, select Customize Colors to create your own color palette.
How to Use Themes Tool to Adjust Colors and Fonts in Excel
A Create New Theme Colors window will appear, where you can choose colors for each item according to your preferences. Then, click Save to save the custom color palette.
 Step 3
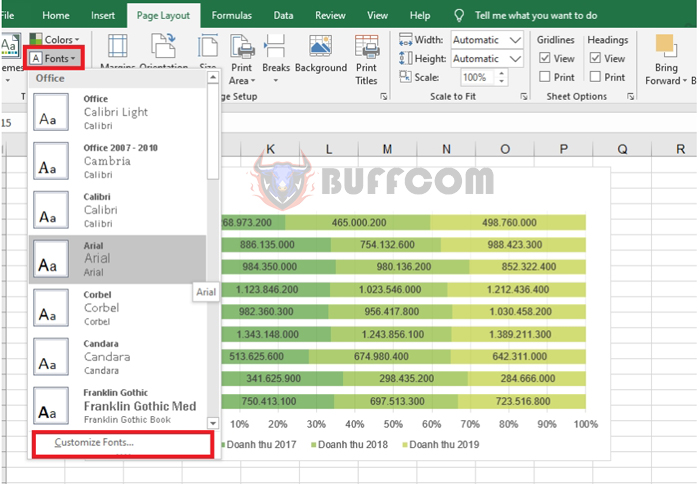
To choose a font for the worksheet, select Fonts. A scroll bar will appear with font options for you to choose from. If you cannot find the desired font, select Customize Fonts to select another font type.
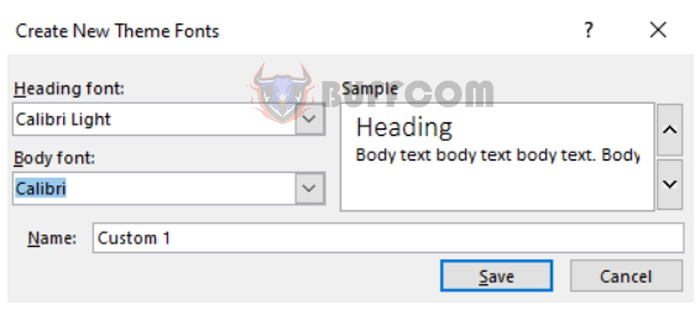
A Create New Theme Fonts window will appear, where you can choose a font for each item according to your preferences. After completing the selections, click Save to save the changes.
Step 4
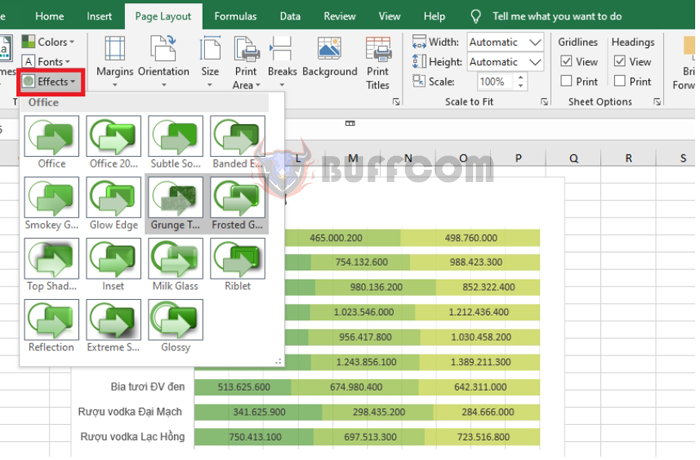
You can create visual effects by selecting Effects under the Themes section. A scroll bar will appear with different effects for you to choose from.

How to Use Themes Tool to Adjust Colors and Fonts in Excel
In conclusion, the above article has provided instructions on how to use the Themes tool in Excel. We hope that this article is helpful for you in your work. Good luck!

