Tips for setting up landscape printing in Excel
Tips for setting up landscape printing in Excel: While working on Excel, there may be times when you need to print spreadsheets that have a wide horizontal orientation. Printing them vertically would make them look bad and not display the entire spreadsheet. In this article, Buffcom.net will guide you on how to set up landscape printing in Excel.
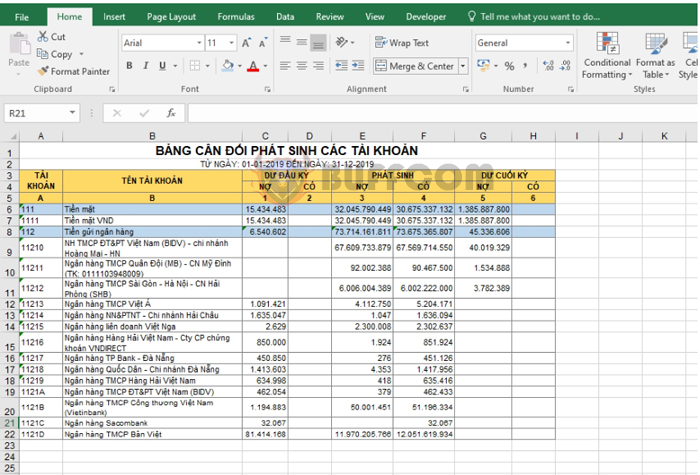
For example, let’s say we need to print the following spreadsheet:
Tips for setting up landscape printing in Excel
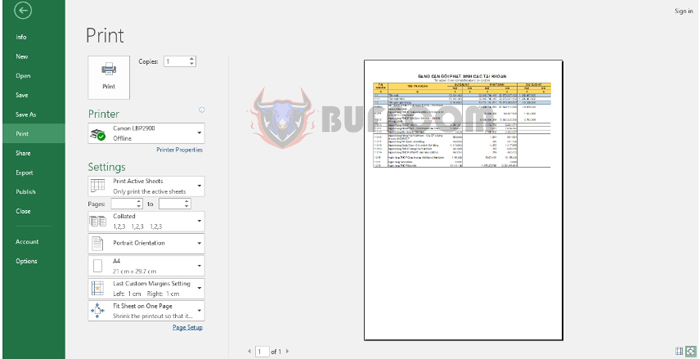
As you can see, the spreadsheet is quite wide. If we print it vertically to fit the page, the spreadsheet will be very small. In this case, we need to rotate the page to landscape orientation to better fit the spreadsheet.
Tips for setting up landscape printing in Excel
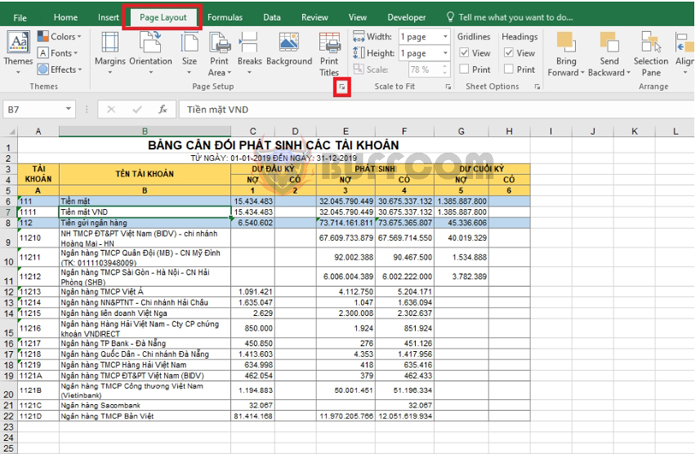
To set up landscape printing, select the Page Layout tab. Then click on the arrow in the bottom right corner of the Page Setup section.
Tips for setting up landscape printing in Excel
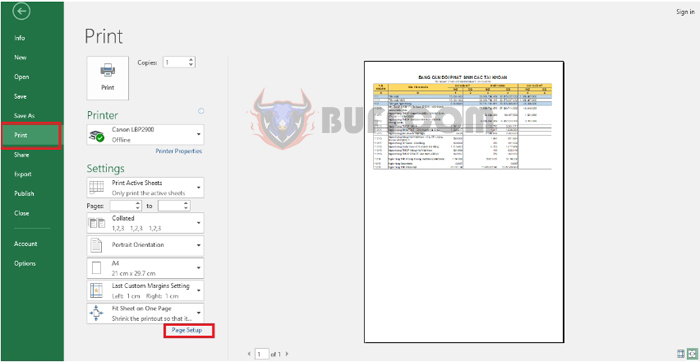
Alternatively, go to the File tab => select Print or use the keyboard shortcut Ctrl + P to open the print settings. Then select Page Setup.
Tips for setting up landscape printing in Excel
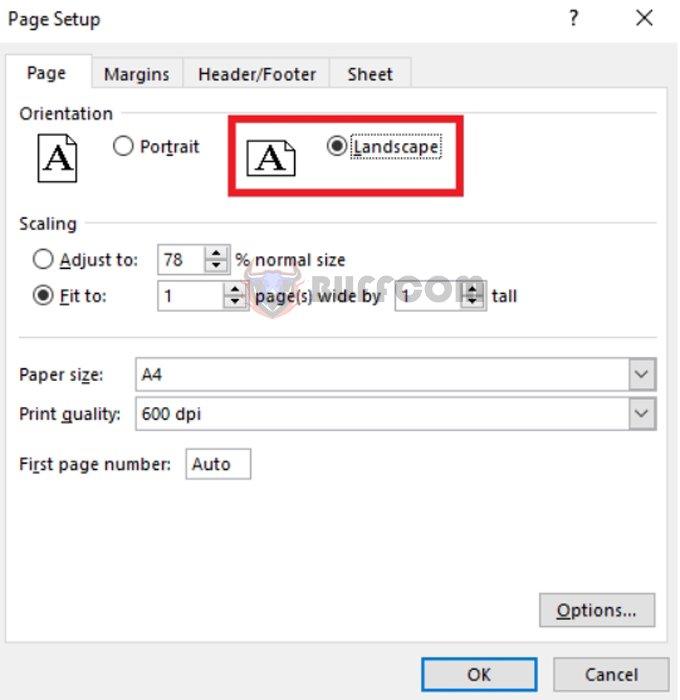
After the Page Setup dialog box appears, select the Page tab and check the Landscape option.

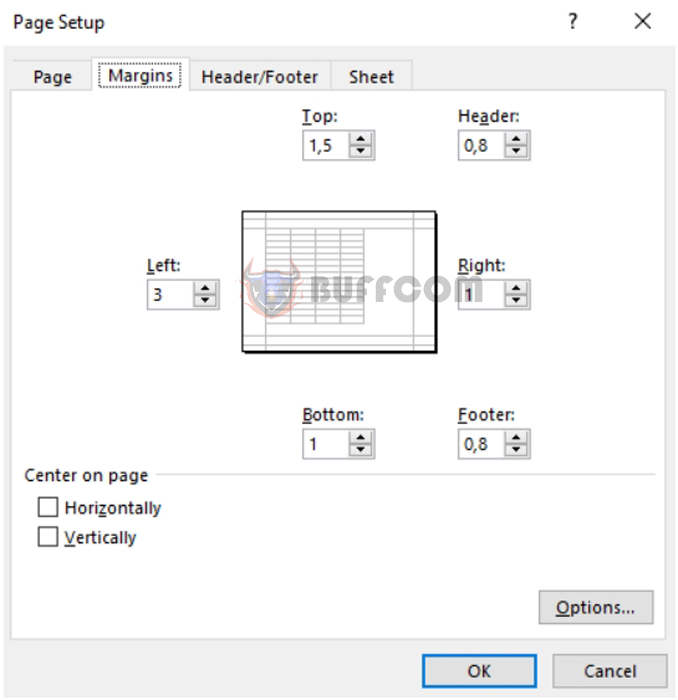
Next, switch to the Margins tab and adjust the page margins:
- Top: top margin
- Bottom: bottom margin
- Left: left margin
- Right: right margin
Then click OK to complete the setup.
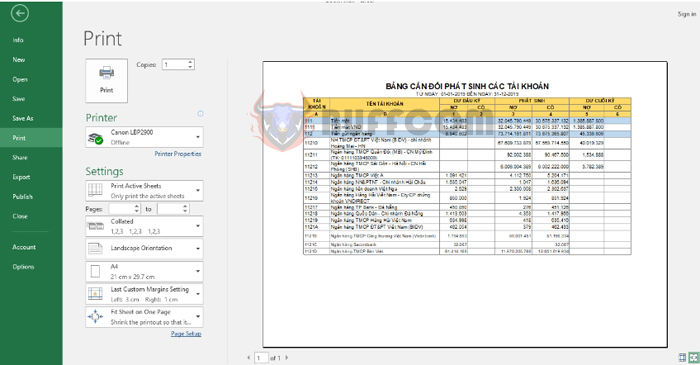
 After setting up landscape printing and adjusting the margins, the result will be a printout that better fits the spreadsheet.
 So, this article has shown you how to rotate the page to landscape orientation in Excel. We hope this article will be useful to you in your work. Good luck!

