How to limit columns in a filtered result set in Microsoft Excel

Filtering records in Microsoft Excel is a simple task, but you may wonder how to limit the number of columns in a filtered result set. The regular Excel filter doesn’t provide an option to limit columns since it filters the source data directly. However, you can achieve this by using Excel’s Advanced Filter feature. I’ll guide you through the process of using Advanced Filter to return a filtered set based on criteria from two columns and show you how to limit the result set to specific columns.
How to limit columns in a filtered result set in Microsoft Excel
Understanding Microsoft Excel’s Advanced Filter:
Excel‘s Advanced Filter feature differs from the regular filter by allowing you to enter criteria at the sheet level and copy the filtered results to another location. It requires three components: source data, criteria, and location.
Using Advanced Filter in Excel:
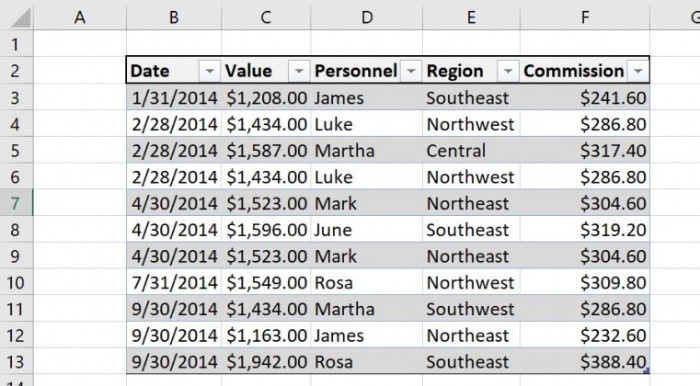
Let’s go through an example using a table named “Commission” (Figure A). Suppose you want to view records for employees whose names start with “M” and have a commission less than $250. Additionally, you want to copy the filtered results to another location instead of modifying the source data.
- Copy the header row to another sheet (Figure B).

- Enter the criteria “M*” in cell D3 for the “Personnel” column.
- Enter the criteria “<=250” in cell F3 for the “Commission” column. Both criteria expressions should be in the same row to create an “and” operation. To perform an “or” operation, place one of the criteria expressions in the next row (Figure B).
Running the Advanced Filter:
- Click on the sheet tab that contains the criteria and location headers (e.g., “Results”). The active sheet must be the location sheet.
- Go to the Data tab and click on “Advanced” in the Sort & Filter group.
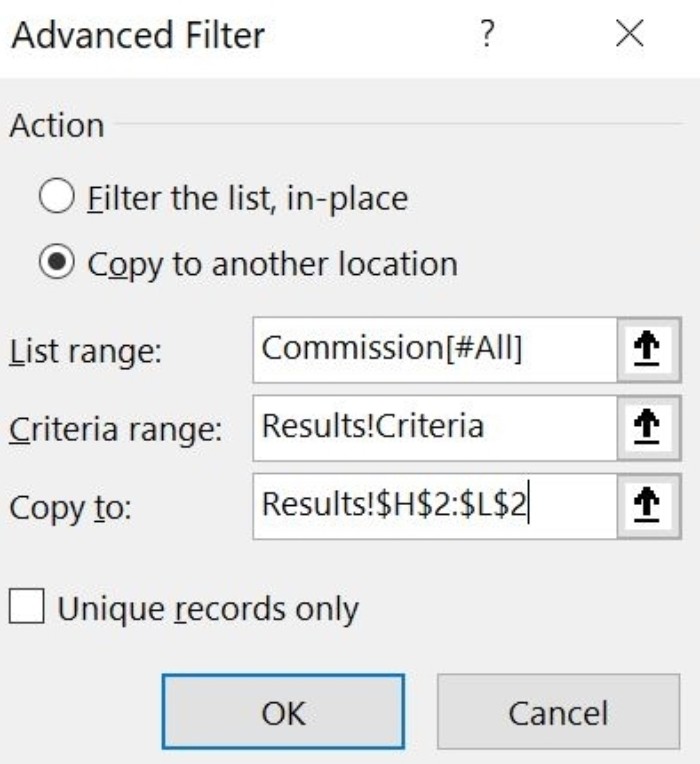
- In the resulting dialog, specify the source data, criteria, and location for the result set (Figure C). Click the arrow next to each control to select the respective range, including the header. To highlight the source data, click the sheet tab first (e.g., “Data”). Include rows 3 and 4 for the criteria settings. The copy-to location range is row 3.

- Click OK.
Note: If there is no filtered result set, it means there are no records that meet the criteria. You can modify the criteria and rerun the filter.
Limiting the Columns using Advanced Filter:
To limit the columns in the filtered result set, change the header cells to match the desired columns (Figure E). Follow these steps:
- Run the Advanced Filter as before, but this time, specify the new header cells (e.g., N2:O2) as the Copy-to range (Figure E).
- The result set will now display only the specified columns (Figure F).
By adjusting the header cells, you can choose which columns to include in the filtered result set. This approach allows you to work with a subset of data that meets your requirements, even though it differs from a traditional filter.


