How to Disable Windows Search?

If you rarely use Windows Search and wish to disable it, you can turn off the Windows Search service. However, keep in mind that without indexing, searching will take longer.
How to Disable Windows Search?
Before disabling Windows Search, consider trying these alternatives:
- Trim down the files and folders being indexed to improve performance.
- Rebuild the search index if you experience crashes or inaccurate searches.
- Note that other applications, such as Microsoft Outlook, rely on Windows Search for internal searching.
If you still want to proceed with disabling Windows Search, follow these steps:
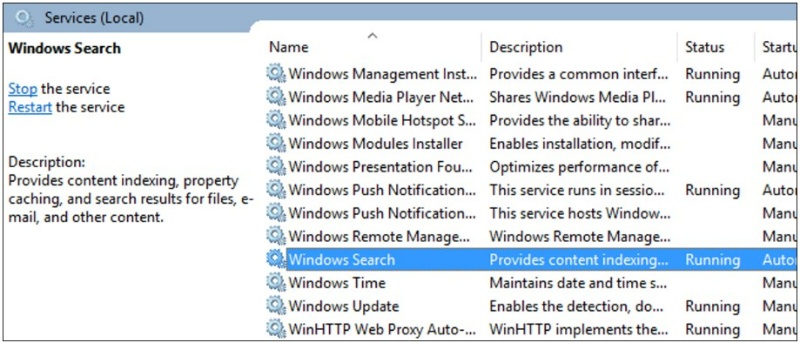
- Click on the Start button and type “services,” then select the corresponding result.

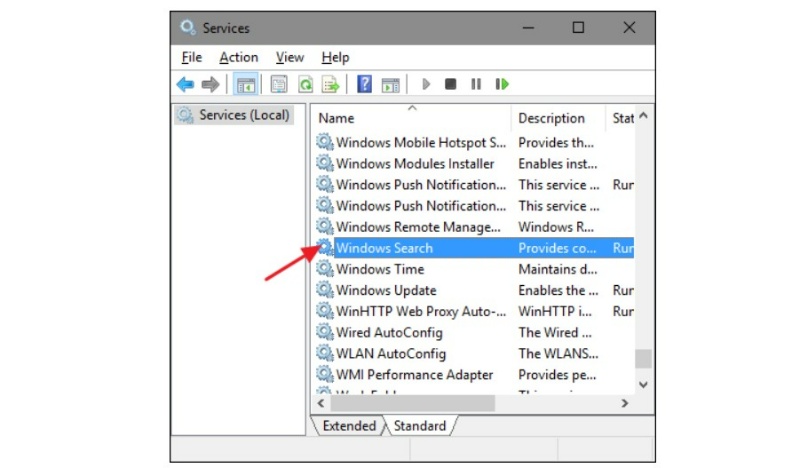
- In the “Services” window, locate and double-click on “Windows Search” in the right-hand side panel.

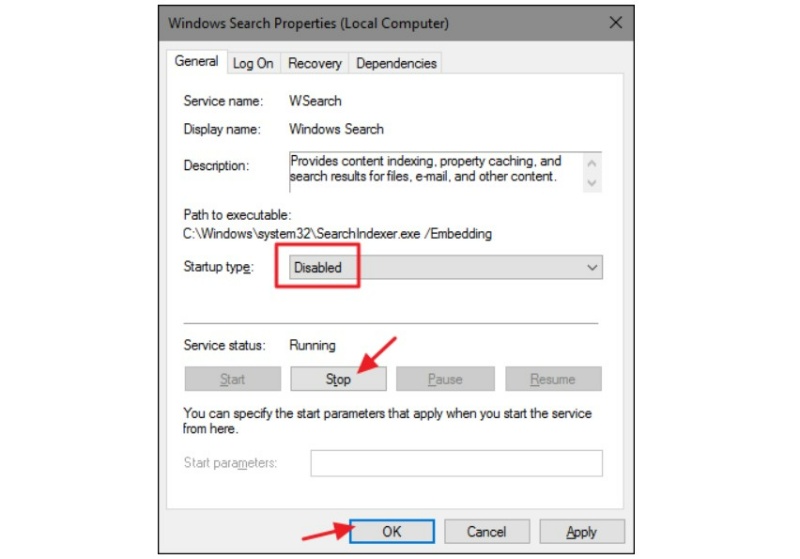
- In the “Startup type” drop-down menu, choose “Disabled” to prevent Windows Search from starting automatically on boot.

- Click the “Stop” button to halt the Windows Search service immediately. Then click “OK” to confirm the changes.

At this point, Windows Search is disabled. Windows may display reminders and offers to fix search-related issues when you perform searches.
To re-enable Windows Search:
- Return to the “Services” window by following the previous steps.
- Change the “Startup type” option back to “Automatic.”
- Click “Start” to restart the Windows Search service.
By following these steps, you can easily disable or re-enable the Windows Search service according to your preferences.


