Saving Time in Outlook with 6 Custom Quick Step Examples ( P2 )
Saving Time in Outlook with 6 Custom Quick Step Examples: By using Quick Steps in Microsoft Outlook, you can click a button to perform one or multiple automated tasks on the selected email. While Outlook provides some convenient Quick Steps, you may want to create your own.
By setting up custom Quick Steps, you can do things like moving emails, creating tasks, and scheduling meetings with just a click.
4. Reply, Reply All, or Forward
Using the Response category, you can compose a new email, forward, reply, reply all, reply with a meeting, or forward as an attachment.
Select the dropdown box Choose an Action and select an option from the Response section.
Quick Steps for Reply
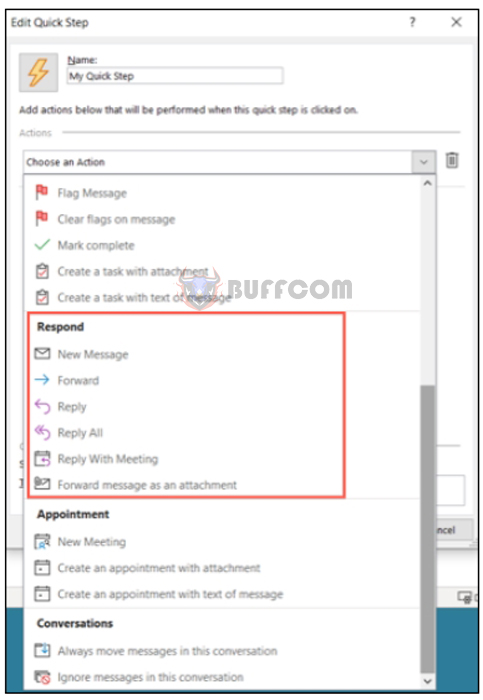 A typical example here is forwarding a message as an attachment. This is perfect if you tend to receive emails that you often forward to others. Select “Forward Message as Attachment” in the Choose an Action dropdown box. To complete the remaining details at that time, you don’t need to select anything else.
Forward email as an attachment action
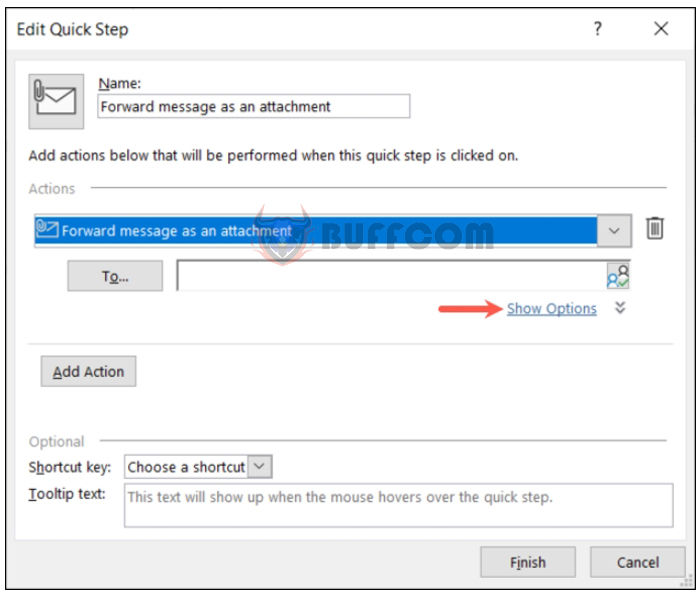
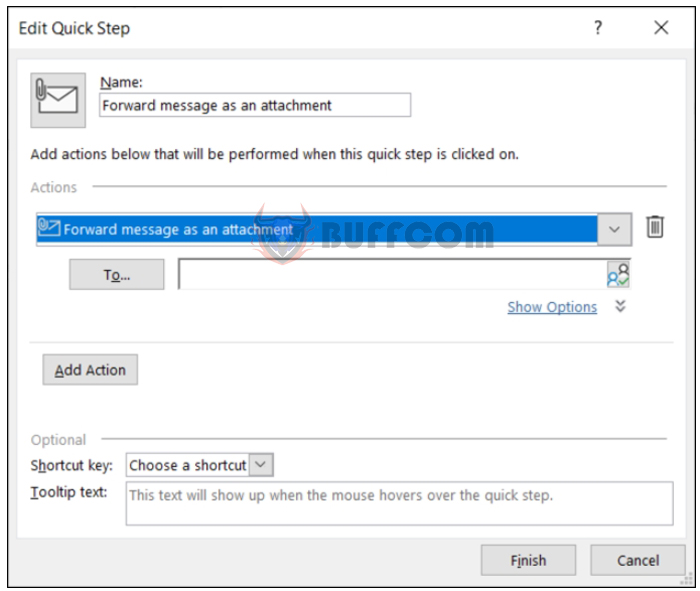 To prefill the details for the email you’re forwarding, select “Show Options.”
Show Options for forwarding a message
 You can then add as many optional details for the email, including recipients, subject, flags, importance, and text. Just remember, these details apply every time you use Quick Steps.
Options for forwarding a message
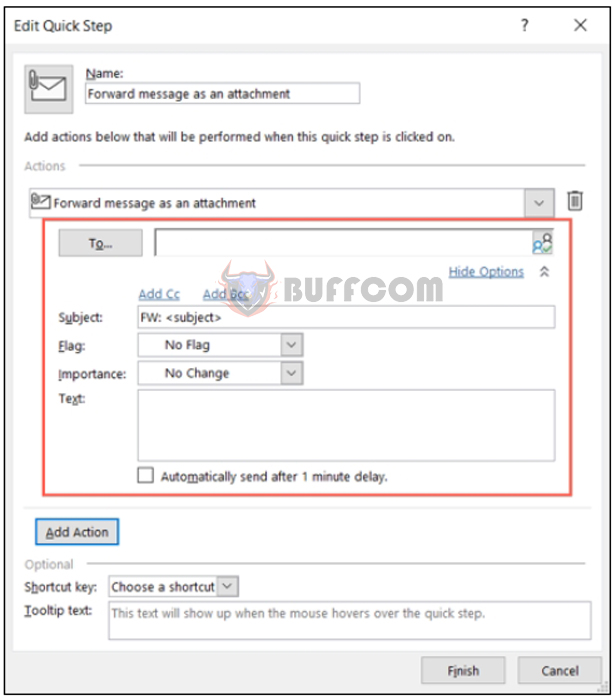 Make sure to name your Quick Step and select any additional options at the bottom. Click “Finish.”
5. Schedule an appointment
The Ideal Categories for reminders of meetings are Appointment. You can set up a new meeting or create an appointment.
A great example is creating a new meeting.
Quick Steps for an appointment
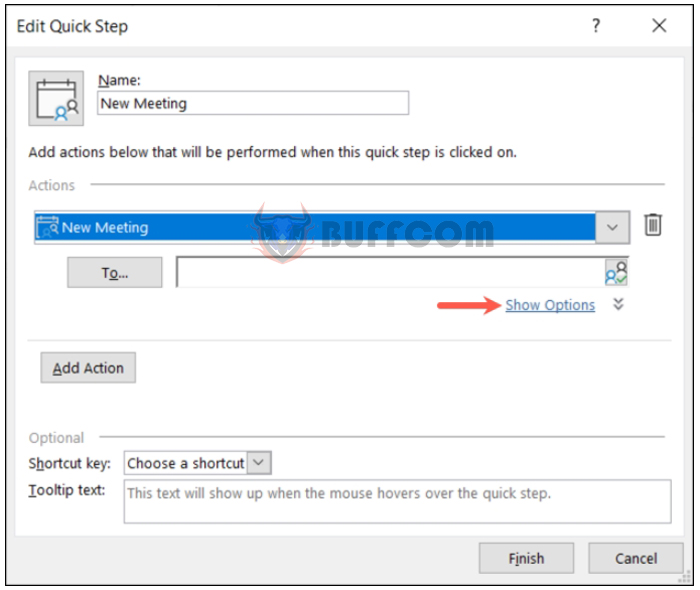
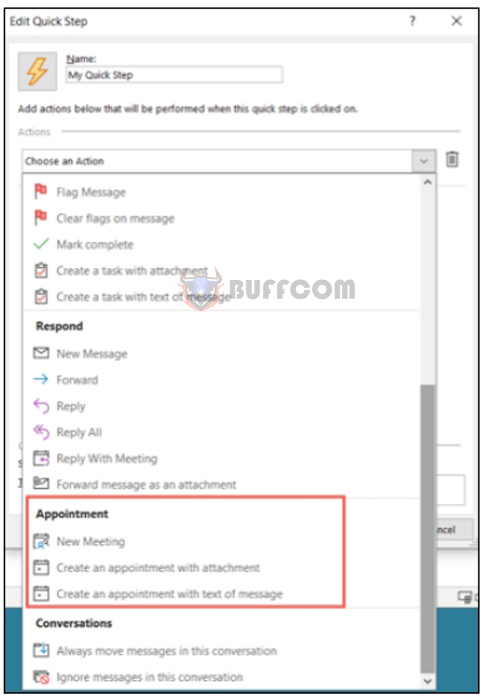 To set up an empty meeting request that you fill in on the spot, simply select “New Meeting” in the Choose an Action dropdown box and don’t select anything else. To prefill the details for the meeting, select “Show Options.”
Show Options for a new meeting
 Similar to the Quick Reply Steps above, you can add optional details such as attendees, subject, location, importance, and text. Once again, these details apply every time you use Quick Steps.
Options for a new meeting
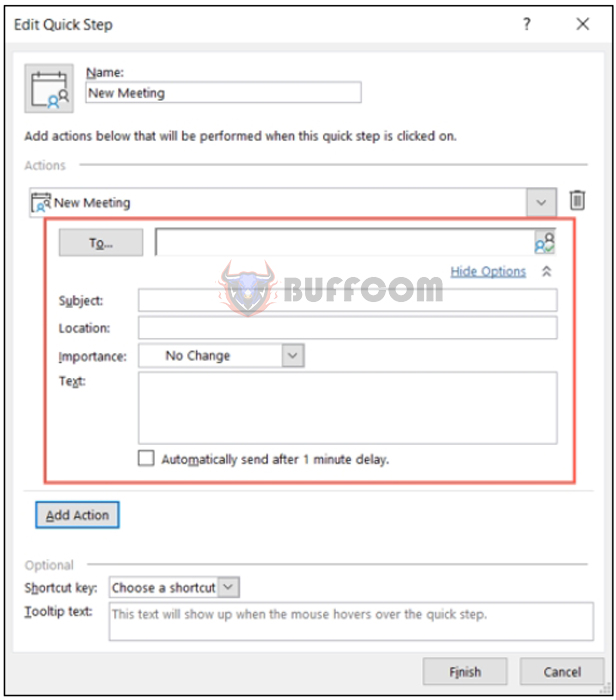 Name your Quick Step and select any additional options at the bottom. Click “Finish.”
6. Manage conversations
The final Quick Step category for custom actions is Conversation. With it, you can always move messages within the conversation or simply skip them.
Select the dropdown box Choose an Action and select an option from the Conversation section.
Quick Steps for conversations
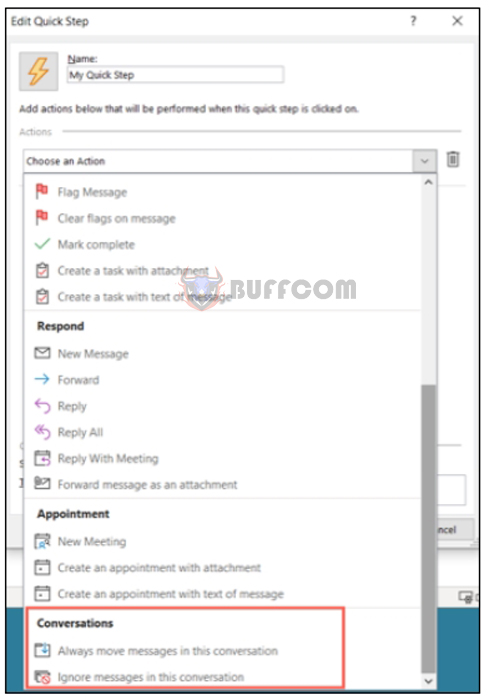 If you choose to move the email, select the destination in the next dropdown box. If you choose to skip the messages, you don’t need to select anything else.
Always move action
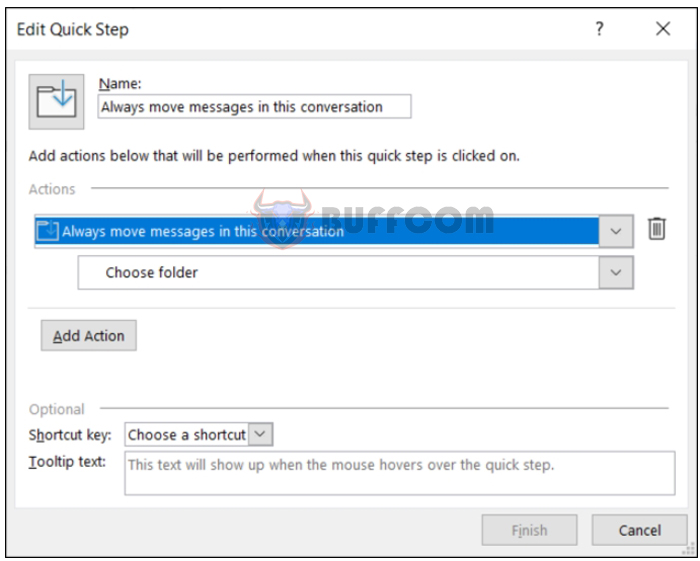 Name your Quick Step, select an option at the bottom if desired, and click “Complete.”
Using your Quick Steps
After creating your custom Quick Step, you can use it just like the predefined options. Select an email and go to the Home tab. Choose an action in the Quick Steps box in the named ribbon section. And that’s all there is to it!
Quick Steps on the Home tab
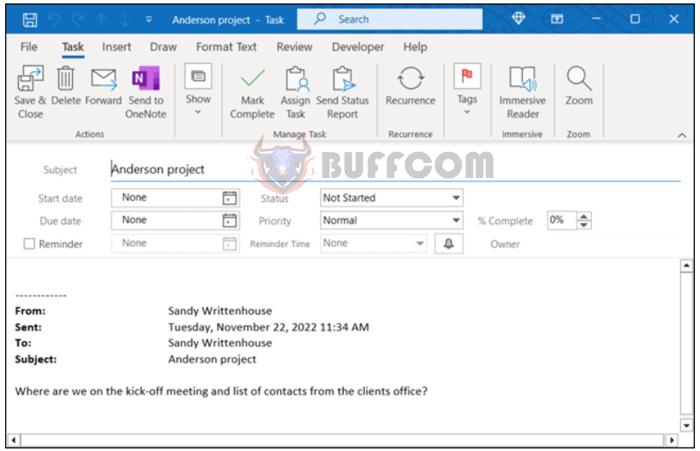
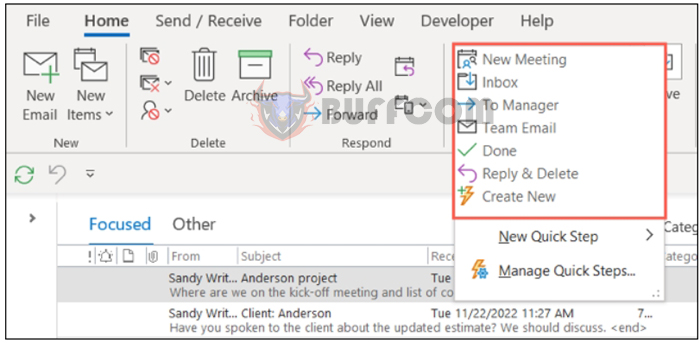 If the Quick Step is set to move, flag, or reply, it will automatically take place when you click the button. If the Quick Step is set to forward, create a task, or schedule an appointment, you will see the corresponding dialog box appear, similar to the Quick Step displayed below for creating a task.
New Task Quick Step
Saving Time in Outlook with 6 Custom Quick Step Examples ( P2 )
While rules in Outlook are great for automating tasks without lifting a finger, you may want to perform an action to execute repetitive tasks on specific emails. This is the perfect time to use Quick Steps.


