Installing and Configuring Google Chrome on Windows 7

Google Chrome is widely embraced for its notable features, encompassing speed, simplicity, and security, making it a preferred choice for many users in their daily tasks. If you haven’t already installed the Google Chrome browser on your computer, you can easily download and install it.
Nevertheless, if you encounter errors preventing its smooth operation on your computer, you also have the option to uninstall it. In this post, we will guide you through the steps of both installing and uninstalling Google Chrome on Windows 7.
Installing Google Chrome on Windows 7
Google Chrome stands out as a user-friendly and robust tool, making it a popular choice for a diverse audience eager to incorporate it into their computing experience. Below, we outline three straightforward steps to download and install Google Chrome on Windows 7.
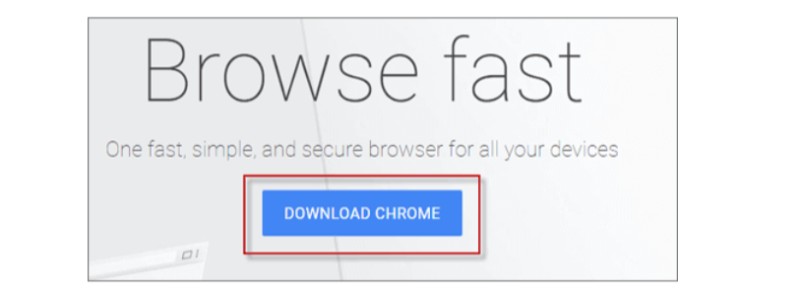
Step 1: Visit the Google Chrome website and click on the “DOWNLOAD CHROME” button.

Google Chrome on Windows 7
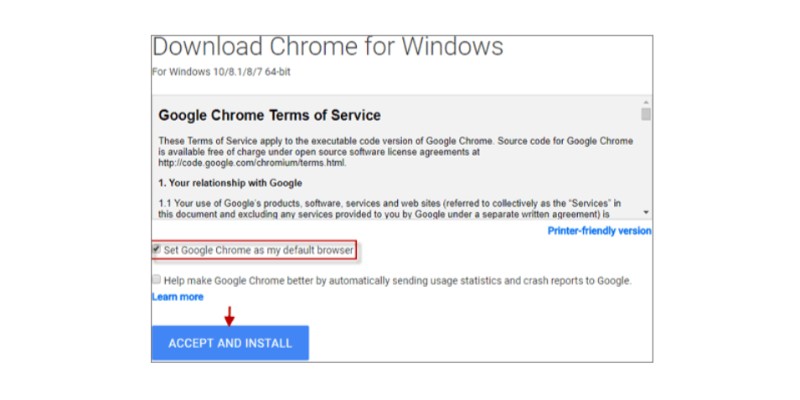
Step 2: In the terms of service window, indicate whether you want Chrome as your default browser. Then, select the “ACCEPT AND INSTALL” button to proceed to the next window.
 Note: If you wish to set it as the default browser, simply check the corresponding option.
Step 3: Save the Chrome browser on your computer by simultaneously pressing the Ctrl+S keys. This action signifies the successful installation of Google Chrome on your computer.


