How to break a page in Word that anyone can do
Are you sure you know everything about Word? Do you want to learn how to break a page in Word quickly and conveniently? Let’s find out through the following helpful article.
In modern life, familiarizing oneself with software tools such as Word, Excel, and Google Sheets is no longer a strange thing for everyone. We not only need to learn the basics of Word and simple Excel functions but also have to learn advanced tricks and hacks in Word, Google Sheets, etc. Today, we will introduce one of the seemingly familiar but not widely-known operations, which is how to break a page in Word.
I. What is breaking a page in Word?
For example, if you need to present a piece of text on several pages, you need to switch to a new page because the paragraph is quite long. This is not considered breaking a page in Word, as you only write a full page and then move to the next page. However, if you need to work on a graduation project with many chapters and many separate ideas, you need to break them into separate pages so that readers can easily follow. This is called breaking a page in Word. So, how to break a page in Word 2010, and what are the benefits? Let’s find out.
II. The benefits of breaking a page in Word
When you break a page in Word 2010, even if you add more content to the previous page, the contents on the subsequent pages will not shift or change to the next line. This is different from breaking a page using the Enter key:
Passive page break using the Enter key: This method creates blank lines to fill the remaining space on the paper. At this point, the contents below will be pushed down to the following pages. The subsequent pages will depend on the blank lines left by the previous page. Basically, the contents of each page will depend on each other.
Active page break in Word using the Ctrl + Enter key: This method breaks the page at the first line of the new page. The contents on each page are independent of each other and do not affect each other. The content on the subsequent page does not depend on the blank space on the previous page.
Therefore, to ensure that breaking a page in Word is always accurate, it is recommended to use the active page break in Word using the Ctrl + Enter key.
Here’s one of the simplest but most effective keyboard shortcuts when working with Word 2010 in particular and Word versions in general.
III. Guide to Page Breaks in Word
Step 1: First, place the cursor where you want to insert a page break.
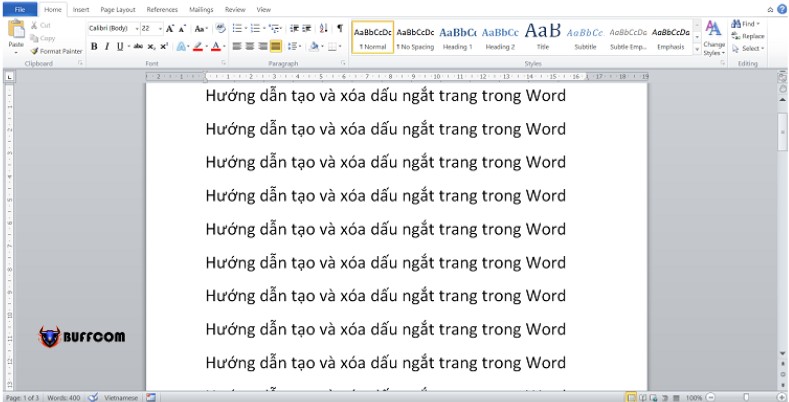
How to insert page breaks in Word
The page break in Word is something that anyone can do.
Guide to Page Breaks in Word
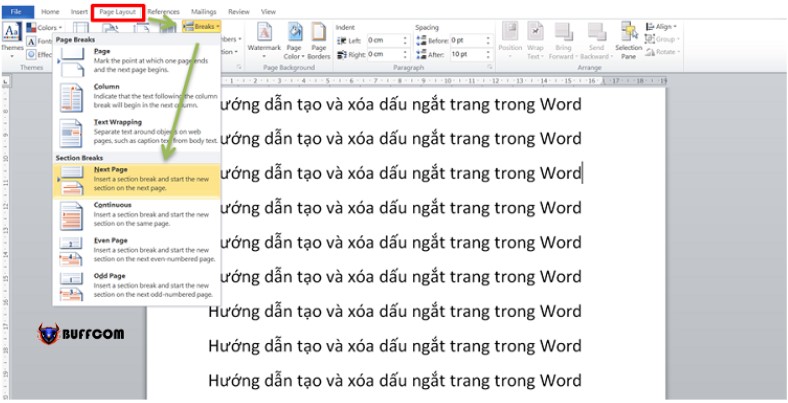
Step 2: Then, go to Layout > Breaks > Section Breaks. A new window will appear with options to perform page breaks in Word, such as:
How to insert page breaks in Word
Next Page: This option allows you to create a new page that includes new sections.
Note: On the new page, you can select landscape or portrait orientation without affecting the pages above.
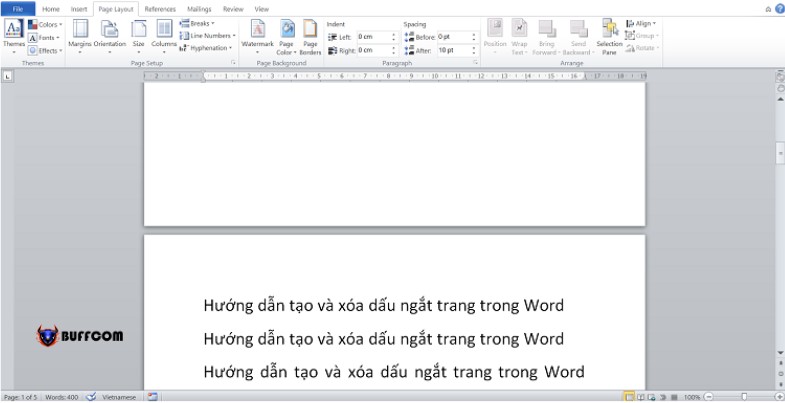
How to insert page breaks in Word
Continuous: This is the command to break the page in Word without creating a new page, which is used for some pages that have many different formats.
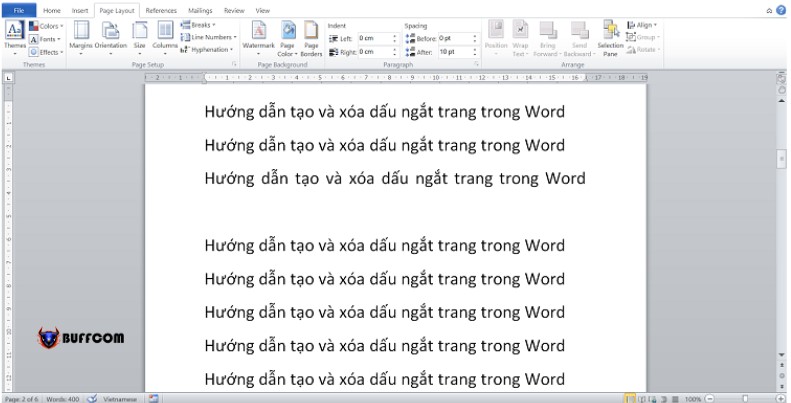
How to insert page breaks in Word
Even Page: This is one of the ways to create a new even page in Word.
Odd Page: This is one of the ways to create a new odd page in Word.
For Word 2003, we only need to select Insert > Breaks to display a new option interface. Then, we proceed with the optional steps for page breaks in Word as we presented above.
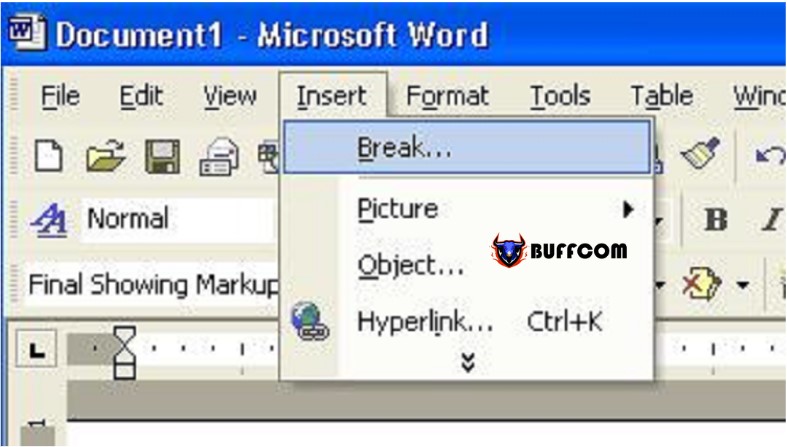
How to insert page breaks in Word
IV. How to Insert a Page Break When Inserting a Table or Image into Content
1. The first way to insert a page break
We will perform a page break in Word with the following steps.
Step 1: First, on the toolbar, select Insert.
Step 2: Then, in the Insert menu, select Page Break to perform an immediate page break in Word.
Note: If you perform these two operations, you need to click the mouse in the exact position you want to break the page to achieve your desired results. Where the mouse cursor is pressed will be moved to the new page after the two operations are completed.
2. The second way to insert a page break
In addition to the above method, you can also learn how to insert a page break in Word with the following second method:
Step 1: Perform the operation on the Insert menu as above.
Step 2: In the Page Layout > Breaks > Page menu.
So it looks like you have successfully implemented the page break methods in Word. These are very simple and easy-to-use ways to insert page breaks in Word. These methods can help you save time by not having to press Enter too many times, and you won’t have to worry about spacing or content being moved to another page when making edits.
V. Some operations related to page breaks in Word Link
1. How to remove page breaks in Word
Method 1: Manually removing page breaks in Word.
By manual method, it means that you will have to perform the steps to remove page breaks in Word using ways that are not very fast and convenient but direct and simple.
Step 1: Select Home > Paragraph > Show/Hide in Word.
Step 2: After completing the above steps, the page break marks will appear in your document. At this point, you just need to remove the page breaks by selecting the page break mark you want to delete and then pressing Delete.
Above are 2 steps to help you remove page breaks in Word manually, which are quite simple. However, many people want to find faster and more time-saving methods. So, please continue to follow our guide to remove page breaks in Word as follows:
Method 2: Remove page breaks in Word
You can use the Find & Replace feature in Word with the following steps:
Step 1: Select Home on the toolbar and then click Replace or press the Ctrl + H key combination to open the Find & Replace dialog box as mentioned above.
Step 2: In the interface of the opened dialog box, select Find what and then click More.
Step 3: Then select Special > Manual Page Break.
After completing the above steps, you will see that the interface of the Find what dialog box will display “^m”. At this point, you can click Replace All to replace them. After completing these steps, page breaks in Word will be completely removed quickly and easily.
Method 3: Adjust automatic page breaks in your Word document.
First, go to Home > Paragraph > Line and Page Break, then select the customization that you want and check it. Each option will have a different definition.
Widow/Orphan Control: sets a command to allow you to put a minimum of 2 lines of a paragraph at the beginning or end of a page.
Keep with next: this command helps you to remove page breaks on the pages that you want to keep close to each other.
Keep line together: this command will prevent the appearance of page breaks in the middle of the paragraph that you are creating.
Page break before: this command allows the user to add a page break before a specific paragraph.
After you have finished selecting the customization that you want, click OK to complete the process. So with just a few basic steps, you can remove automatic page breaks in Word. Remember this process because it can help you in many situations when creating a document.
2. How to remove blank pages in Word 2010
During the document creation process, many people accidentally press a button or press Enter too many times to create page breaks and do not know how to remove them automatically, as we mentioned above. This leads to the creation of many blank pages between pages with content, causing a loss of aesthetics and unprofessional appearance. That’s why we are here to guide you on how to remove blank pages in Word 2010.
2.1. Using Paragraph to delete blank pages
Paragraph can be used in many cases where you want to delete blank pages in Word. Here’s how to delete a blank page in Word using Paragraph:
If the blank page appears at the end of your document.
In this case, you need to place the cursor at the end of the document and then press the Ctrl + Shift + * key combination, or you can select Home > Paragraph to show the hidden characters. Then, select and highlight those characters and press Delete or Backspace to delete the blank page in Word at the end of the document.
If the blank page is caused by a Page Break or Section Break.
You can remove a blank page in Word 2010 by clicking the Paragraph icon in the Home tab. Then, click before the Page Break or Section Break characters and press Delete.
If the blank page appears in a table you created in Word.
You can click the Paragraph icon in the Home tab to show the hidden characters in the text. Then, select and highlight those characters and press Ctrl + D to open the Font dialog box. Select Hidden and click OK to complete the operation. Then, click the Paragraph icon again to complete the operation. The blank pages will disappear and the content behind them will be pushed closer to the table.
2.2. Blank page at the end of the document in Word
In addition to the methods mentioned above, you can also delete a blank page in Word by simply placing the cursor on the blank page and pressing the Delete key.
2.3. Interspersed blank pages among content pages
In this case, you can place the cursor at the beginning of the page you want to delete, and then press Backspace to delete the blank page.
How to remove blank pages in Word 2010
2.4. Another method
If you have tried all the methods above and have not succeeded, you can use this last method to delete a blank page in Word.
Place the cursor at the last position on the page before the blank page. Press and hold the Shift key and click the cursor at the beginning of the blank page you want to delete, and then press Delete to complete the operation.
These are the most common and easy-to-use tricks for deleting blank pages in Word. However, you should be careful, as you could accidentally delete content pages if you make a mistake.
VI. Conclusion
Above, we have introduced to you ways to break pages in Word, as well as ways to delete pages in Word 2010. In the era where everyone uses Word, from students to office workers as today, learning these tricks is never redundant for you. Having these page breaking and deleting skills in Word will be very helpful for you in both work and life.

