Effortless Windows 11 Installation from USB
Learn the step-by-step process of Windows 11 Installation from a USB with this comprehensive guide. While installing Windows 11 via a USB drive is a relatively straightforward task, it’s crucial to be well-prepared and meticulously follow each step. With the right precautions and accurate guidance, you’ll soon be enjoying Microsoft’s new operating system hassle-free.
Requirements for Installing Windows 11
Windows 11, Microsoft’s latest operating system, comes with specific system requirements to ensure an optimal user experience. Here are the details on the necessary requirements to install and run Windows 11 on your device.
Basic Requirements:
- Processor: 1 gigahertz (GHz) or faster with at least two cores on a compatible 64-bit chipset or System on a Chip (SoC).
- RAM: 4GB or more.
- Disk Space: 64GB or more.
- Firmware system: UEFI, compatible with Secure Boot.
- TPM version: Trusted Platform Module (TPM) version 2.0.
- Graphics Card: Compatible with DirectX 12 or later, with WDDM 2.0 driver.
- Display: diagonal greater than 9 inches – HD resolution (720p) or higher – monitor with a pixel density of at least 8 bits per color channel.
- Internet connection: Windows 11 requires an internet connection during the initial device setup phase. A Microsoft account is also required to complete setup.
How to Install Windows 11 on USB Using Media Creation Tool
Installing Windows 11 on a USB stick is an excellent way to perform a clean install, upgrade to Windows 11, or run diagnostics on a computer facing issues. Microsoft’s Media Creation Tool is a free, user-friendly tool designed for this purpose. To use it, ensure you have a USB stick with at least 16GB of free space. Note that all data on the flash drive will be erased during the process. The Windows 11 ISO image will be downloaded by the Media Creation Tool, so a stable internet connection is necessary.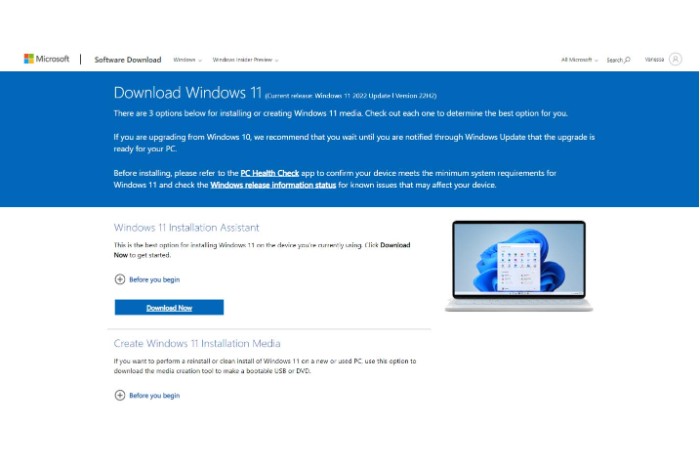
Here’s how to use the Media Creation Tool step by step:
- Visit the official Microsoft site to download the latest version of the Media Creation Tool.
- Click the “Download Tool Now” button and wait for the download to complete.
- Locate the downloaded file (usually found in the “Downloads” folder) and double-click it to launch the application.
- If prompted, grant administrator permissions.
- After accepting the terms of the license agreement, you will be asked if you want to upgrade your current PC or create installation media for another PC. Select “Create installation media (USB, DVD, or ISO file) for another PC.”
- Select the language, edition, and architecture of Windows 11 you want to install. If creating installation media for the current PC, you can simply tick the “Use recommended options for this PC” box.
- Click “Next.”
- When asked “Choose which media to use,” select “USB flash drive.”
- Ensure the USB stick is plugged into your computer and select it from the list.
- Click “Next.”
- At this point, the Media Creation Tool will download the necessary files and prepare the USB stick.
- Once done, you will see a message stating that the USB stick is ready to use.
- After the process is complete, click “Finish” to close the Media Creation Tool.
Now you have a bootable USB stick ready to install Windows 11 on any compatible device. When you want to install Windows 11, boot the target device from the USB stick and follow the on-screen instructions. Always make sure to back up your data before installing or upgrading your operating system.
How to Install Windows 11 from USB on a System with BIOS
While modern computers typically use the UEFI interface instead of the traditional BIOS, some older computers and specific devices still rely on BIOS. Here is a step-by-step guide on installing Windows 11 on a system with BIOS.
Preparation of the Bootable USB Flash Drive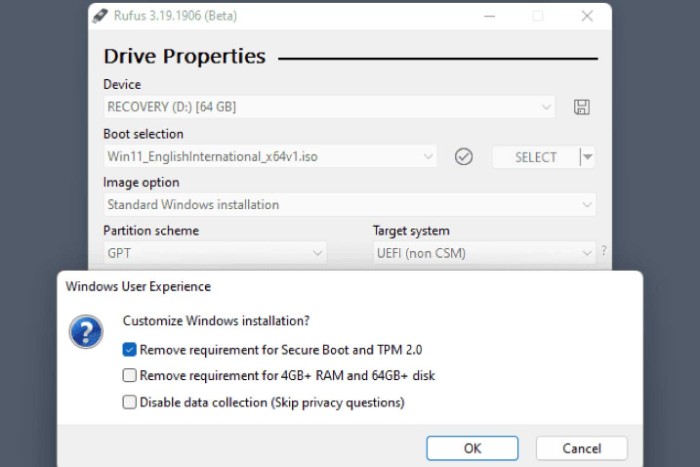
Using Suitable Software:
- Download and install RUFUS.
- Launch RUFUS and select your USB stick.
- In the “Partition scheme” section, choose “MBR” and set the target system as “BIOS or UEFI-CSM.”
- Load the Windows 11 ISO image using the “Select” option.
- Click “Start” to create the bootable USB stick.
Install from BIOS
BIOS access:
- Restart your computer.
- During the boot process, repeatedly press the appropriate key (usually F2, F10, F12, or DEL) to enter the BIOS.
Configuring Boot Options:
- In the BIOS, navigate to the “Boot” or “Startup” section.
- Ensure “USB Drive” or “USB Device” is set as the first boot option.
- Save changes and exit the BIOS.
Startup and Installation:
- With the USB stick inserted, the computer should boot from it.
- Follow the onscreen instructions to proceed with installing Windows 11.
- During the installation, you may receive warnings about the Windows 11 system requirements. If you have prepared your USB to bypass these requirements (such as TPM or Secure Boot), proceed with the installation.
How to Windows 11 Installation from USB Without Requirements
Windows 11 introduced new hardware requirements, but this guide shows how to bypass system checks and install Windows 11 from USB even on unsupported hardware. Note that ignoring prerequisites could lead to compatibility problems or inferior performance. Proceed at your own risk, and remember to back up your data.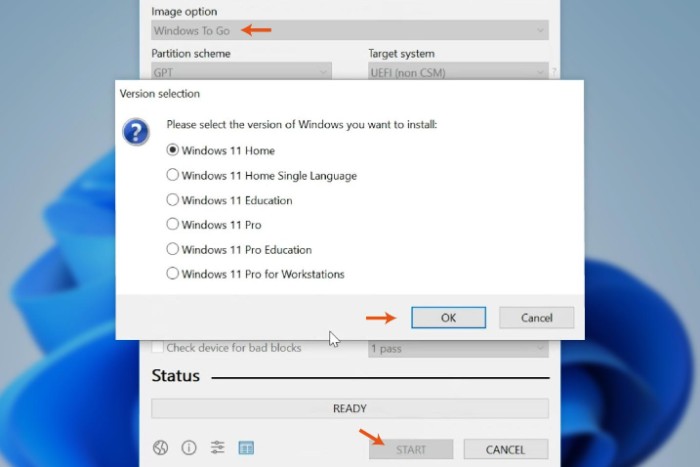
Instructions:
- Use a tool like RUFUS to make the Windows 11 ISO image bootable on the USB stick.
- Browse through the USB stick’s folder structure to “Sources.”
- Look for a file called install.wim or install.esd. If you find install.esd, rename it to install.wim.
- Use a tool like 7-Zip to open install.wim. Inside, go to 1\Windows\Panther.
- Find the appraiserres.dll file and rename it (e.g., to appraiserres-backup.dll) to prevent hardware compatibility checks during installation.
- Restart your computer and boot from the USB stick.
- Follow the standard Windows installation procedure, selecting “Custom” when asked for the type of installation.
- Choose the partition for Windows 11 Installation and proceed.
- Once the installation is complete, set up Windows 11 as usual.
How to Windows 11 Installation from USB Without Meeting CPU Requirements
Windows 11 Installation has specific CPU requirements, but some users with older or unsupported CPUs may want to try the new OS. Here’s how to set up Windows 11 without having a compatible CPU, keeping in mind that it may result in poor performance and compatibility issues.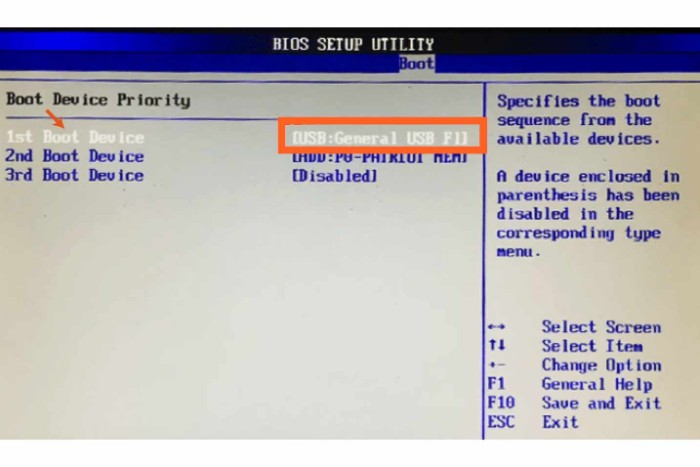
Bypassing CPU Control:
- Prepare the USB stick using one of the procedures outlined in this article.
- On the USB stick, navigate to the Sources folder.
- Locate the appraiserres.dll file and rename it (e.g., appraiserres.old) to disable hardware checks during installation.
- Download a modified version of appraiserres.dll with CPU checking turned off from dedicated community forums.
- Copy the modified appraiserres.dll file to the Sources folder on your USB stick.
Startup and Installation:
- Insert the USB stick into the computer where you want to Windows 11 Installation and restart.
- During the reboot, select the option to boot from the USB stick (usually by pressing a key like F12 or ESC).
- Once booted from the USB, proceed with the installation process as usual, ignoring the CPU compatibility warnings.
Post-Installation Configuration:
- After installation, check for and install all available updates, especially driver-related updates, to ensure maximum compatibility and performance.
- Consider disabling automatic Windows updates, as future updates may reintroduce compatibility checks or cause issues with unsupported CPUs.
How to Windows 11 Installation from USB Without Secure Boot Requirements:
Changing UEFI/BIOS Settings: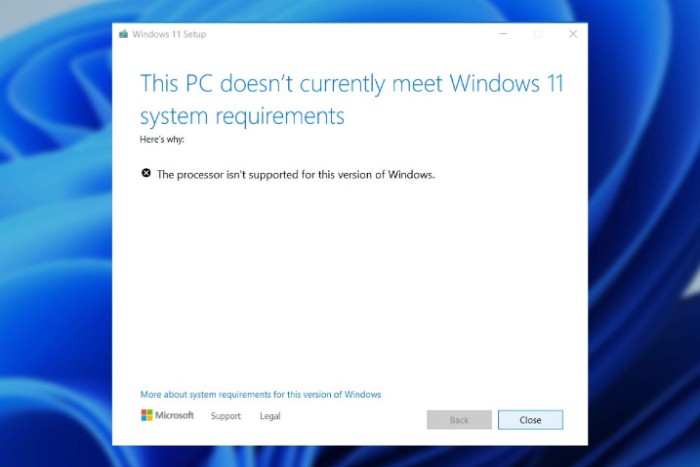
- Turn on the computer and, during the boot phase, press the specific key (usually F2, F10, DEL, or ESC) to access the UEFI/BIOS settings.
- Navigate to startup or security settings.
- Disable the “Secure Boot” option.
- Ensure the boot mode is set to “UEFI” and not “Legacy” or “CSM.”
- Save changes and exit BIOS.
Windows 11 Installation:
- With the USB stick inserted, restart your system.
- During the reboot, select the option to boot from the USB stick.
- Follow onscreen instructions to Windows 11 Installation, ignoring any Secure Boot warnings.
Post-Installation:
- After Windows 11 installation, install antivirus software and keep your system updated to mitigate potential vulnerabilities caused by disabling Secure Boot.
How to Windows 11 Installation from USB Without TPM: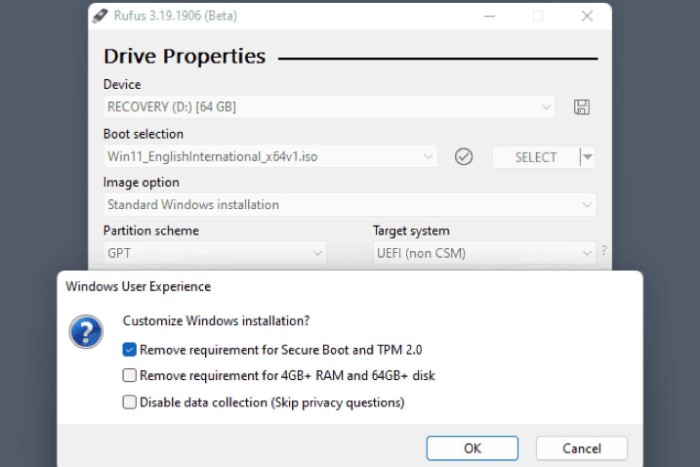
Prepare Bootable USB Device and Edit Setup Files:
- Plug the USB stick into your computer.
- Navigate to the Sources directory.
- Look for the file named install.wim or install.esd.
- Use a tool like “DISM” to mount the install.wim or install.esd file.
- Find the appraiser.dll file, rename it (e.g., appraiser.bak) to disable TPM checks.
- Unmount the image and copy it back to the USB stick.
Windows 11 Installation:
- Plug the USB stick into the target computer.
- Restart and boot from the USB (usually by pressing F12, F10, or ESC).
- Begin the installation process, bypassing TPM-related messages.
Configurations After Windows 11 Installation:
- Proceed with the initial setup of Windows 11 Installation, noting that some TPM-dependent features may be limited or work differently.
Conclusions on Windows 11 Installation from USB:
Windows 11 Installation via USB is a straightforward process, thanks to tools like Rufus and Media Creation Tool. This method provides flexibility for a portable OS or installation on different devices without the need for CD/DVD.

