How To Change DNS On Windows 10
DNS is a widely used network protocol on computers nowadays. Those who have knowledge about computers or work extensively on them are likely familiar with DNS. DNS is important on a computer because it can improve network speed and allow access to blocked websites. However, different versions of Windows have different methods for changing DNS settings. Today, Buffcom.net will guide you on how to change DNS on Windows 10.
How to Change DNS on Windows 10
Step 1: On the Taskbar of your computer, locate the Network icon and click on it to display the available options. Then, select “Network & Internet settings” to proceed.
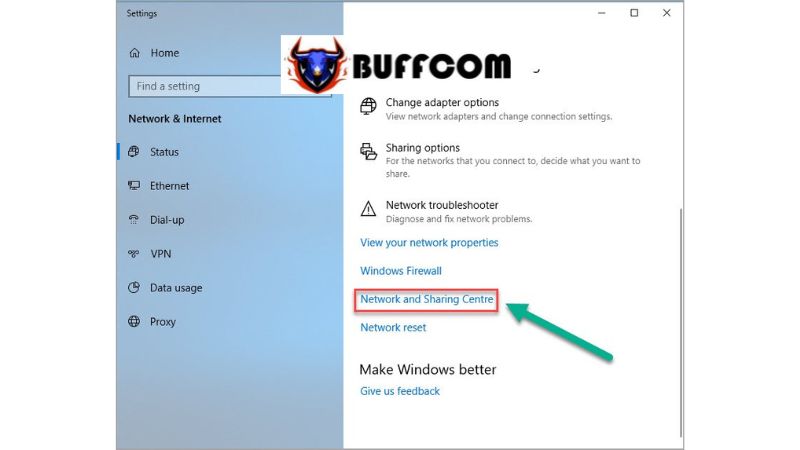
 Step 2: In the opened Settings window, choose “Network and Sharing Centre” to continue.
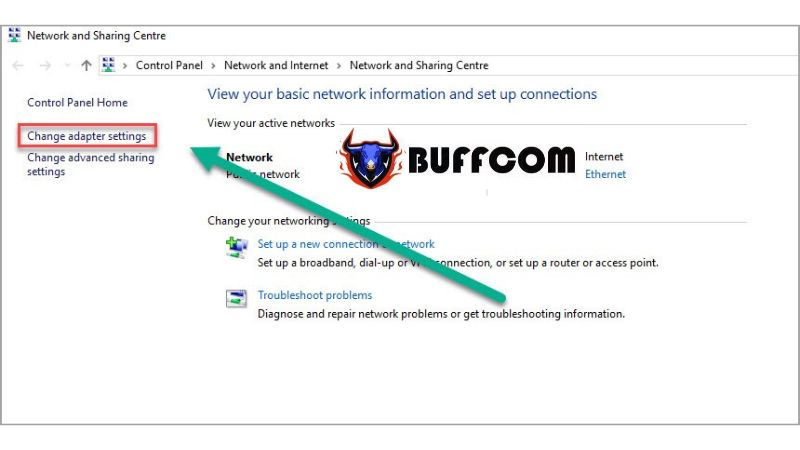
 Step 3: Next, select “Change adapter settings.”
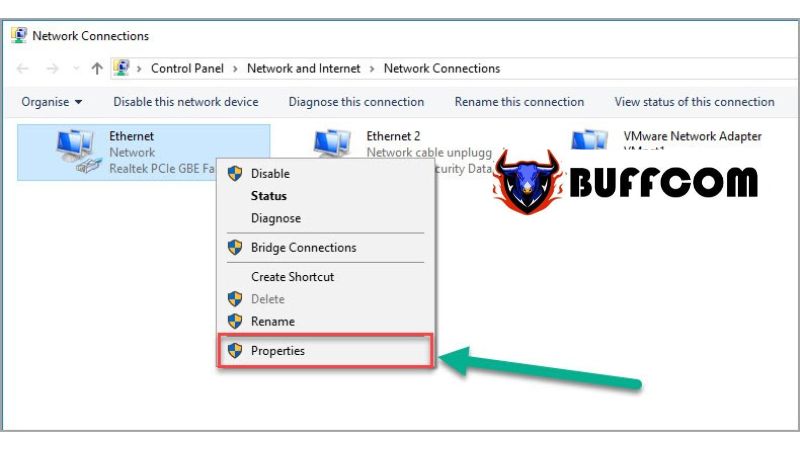
 Step 4: When the Network Connections window appears, right-click on “Ethernet” and choose “Properties.”
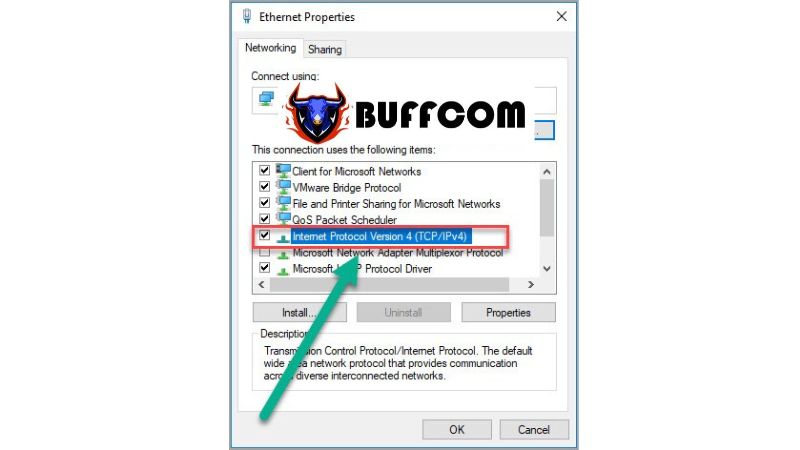
 Step 5: In the Ethernet Properties window, locate the “Internet Protocol Version 4 (TCP/IPv4)” and double-click on it.
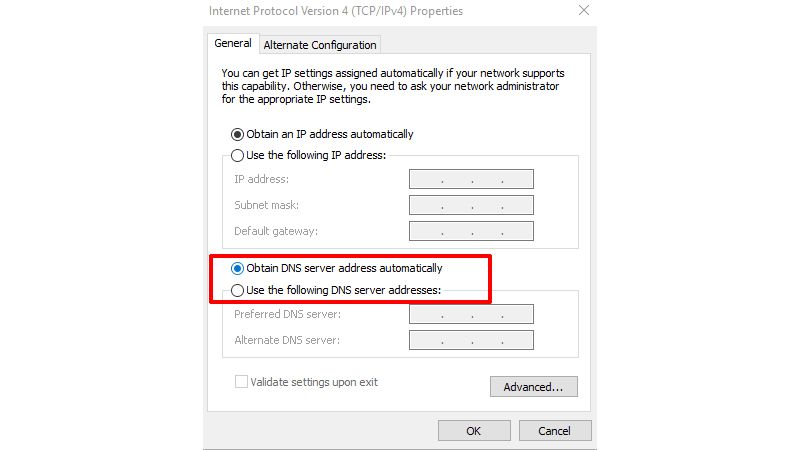
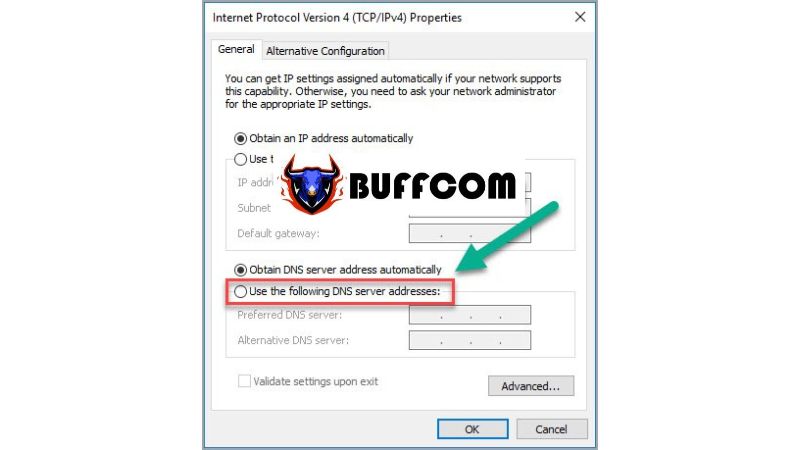
 Step 6: Once the Internet Protocol Version 4 (TCP/IPv4) window opens, you can choose to configure DNS settings. If your DNS settings are set to automatic, switch to the “Use the following DNS server addresses” mode.
 Step 7: Then, enter the desired DNS server addresses and click “OK” to save the changes.
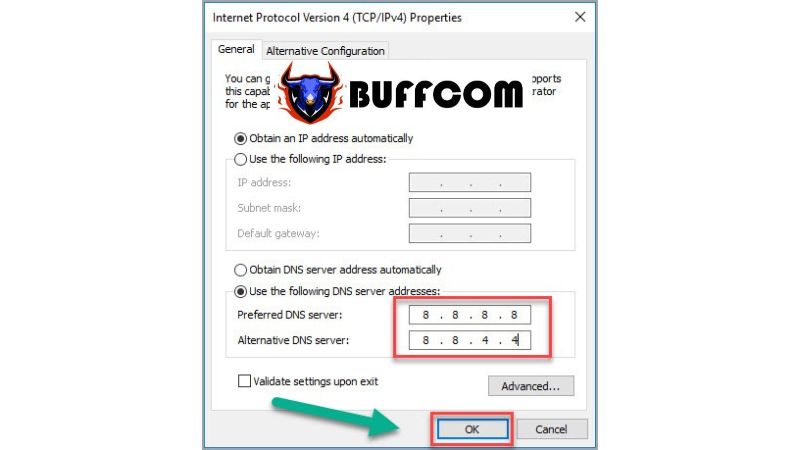 Enter DNS server addresses
Here are some DNS server addresses for reference:
Google DNS:
Preferred DNS server: 8.8.8.8
Alternate DNS server: 8.8.4.4
Norton ConnectSafe:
Preferred DNS server: 199.85.126.10
Alternate DNS server: 199.85.127.10
FPT DNS:
Preferred DNS server: 210.245.24.20
Alternate DNS server: 210.245.24.22
Singapore DNS:
Preferred DNS server: 165.21.83.88
Alternate DNS server: 165.21.100.88
Thus, Buffcom.net has provided you with the quickest and most accurate guide on how to change DNS on Windows 10. If you are interested in genuine Windows keys, please contact Buffcom.net for further assistance!


