How to Do Web Forms in Visual Studio 2022
Microsoft has made it clear that while Blazor and .NET 6 are the recommended technologies for modern web development, Web Forms from the old .NET Framework isn’t going away in Visual Studio 2022. Despite not being actively invested in, Web Forms will continue to be supported, ensuring that developers can still work with their existing projects in Visual Studio.
In this article, I’ll guide you through how to set up and use Web Forms in Visual Studio 2022, even as Microsoft promotes Blazor as the future of web development. Whether you’re maintaining legacy applications or prefer the Web Forms approach, you’ll find all the necessary steps to get started.
Even though Microsoft is focusing on newer technologies like Blazor for .NET 6, setting up Web Forms in Visual Studio 2022 is straightforward. Here’s how you can do it:
-
Install the Necessary Workloads:
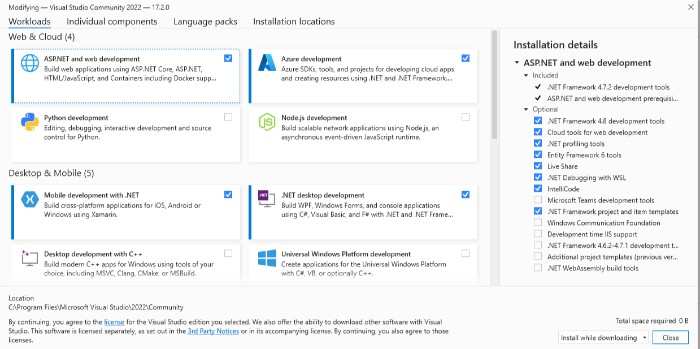
- Start by ensuring you have the required workloads installed. Open Visual Studio Installer and select the “ASP.NET and web development” workload. This will install everything you need to create and manage Web Forms applications.
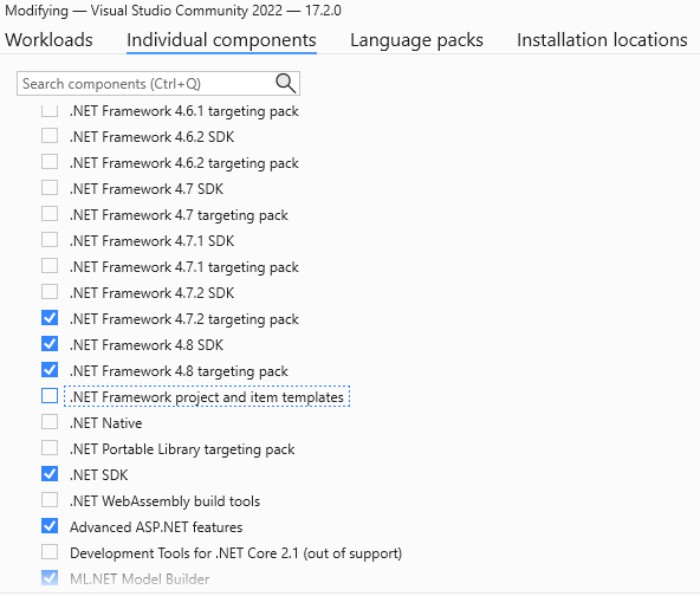
- If you don’t see the option to create an ASP.NET Web Forms project after installing the workload, you might need to add some additional components manually. To do this, go to the “Individual components” tab next to “Workloads” in the Visual Studio Installer, and select “.NET Framework project and item templates.”
-
Creating a New Web Forms Project:
- Once you have the necessary components installed, you can create a new project. In Visual Studio, go to “File” > “New” > “Project.”
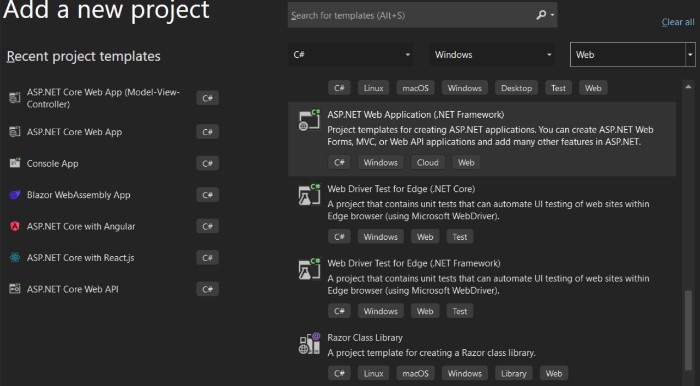
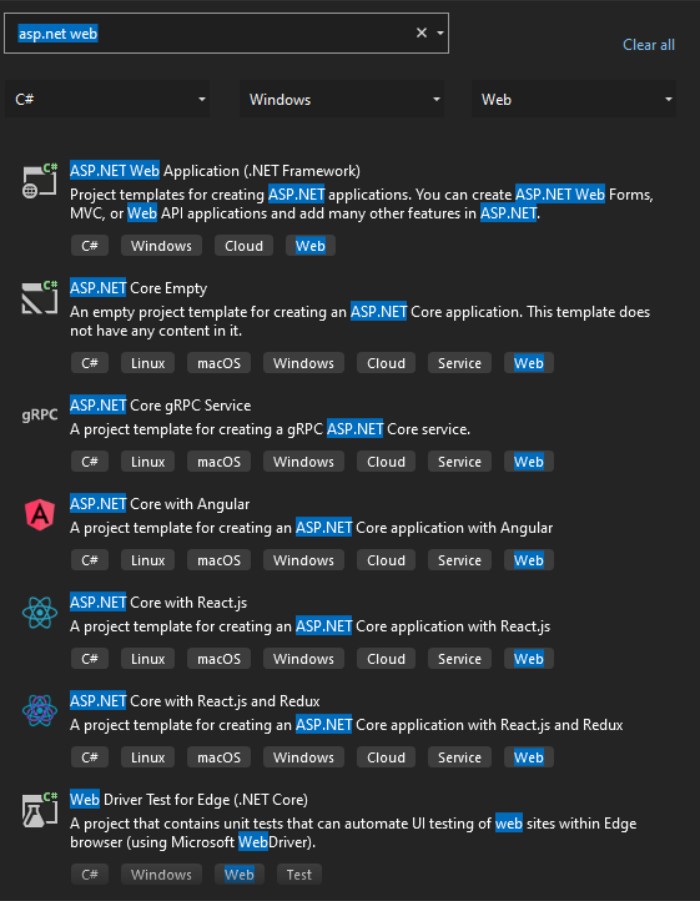
- In the “Create a new project” dialog, type “ASP.NET Web Application (.NET Framework)” into the search bar. Select this template, and click “Next.”
- Follow the prompts to configure your project, ensuring that “Web Forms” is selected as the type of application you want to create.
-
Enabling Web Live Preview:
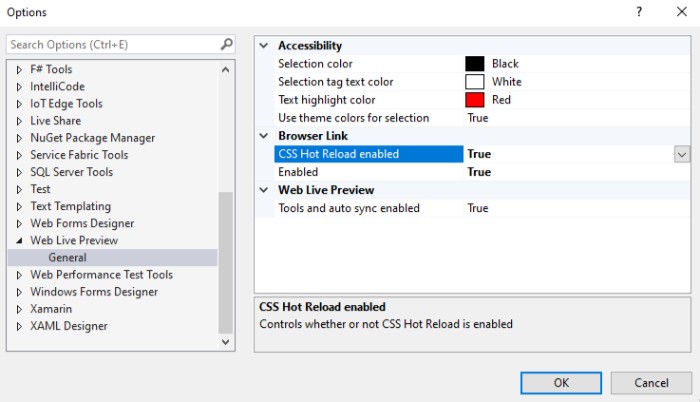
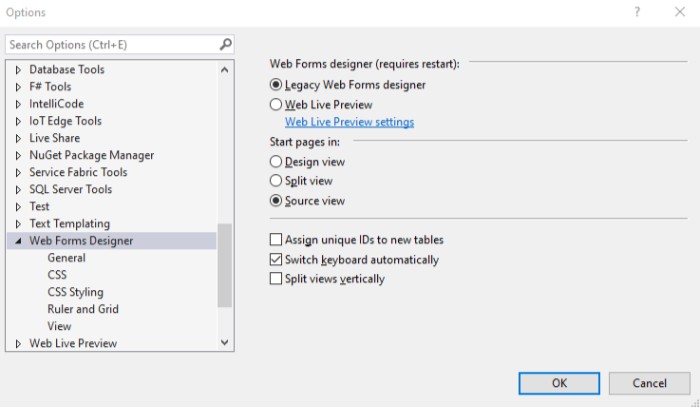
- Visual Studio 2022 introduces the Web Live Preview feature, which allows you to see real-time updates to your Web Forms application as you code. To enable this, go to “Tools” > “Options” > “Web Forms Designer” and select the Web Live Preview option.
- This feature allows you to see your changes immediately, making it easier to design and debug your web pages.
-
Using the Web Forms Designer:
- If you prefer the traditional Web Forms Designer, you can choose the “Legacy Web Forms designer” in the same “Tools” > “Options” > “Web Forms Designer” menu. This gives you the familiar Design, Split, or Source view options.
- The Legacy Web Forms designer allows you to work with Web Forms in the way that you’re accustomed to, with the added benefit of Visual Studio 2022’s performance improvements.
-
Building and Running Your Web Forms Application:
- After setting up your project and choosing your preferred designer, you can start building your application. Visual Studio 2022 supports all the usual Web Forms components, such as GridViews, DataLists, and Repeaters.
- When you’re ready to test your application, simply hit F5 to run it. Visual Studio will launch your Web Forms app in a local IIS Express instance, where you can interact with it just as you would in a production environment.
How to Do Web Forms in Visual Studio 2022
While Microsoft is steering developers towards Blazor and .NET 6 for new projects, Web Forms is still a viable option for many developers, especially those maintaining or extending existing applications. Visual Studio 2022 ensures that you can continue to work with Web Forms efficiently, with tools like Web Live Preview making the development experience smoother and more modern. Whether you stick with Web Forms or transition to Blazor, Visual Studio 2022 has you covered.


