How to Easily ReduceCompress the Size of Word Files
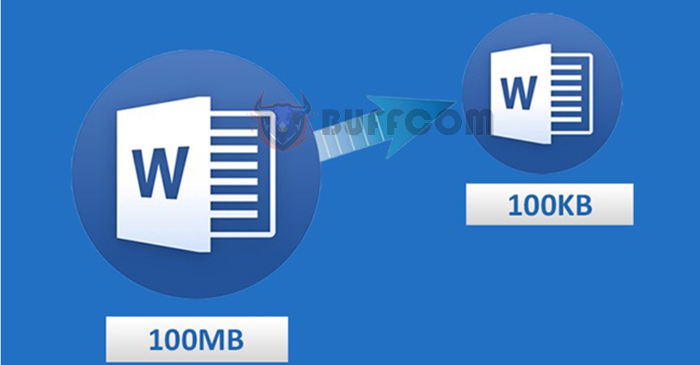
How to Easily Reduce/Compress the Size of Word Files: If your Word document contains numerous images, objects, videos, etc., embedded within it, the file size can become quite large. Sharing such a file via email, chat, or online applications can become challenging or even impossible. In such cases, you can compress the embedded objects within the document to reduce the size of the Word file. If your document doesn’t contain images or you’ve followed the above steps and still need to reduce the file size further, there are plenty of other useful tips that can certainly help reduce the size of your Word document. Read the following article to learn how.
1. Convert to .docx Format
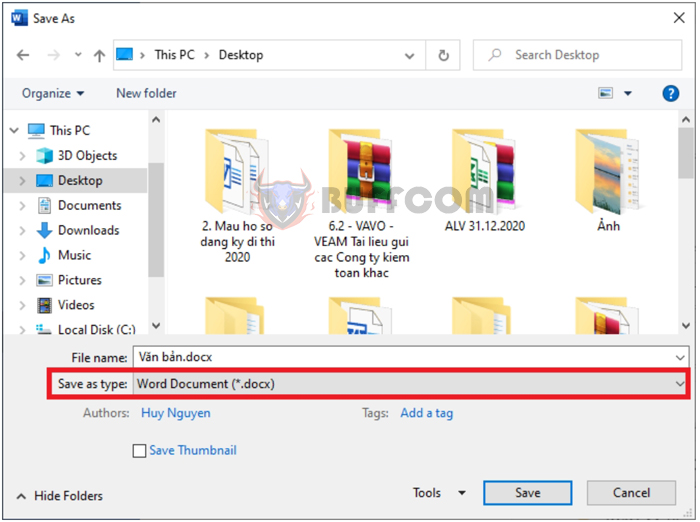
The latest Word format is .docx. If you’re using the old .doc format, convert it to .docx. To do this, open the Word file, then select the “File” tab on the toolbar => “Save As” => “Browse.”
Reducing Word File Size
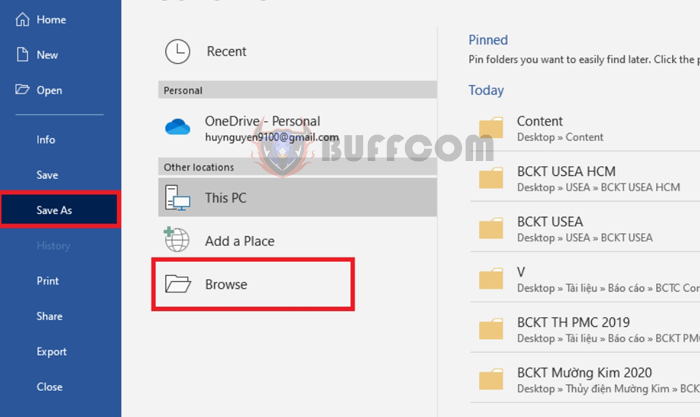 The “Save As” window will appear. Choose the location to save the new file and under “Save as type,” select “Word Document (*.docx).” Finally, press “Save” to convert the file format.
2. Compress Embedded Images
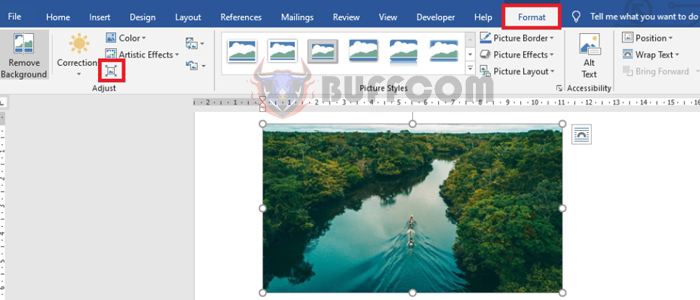
Compressing embedded images within the file can significantly reduce its size. First, select the image you want to compress. Then, go to the “Format” tab on the toolbar. Next, click the “Compress Pictures” icon under the “Adjust” section.
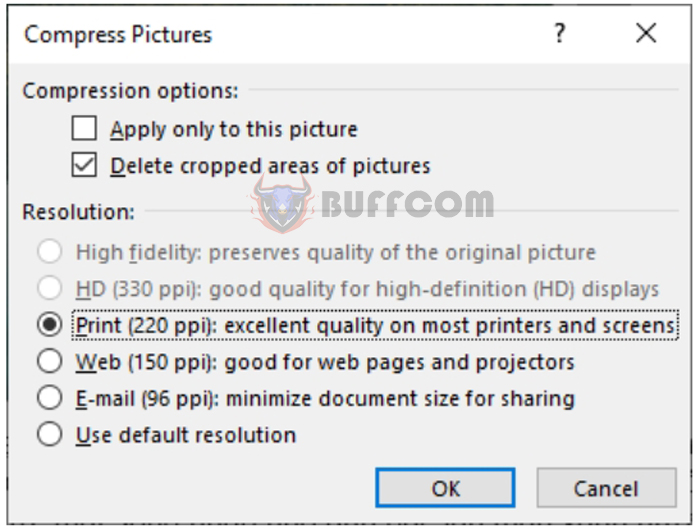
The “Compress Pictures” dialog box will appear. Uncheck “Apply only this picture.” Then, choose one of the following options:
- Print (220 ppi): excellent quality for most printers and screens for optimized printing.
- Web (150 ppi): good for web pages and projectors for sharing online and project use.
- E-mail (96 ppi): minimize document size for sharing via email.
- Use default resolution for default settings.
Finally, click “OK” to complete the setup. The image size will be significantly reduced.
 3. Disable Image Editing Features
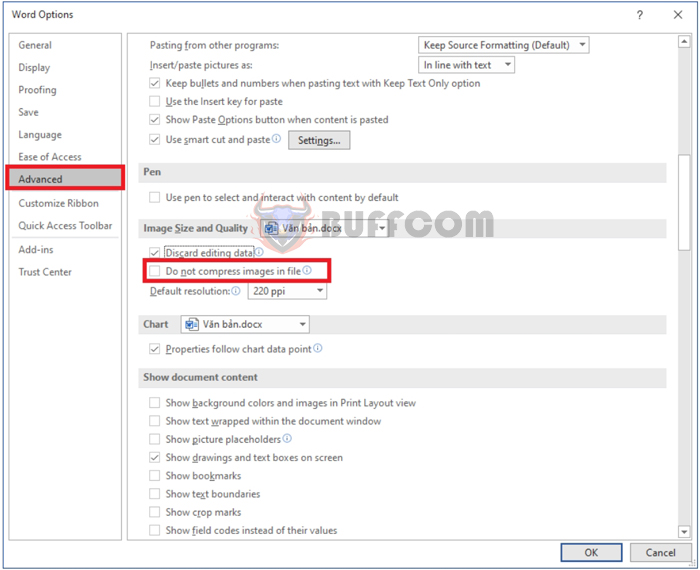
Open the Word file you want to reduce in size. Go to the “File” tab on the toolbar. Then, select “Options” at the bottom left corner of the screen.
Reducing Word File Size
 The “Word Options” window will appear. Choose the “Advanced” tab on the left sidebar. Scroll down to “Image Size and Quality,” then check “Do not compress images in file.” Finally, click “OK” to complete the setup. This will disable image editing features, significantly reducing the file size.
How to Easily ReduceCompress the Size of Word Files
In this way, the article has guided you on how to reduce the size of Word files. Hopefully, this article will be helpful to you in your work. Wishing you success!

