How To Enable The Hibernate Feature That Is Disabled On Windows 10

You want to use the Hibernate feature for your computer on Windows 10, but this feature is disabled by default. Here’s a guide to enable the Hibernate feature.
How to Enable the Disabled Hibernate Feature on Windows 10
In other versions of Windows, this feature is not disabled by default, but it is disabled on Windows 10.
Why should you use this feature?
While you’re working on your computer with multiple programs running, it can be time-consuming to close them all and reopen them later. So, how can you shut down your computer without closing the applications? That’s where the Hibernate mode comes in. When you use this mode, your programs will remain intact when you turn on your computer again.
Here’s a guide to enable the Hibernate feature on Windows 10
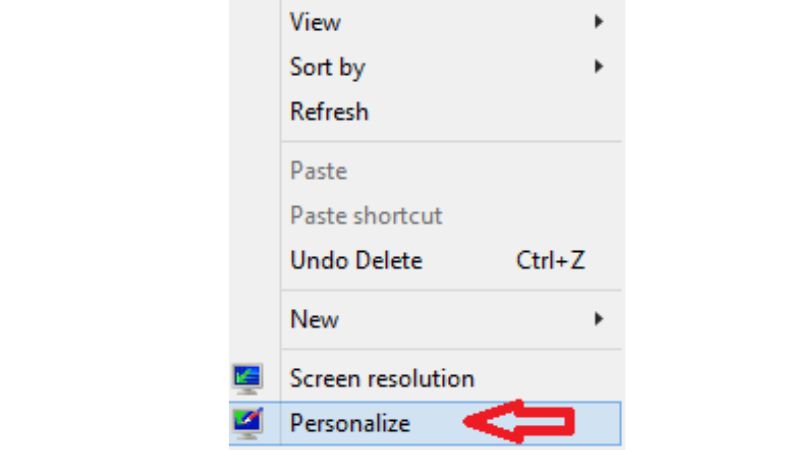
Right-click on an empty space on the desktop and select “Personalize.”

Look towards the upper right corner, and you’ll find the Screen Saver icon.

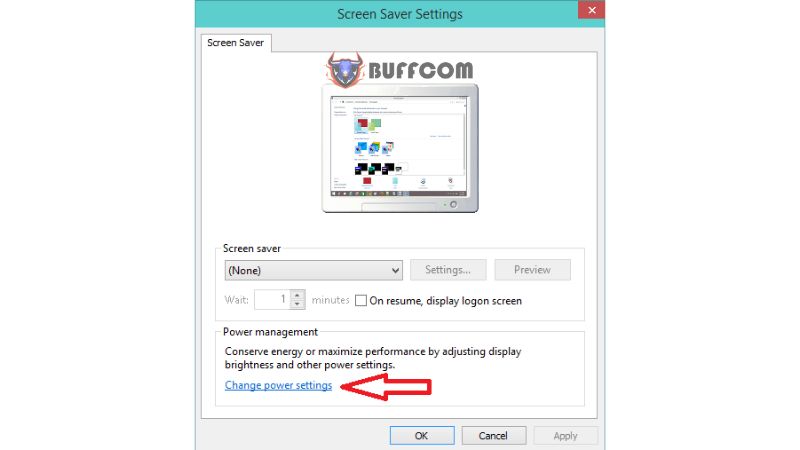
Click on “Screen Saver Settings” to open the Screen Saver Settings window.
Below, click on the “Change Settings” link.

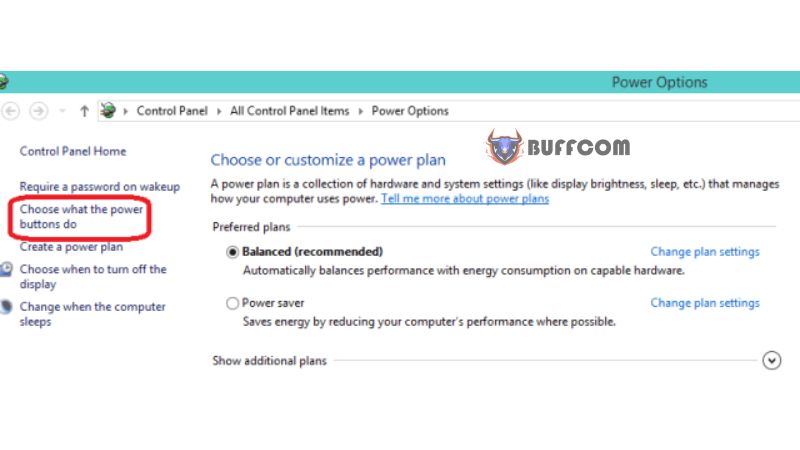
Select “Choose What the Power Buttons Do” at the bottom.

In the System Settings window that appears, scroll down to “Settings Shutdown” and check the “Hibernate” box.
Finally, click on “Save changes.”
It’s as simple as that! Now you can use the Hibernate feature. If you’re interested in purchasing a Windows product key, please contact Buffcom.net.


