How to Hide Files in JPG Images on Windows 10
If your computer is shared by multiple users, instead of protecting your data by setting passwords for folders or hiding files, you can hide files within a JPG image. When you do this, users will only see the image without any indication of hidden files inside it.
However, if someone looks at the size of this image, they will question why it is so large. Nevertheless, only those who pay attention will notice that. In this article, I will guide you on how to hide data inside a JPG image on Windows 10.
Hiding Files in JPG Images on Windows using Command Prompt
If you are a Windows user, you can use commands in Command Prompt to hide files within an image. When you open this image file, it will appear as a regular image with no indication of hidden files inside it.
Hiding Files within an Image
Step 1: Prepare a JPG image on your desktop. Rename it with a simple name.
Step 2: Compress the files you want to hide into a ZIP format by:
Selecting all the files you want to compress, then right-click and choose “Send to” -> “Compressed (zipped) folder.”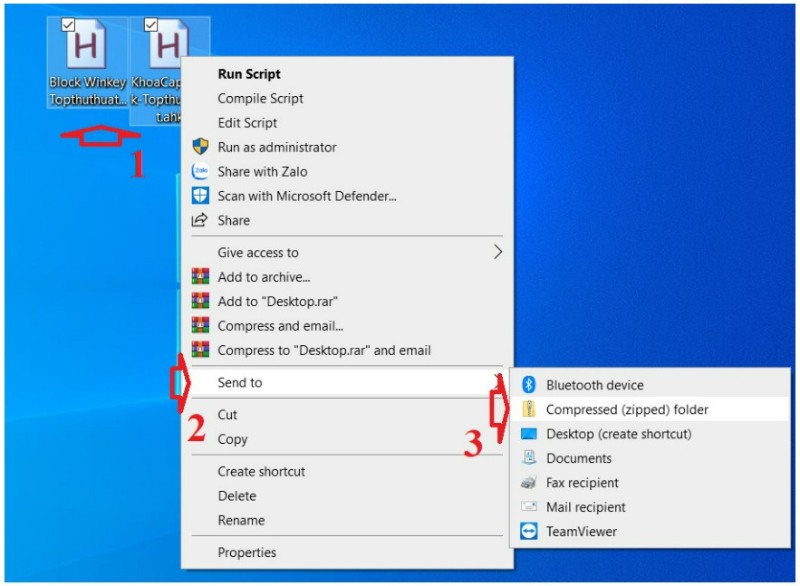
Step 3: Rename the ZIP file with a simple name and move it to the desktop.
Step 4: Press Windows + S, then type “cmd” in the search and press Enter to open the Command Prompt window.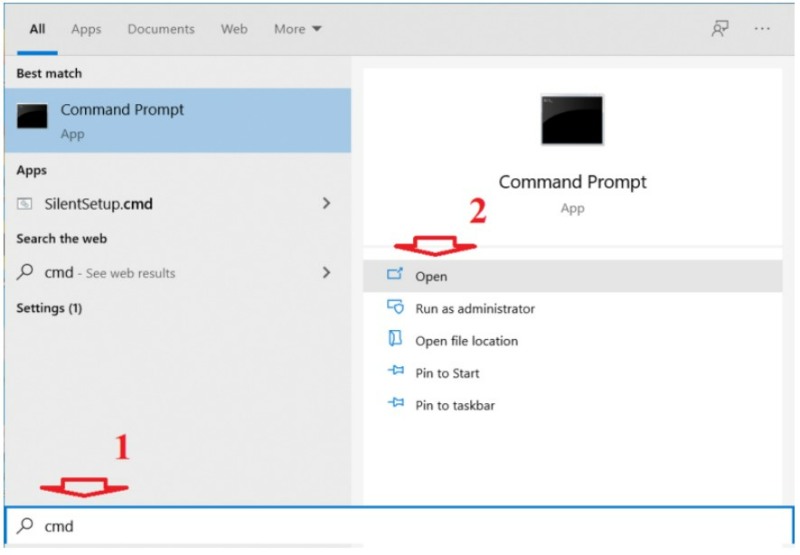
Step 5: Enter the following command and press Enter to set your desktop as the current working directory:
cd desktop
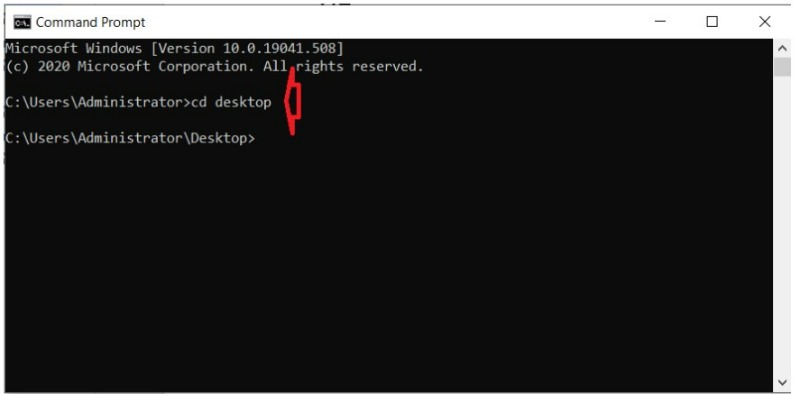 Step 6: Enter the following command to hide your files within the JPG image:
copy /b source-image.jpg + your-archive.zip target-image-file.jpg
Here is the meaning of each part in the command:
source-image.jpg: Replace it with the name of the existing image on your desktop that you want to hide files within.
your-archive.zip: This is the ZIP file containing the files you want to hide.
target-image-file.jpg: Enter any desired name for the output image file; this will be the resulting file containing your image and ZIP file.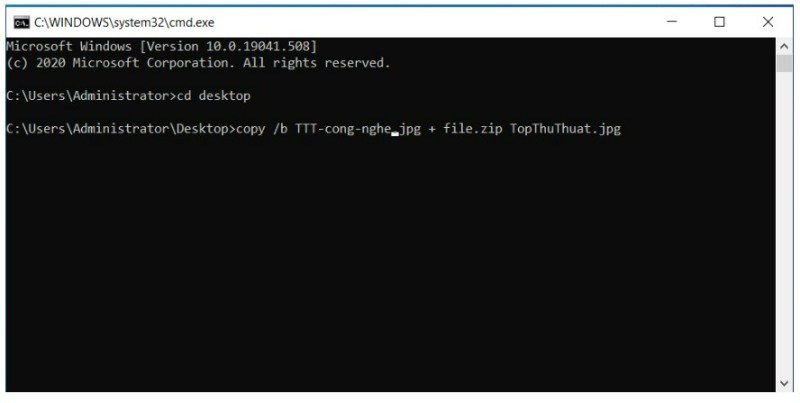
Step 7: Once the command is executed, a new JPG image file will appear on your screen. It contains the files you want to hide within the JPG.
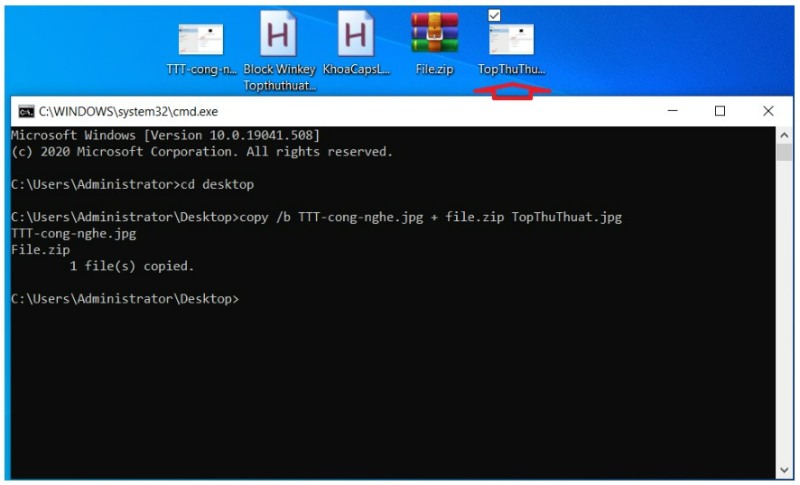 Revealing Hidden Files After Performing the Process
You don’t necessarily have to use the Command Prompt to reveal hidden files within the JPG image.
Method 1:
Step 1: To reveal your files, right-click on the JPG image containing the hidden file, select “Open with,” and choose “WinRAR archiver.”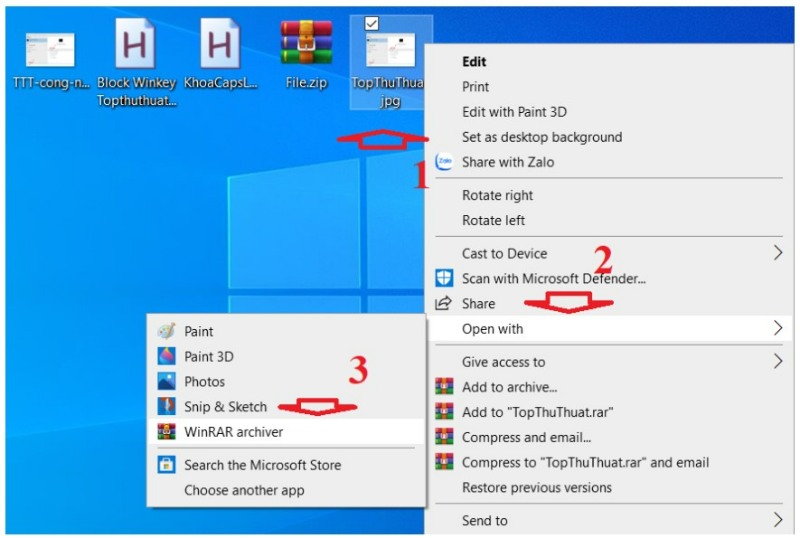
If you don’t see the option “WinRAR archiver,” click on “Choose another app” and search for the WinRAR or any other extraction tool.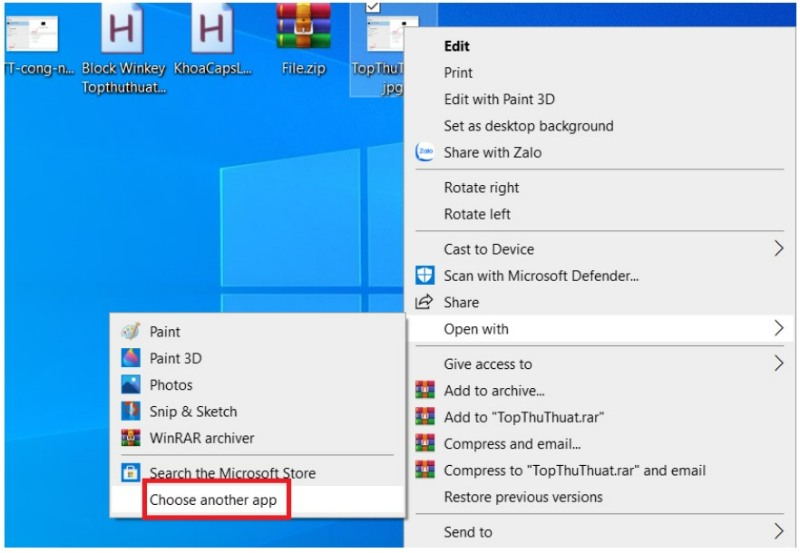
Step 2: Click the “Extract To” button to extract the files from the ZIP file and save them to a folder on your PC.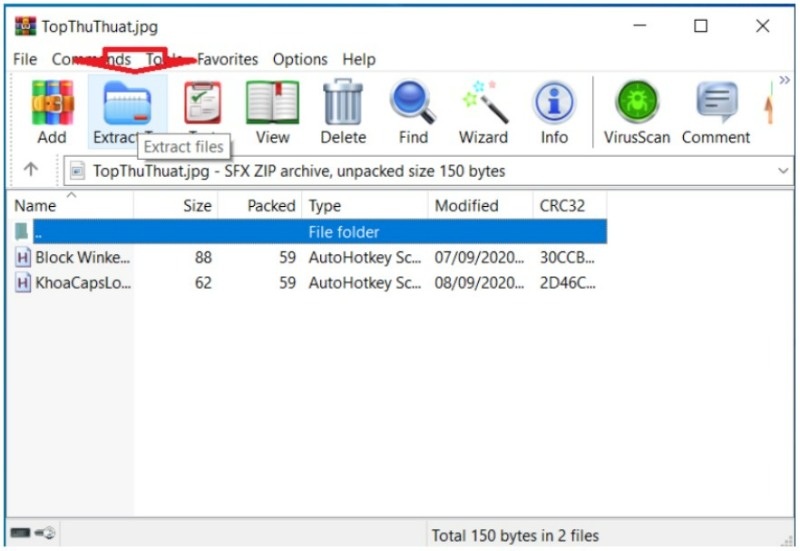
Method 2:
You can use another method to reveal the hidden file by changing the file extension of the JPG image.
Step 1: Right-click on the JPG image, select “Rename,” and change the file extension to “.ZIP.”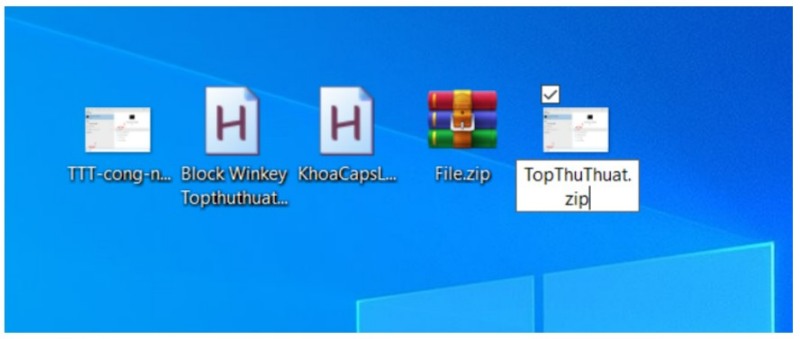
Step 2: Double-click the renamed file to extract the hidden files inside.
Now you know another useful trick to hide files on your computer. Additionally, you can explore more methods to hide and reveal hidden files on other PCs. I hope this article has been helpful, and if you have any feedback or further questions related to the article, feel free to leave your comments below.

