Inserting Images into Word, Editing and Compressing Images…
How to insert images into Word? Professional photo editing techniques. As someone who frequently uses Word for office work and document editing, it’s essential to know how to insert images into Word documents. Did you know that with Word, inserting, editing, and compressing images is extremely simple? This article by Buffcom.net will provide you with the basic knowledge to accomplish these tasks. So, take a few minutes and read this article!
Basic ways to insert images:
There are two basic ways to insert images into your Word document:
1: Inserting an image from your computer:
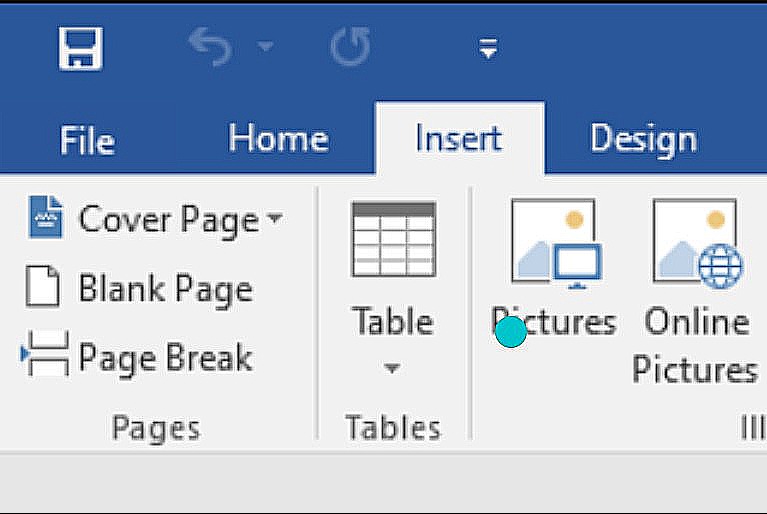
Select the image you want to insert into Word. Then, select Insert —> Pictures.
 2: Inserting an image from the internet:
You can also insert images from various websites on the internet. To do so, select Insert —> Online Pictures. A dialog box will appear, allowing you to select online images in several ways.
Below is an illustration of how you can use Microsoft’s Bing search tool to find and insert an image into your Word file.
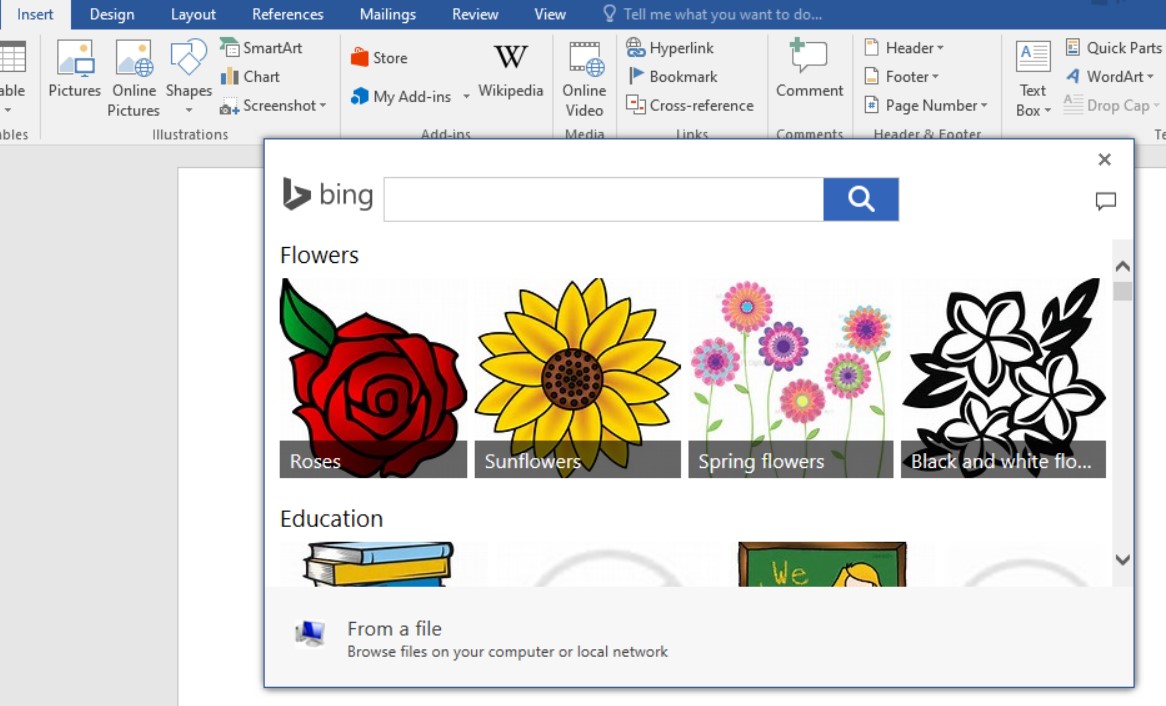
Insert online pictures into Word using Microsoft’s Bing search tool.
How to edit pictures in Word
1: Aligning the image within the text block:
Typically when you insert an image, it may be out of alignment in a way that is not to your liking. So you can align the image as desired. Select Format —> Position and choose various alignment options such as: align top left, align top, align top right, align left, align center, align right, etc. There are many alignment options available for you to choose from.
 2: Rotating your image:
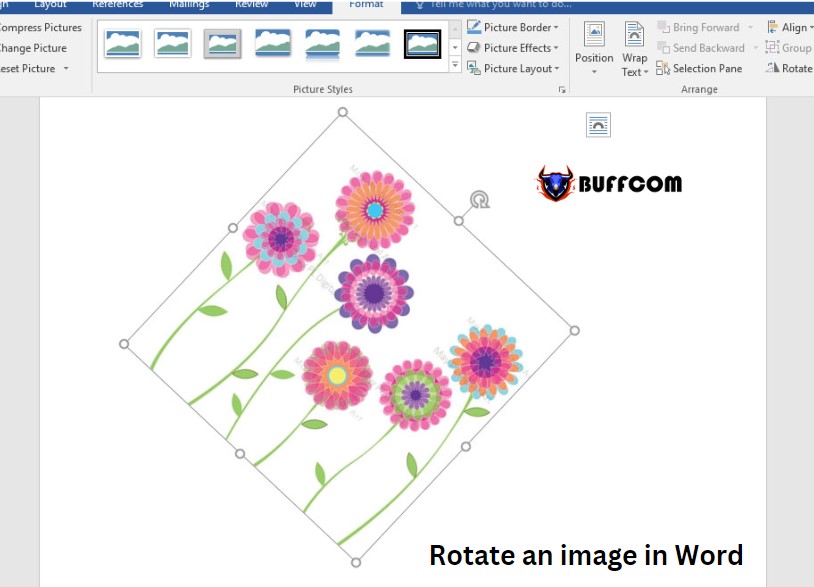
Rotate your image according to your preference, easily rotating it 180 or 360 degrees. Click on the circular button with an arrow on top of the image.
 3: Adjusting the size of the image:
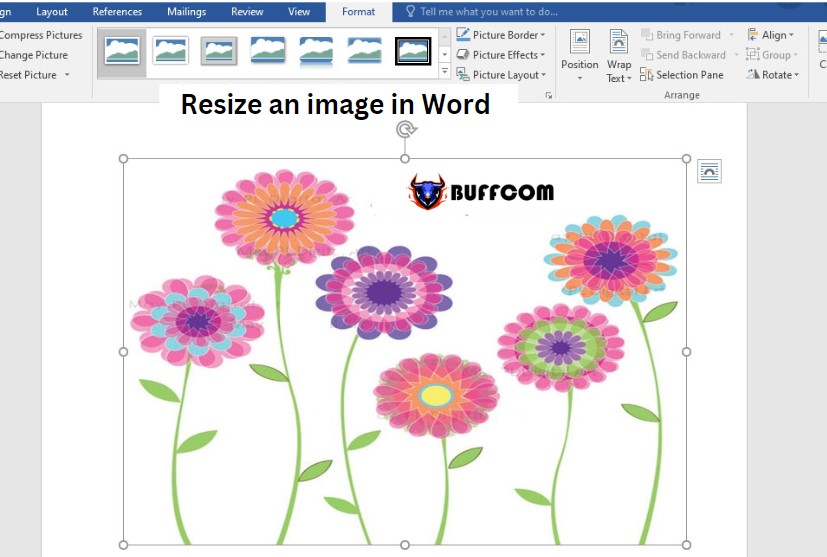
The circular buttons surrounding the image are where you can adjust its size. You can adjust the size by dragging it to any size you want. To maintain the image’s aspect ratio, hold down the Shift key + the corner circular button; this will prevent the image from being distorted and only increase its size.
 4: Applying a style to the image:
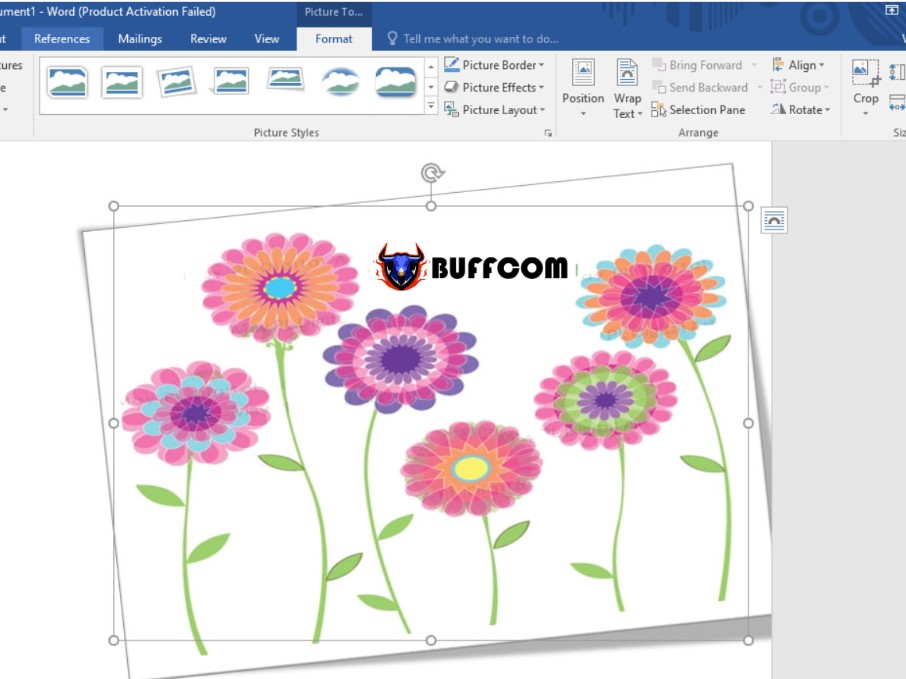
This is perhaps the most fun part, as you can apply many different styles to your image to prevent it from looking dull. Select Format and adjust the image style to your liking.
 How to compress images in Word:
To minimize the file size of your images, using the image compression method is the best way.
Step 1: Click on the image you want to compress.
Step 2: In the Format tab, select Compress Pictures.
Step 3: The Compress Pictures window will appear. Here, select the checkbox for Delete cropped areas of pictures. Check the box for Apply only to this picture if you only want to apply the compression setting to the selected image. Uncheck the box for Apply only to this picture to apply the settings to all images in your Word document.
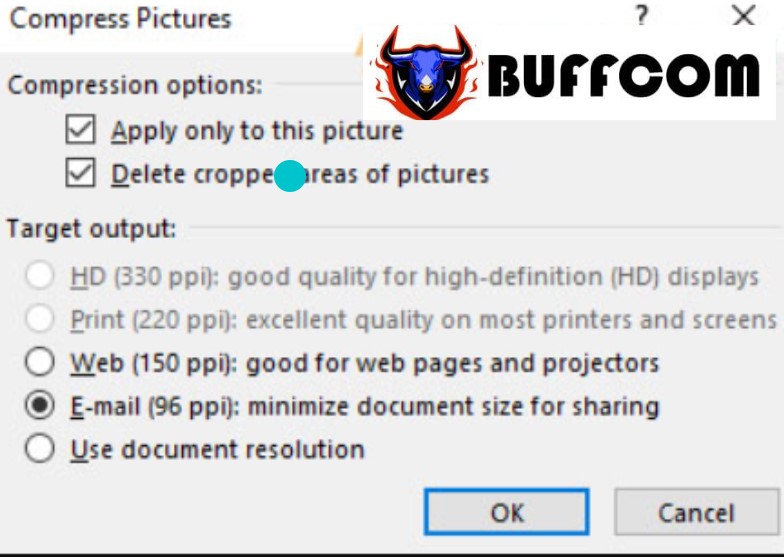
Step 4: Under the Target output section, check the E-mail checkbox to reduce the pixel density, which significantly reduces the file size of your image.
Step 5: Finally, click OK to successfully compress the image in Word.
These are the most professional ways to insert and edit images in Word. We’re glad you’ve followed this article. Thank you!

