Installing and Configuring VMware for Windows 11 Virtualization
Welcome to the comprehensive guide on installing and configuring VMware for Windows 11 virtualization. In today’s fast-paced technological landscape, the ability to run multiple operating systems on a single physical machine is not just a luxury, but a necessity for many IT professionals, developers, and enthusiasts. With Windows 11 bringing a host of new features and improvements, virtualization has become more pertinent than ever.
However, the process is straightforward and involves three steps:
Create a Windows 11 Virtual Machine.
Configure the VM.
Install Windows 11 on the VM.
Step 1: Creating a Windows 11 Virtual Machine
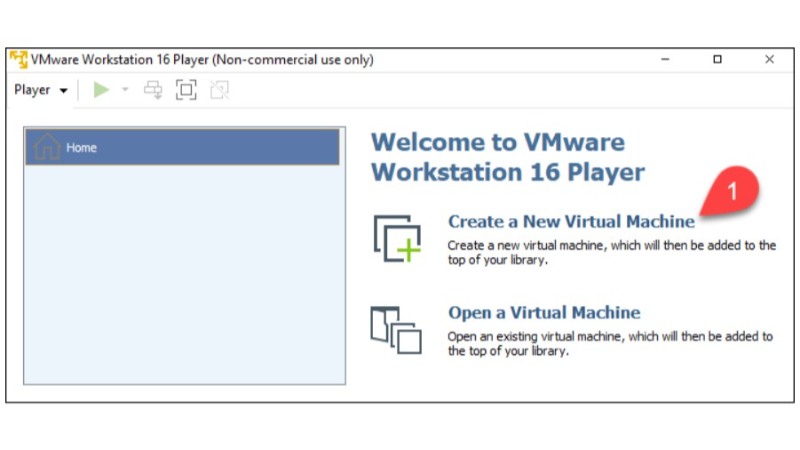
To create a Windows 11 virtual machine, launch VMware Workstation Player and:
Select ‘Create a New Virtual Machine’ in the main window.

Installing and Configuring VMware for Windows 11 Virtualization
Begin the process of creating a new virtual machine.
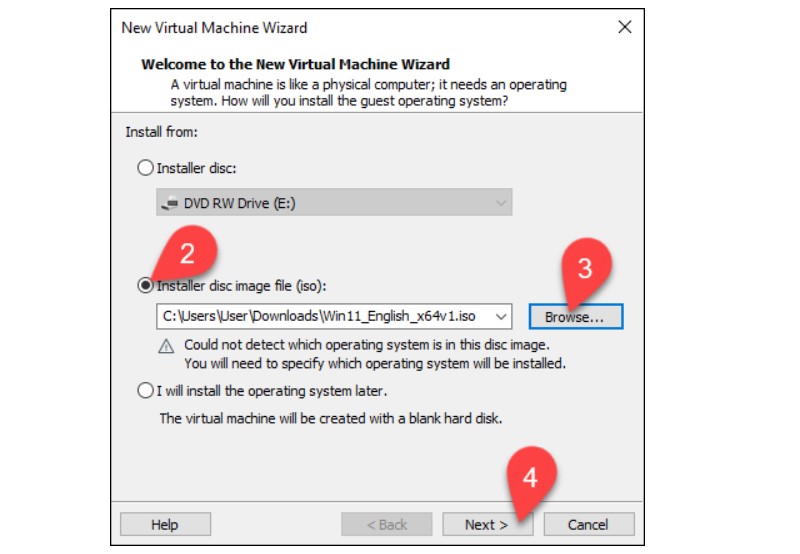
The new virtual machine wizard starts.
Choose the option for the installation disk image file (iso).
Click on ‘Browse’ and locate your Windows 11 ISO file.
Select ‘Next’.
Installing and Configuring VMware for Windows 11 Virtualization
Choose the installation disk image file.
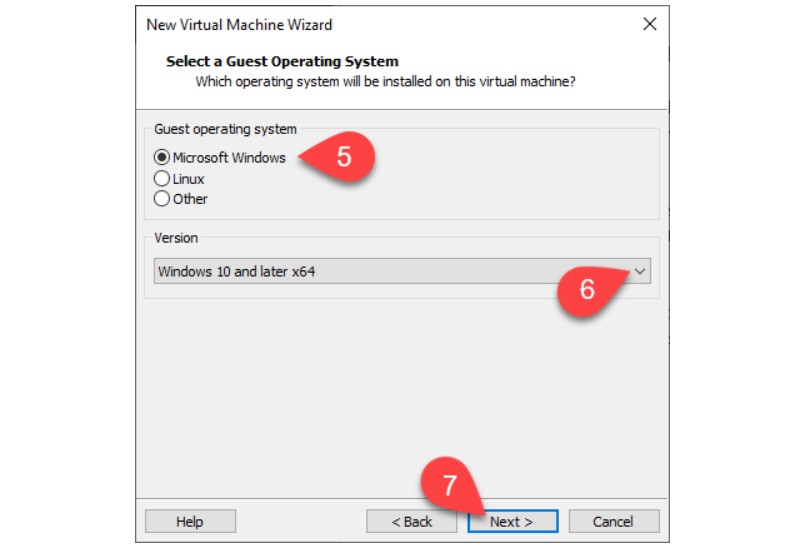
The ‘Select a Guest Operating System’ window loads.
Choose ‘Microsoft Windows’ in the Guest Operating System section.
Select ‘Windows 10 or later x64’ from the dropdown list.
Click ‘Next’.
Installing and Configuring VMware for Windows 11 Virtualization
Choose the guest operating system.
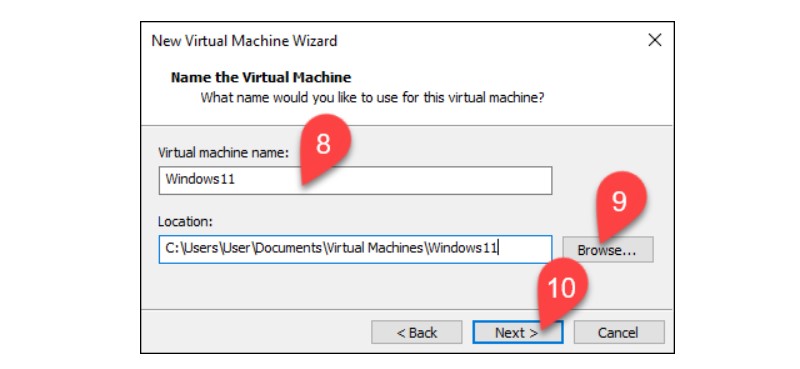
The ‘Name the Virtual Machine’ window appears.
Enter a name for the virtual machine, for example, VM named Windows11.
Click ‘Browse’ to choose the VM’s location or skip this step to use the default location of the tool.
Select ‘Next’.
Installing and Configuring VMware for Windows 11 Virtualization
Name the virtual machine.
The ‘Specify Disk Capacity’ window appears.
Choose the maximum disk size in gigabytes. Specify 60 gigabytes or more for the Windows 11 virtual machine.
Choose the option ‘Store virtual disk as a single file’.
Select ‘Next’.
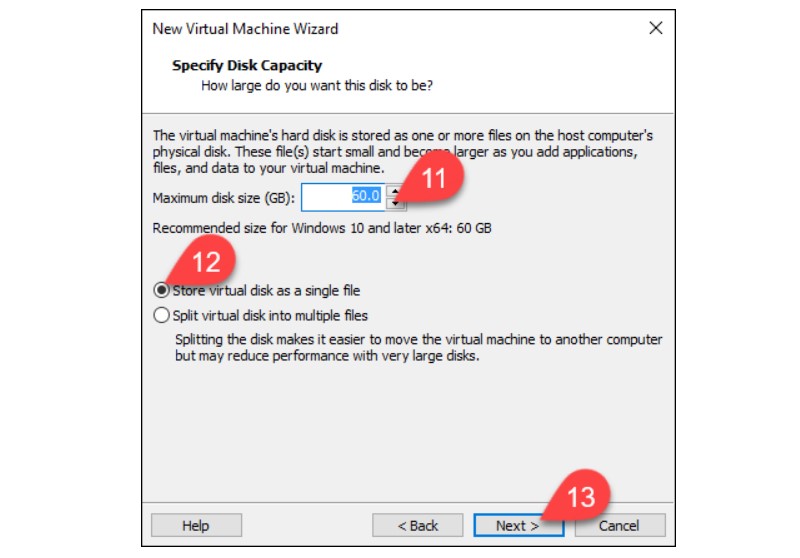
Installing and Configuring VMware for Windows 11 Virtualization
Specify disk capacity.
In the ‘Ready to Create Virtual Machine’ window, you can review all VM settings.
Select ‘Finish’ to create your Windows 11 virtual machine.
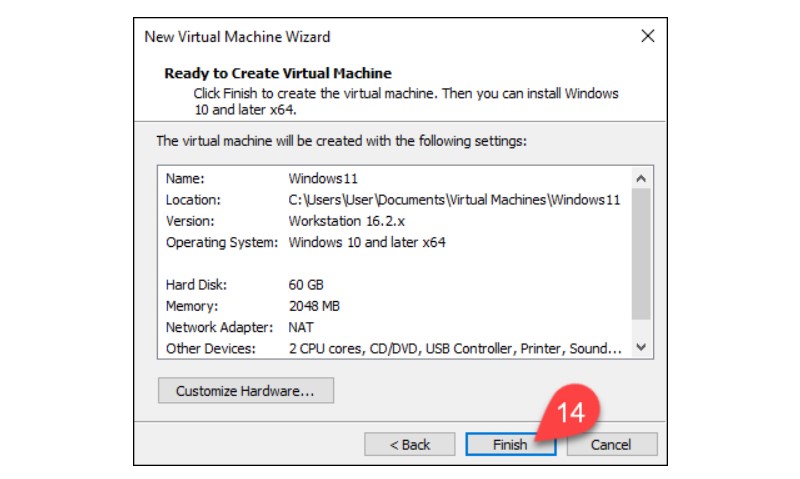
Installing and Configuring VMware for Windows 11 Virtualization
Confirm the configuration and complete the virtual machine creation.
Step 2: Modifying and Starting the Windows 11 Virtual Machine
Since the virtual machine was created with the ‘Windows 10 or later x64’ settings, edit the VM to meet the minimum requirements of Windows 11.
Select your VM in the list on the left side of the window.
Choose ‘Edit virtual machine settings’.
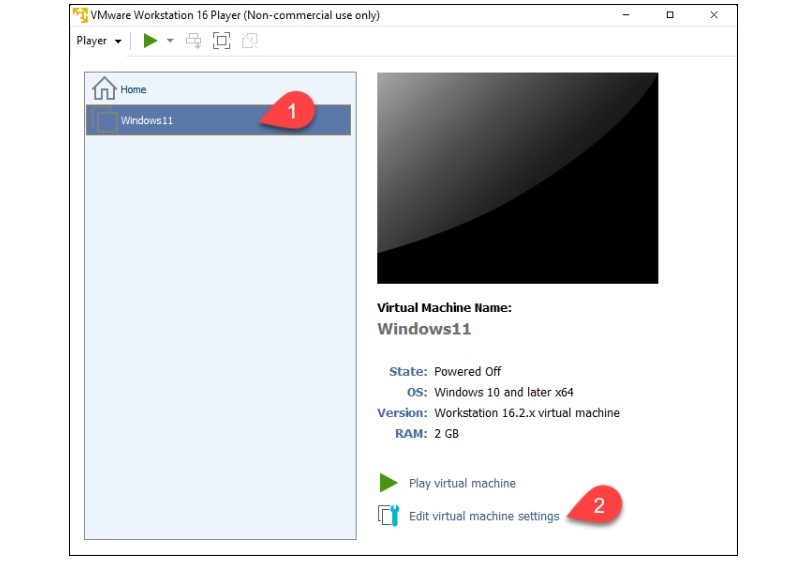
Installing and Configuring VMware for Windows 11 Virtualization
Edit the virtual machine in VMware Workstation Player.
The ‘Virtual Machine Settings’ window will open.
The left menu contains the VM’s virtual devices. Select the device you want to adjust.
Change the device settings on the right side of the window.
Note: To meet the requirements of Windows 11, set at least 4 GB of memory and two processor cores.
Click ‘OK’ once you have finished setting up the VM.
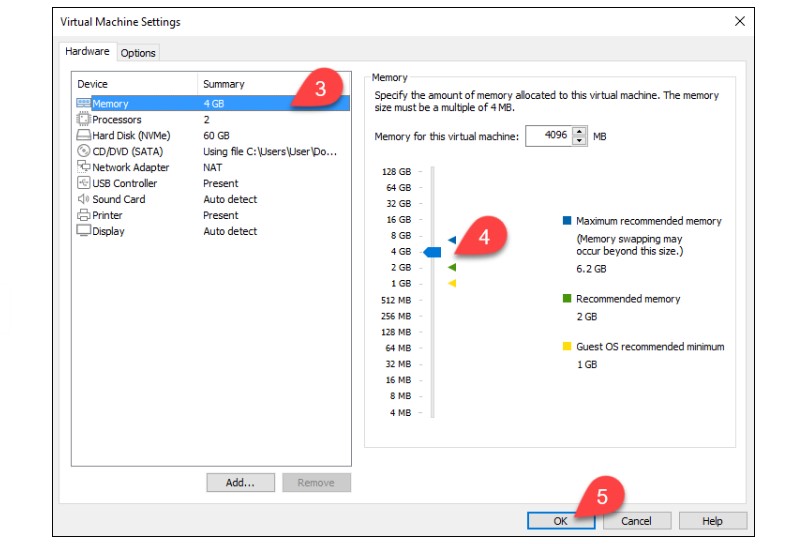 Specify the allocated memory size for the VM.
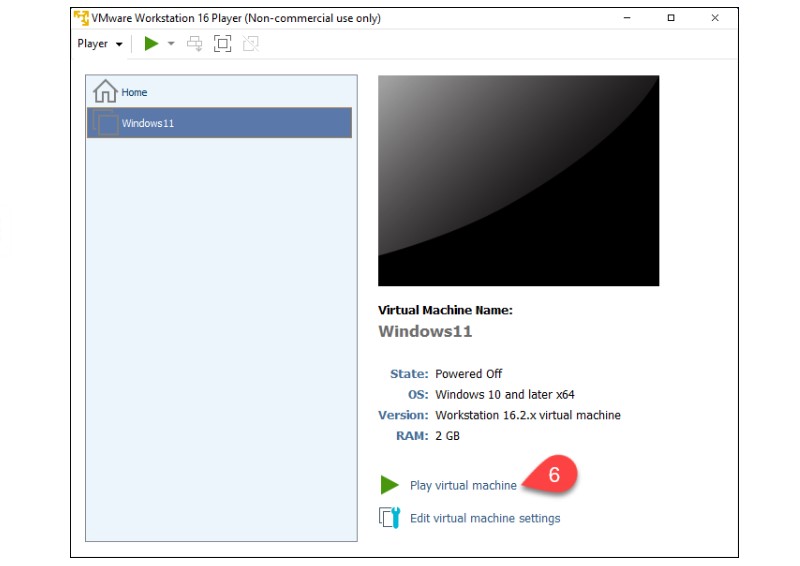
Choose ‘Play virtual machine’ in the main VMware Workstation Player window.
Installing and Configuring VMware for Windows 11 Virtualization
Start the virtual machine in VMware Workstation Player.
The VM window opens.
Press any key when in the VM window to boot from the ISO file.


