How to remove unused pages in Excel
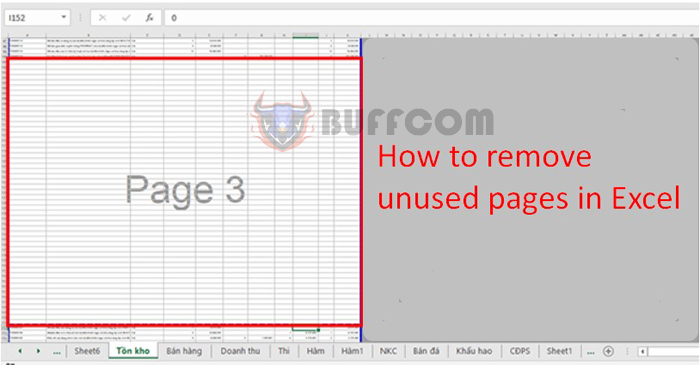
How to remove unused pages in Excel: In Excel, at the end of a spreadsheet, there may be white pages that you do not need to use, or you may have accidentally pressed a key that caused these blank pages to appear on the file. If you don’t pay attention and delete these blank pages in Excel, when you print, the entire document will be printed, including those blank pages. So how can you remove these extra pages in Excel? Follow the instructions in this article to find out.
Step 1
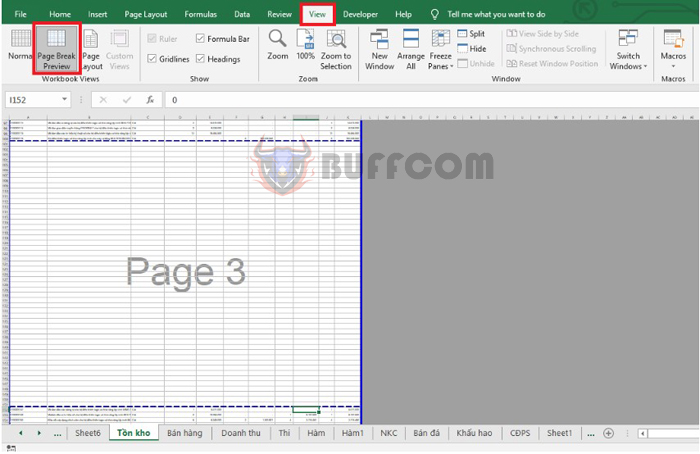
First, you need to switch to page view mode by selecting the View tab on the toolbar. Then select Page Break Preview in the Workbook Views section. This will switch your spreadsheet to preview mode for printing. As shown in the image below, you can see that page 3 is an extra page that is not being used and needs to be deleted.
How to remove unused pages in Excel
Step 2
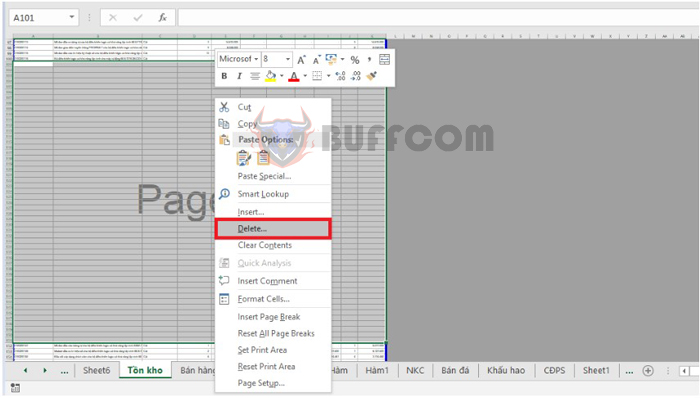
Next, select and highlight all of the extra pages and right-click on them. The scroll bar will appear, then select the Delete option.
How to remove unused pages in Excel
Step 3
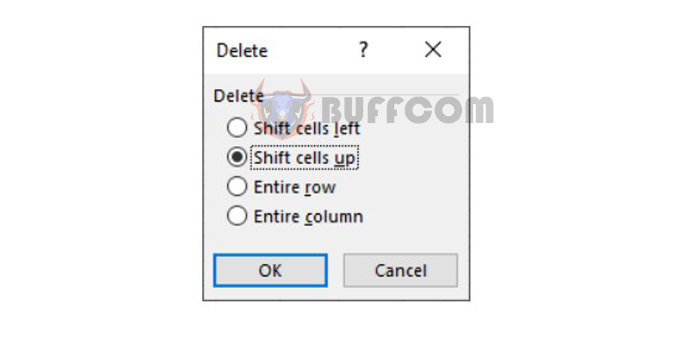
At this point, the Delete dialog box will appear. Select the Shift cells up option and then click OK. This will quickly delete page 3.
How to remove unused pages in Excel
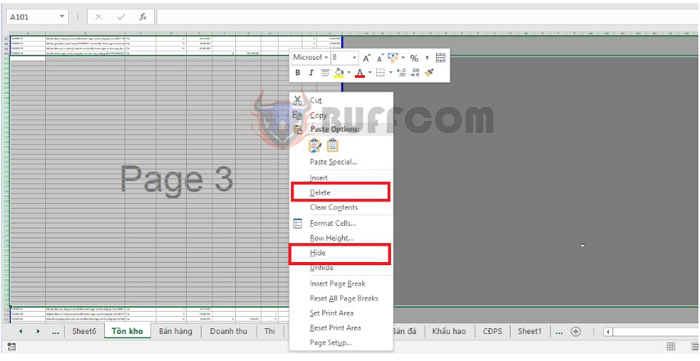
Alternatively, you can highlight all of the blank pages and press Shift + Space to select the entire page horizontally. Then right-click on the page and select Delete to remove the page. Or select Hide to hide the page. If you hide the page, you can retrieve it by selecting Unhide after highlighting.
How to remove unused pages in Excel
That’s it, this article has shown you how to remove extra, unused pages in Excel. I hope this article will be useful for you in your work. Good luck!


