How To Perform Mail Merge In Word

Mail Merge is a very useful feature in Microsoft Word that helps you to significantly reduce the time required to insert a list of information from Excel into various types of documents such as invitations, notices, report cards, pay slips, etc. Even though this feature is very useful, there are still many people who are not aware of it. Here is a very helpful article provided by buffcom.net that can help you easily use the Mail Merge feature in Word.
Steps for Mail Merge in Word
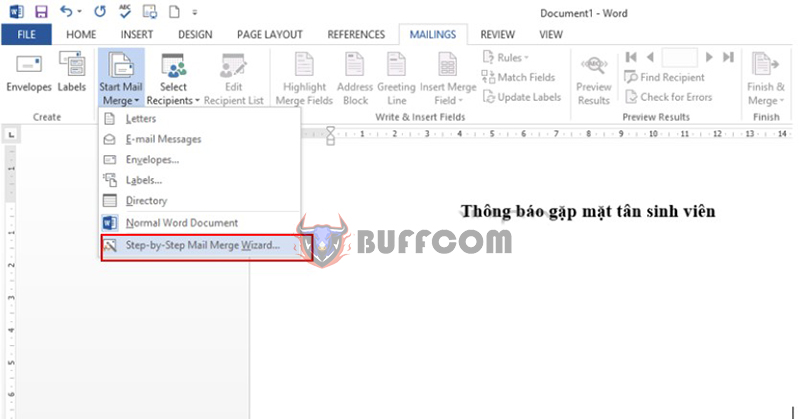
Step 1: Open the Word template file, select the “Mailings” tab, then click “Start Mail Merge” and “Step by Step Mail Merge Wizard.”
 Step 2: The Mail Merge option will appear on the right side of Word. You need to select:
– Step 1: Letters
– Step 2: Use the current document
– Step 3: Use an existing list (if the list is available). You can also choose to create a new list.
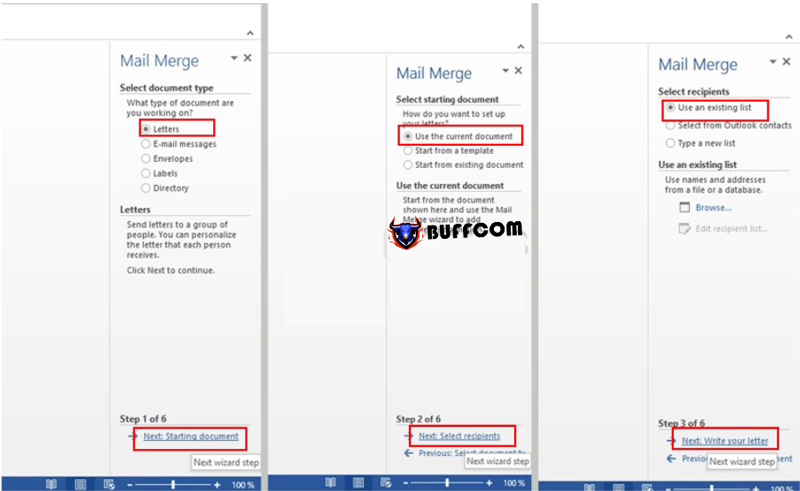 Then, click “Next: Write your letter.”
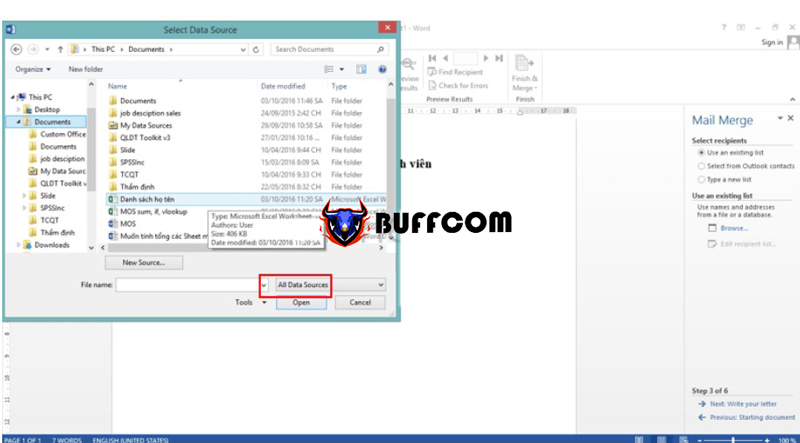
Step 3: In the “Select Data Source” dialog box, choose the available list and click “Open.”
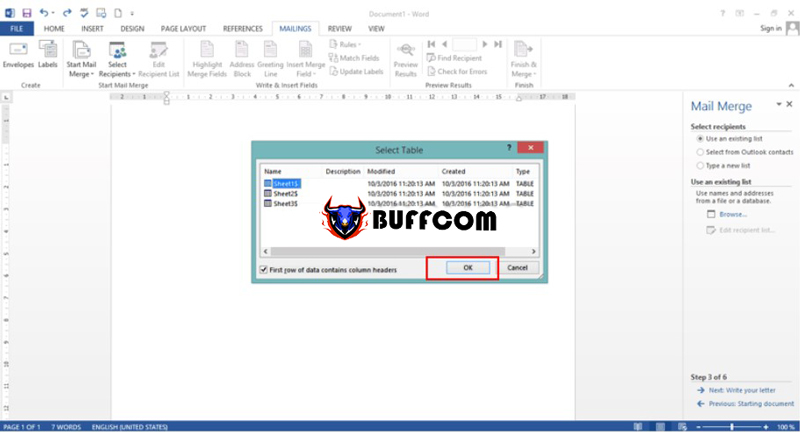
 Step 4: Select the sheet containing the data you want to use. For example, if Sheet1 is the sheet that contains the data in the Excel file, then you need to select Sheet1 and click “OK.”
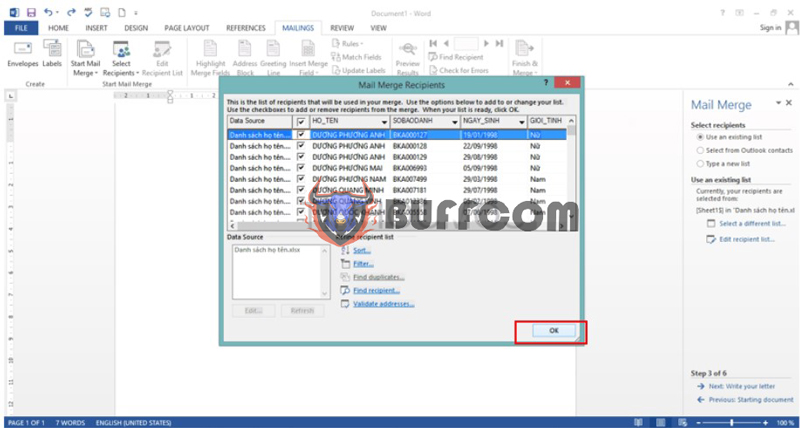
 Step 5: In the “Mail Merge Recipients” dialog box, choose the data you want to insert by marking the checkbox next to the data. If you want to insert all the data, you can mark the checkbox beside “Data Source“. After making the selections, click “OK.”
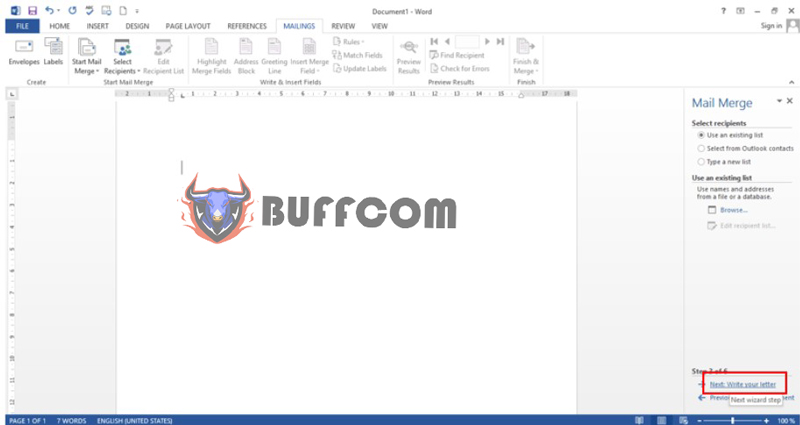
 Step 6: Click “Next: Write your letter” to continue with your mail merge process.
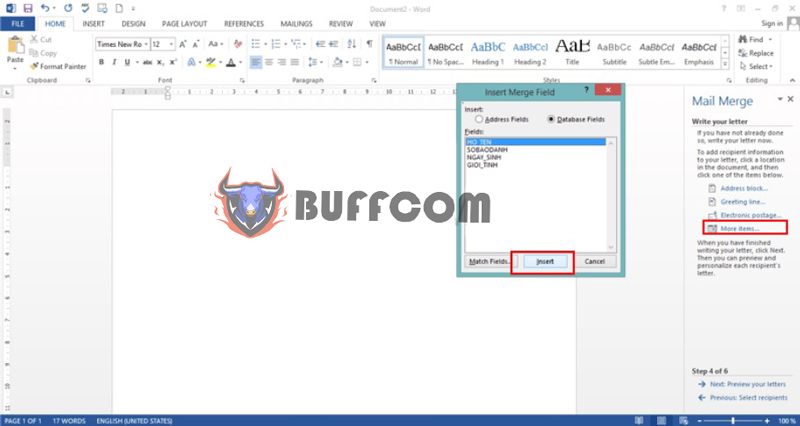
Step 7: In the next step, place your mouse pointer at the position where you want to insert data, and then click on More items. The Insert Merge Field dialog box appears, where you select the correct data field that corresponds to the content beside the mouse pointer, and then click Insert to insert it.
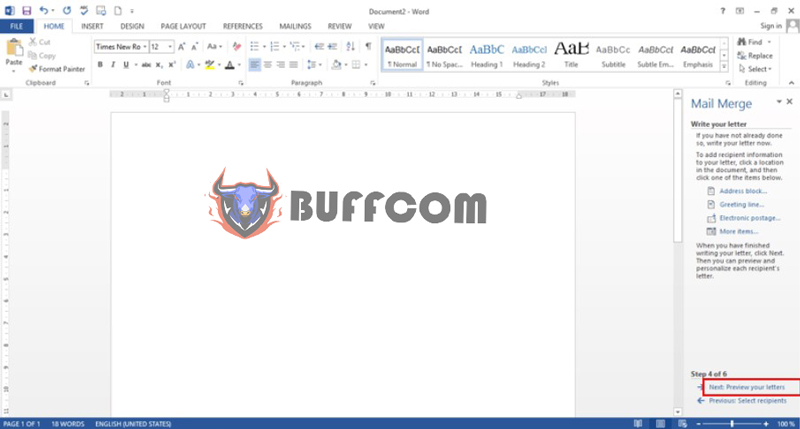
 After performing the insert operation, your Word document’s list will appear as shown below. Click Next: Preview your letters.
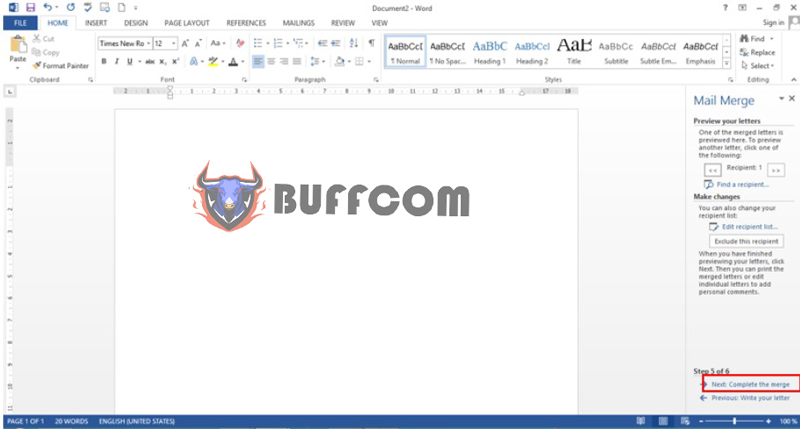
 Step 8: Click Next: Complete the merge to finish the mail merge process.
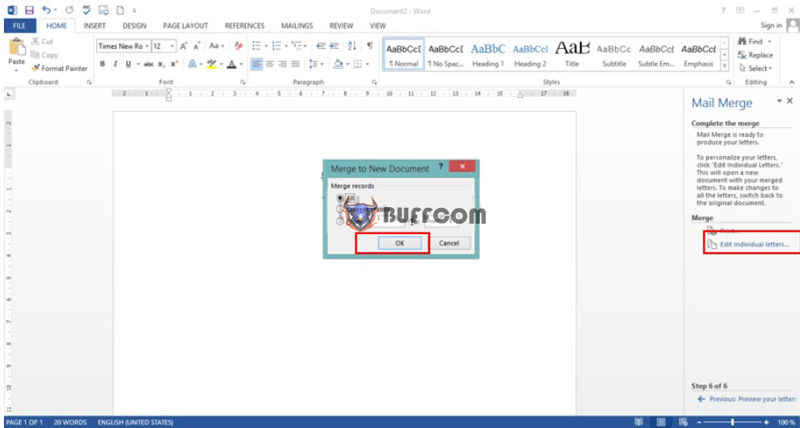
 Step 9: To view all the pages after merging, click Edit individual letters and select OK in the Merge to New Document dialog box.
 Step 10: Click Save.
Conclusion
Above is a detailed guide on how to perform Mail Merge in Word. If you are interested in licensed office software, please contact Buffcom.net!


