How to repeat table header row in Excel on the next page
How to repeat table header row in Excel on the next page: When working with tables in Excel, if your table’s content is too long and spills over onto the next page when printed, it is essential to repeat the header row on subsequent pages. Follow the steps below to learn how to repeat the table header row on the next page in Excel.
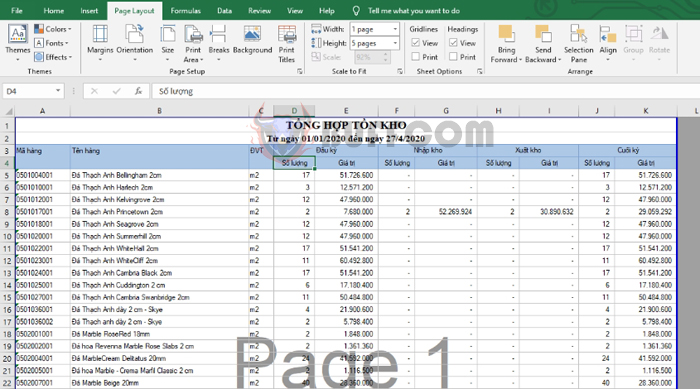
For example, suppose we have a spreadsheet as shown in the image below.
Due to the table’s length, the table header only appears on the first page. The subsequent pages do not have headers, making it difficult to refer to when printed. What we need to do now is to repeat the table header on subsequent pages when printed. Follow the steps below.
How to repeat table header row in Excel on the next page
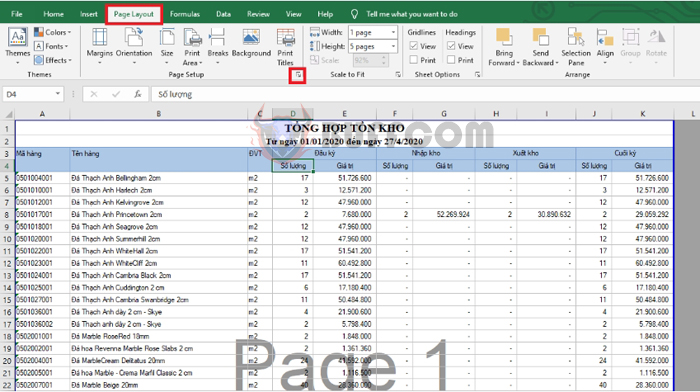
Step 1: Select the Page Layout tab on the toolbar.
Then click the downward arrow icon in the lower-right corner of the Page Setup section.
How to repeat table header row in Excel on the next page
Step 2
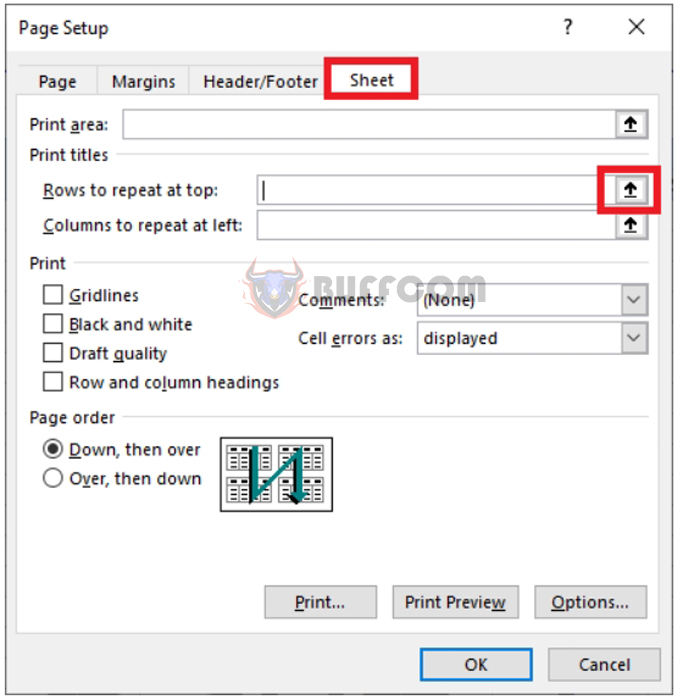
Now, the Page Setup dialog box appears. Select the Sheet tab. Then select the upward arrow icon in the Rows to repeat at top section.
How to repeat table header row in Excel on the next page
Step 3
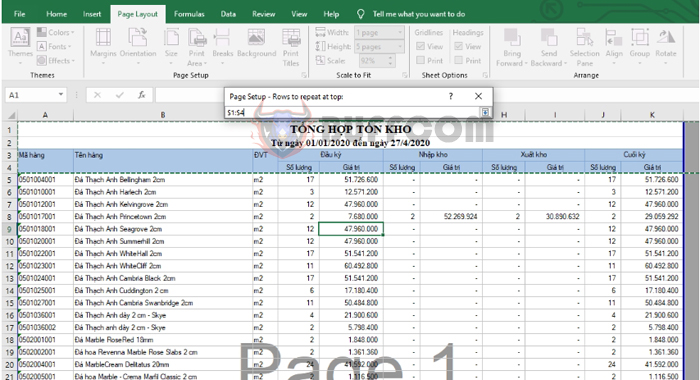
Now, the Page Setup – Rows to repeat at top dialog box appears. Select the header row that needs to be repeated on subsequent pages. After selecting the header row, click the arrow icon.
How to repeat table header row in Excel on the next page
Step 4
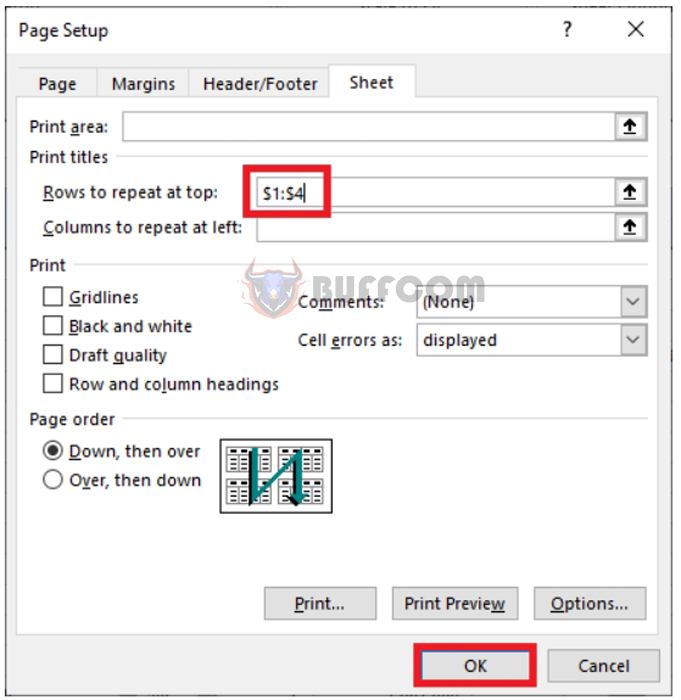
After selecting the header row, the Rows to repeat at top section will display the header row’s repeating symbol. Click OK to complete the process.
How to repeat table header row in Excel on the next page
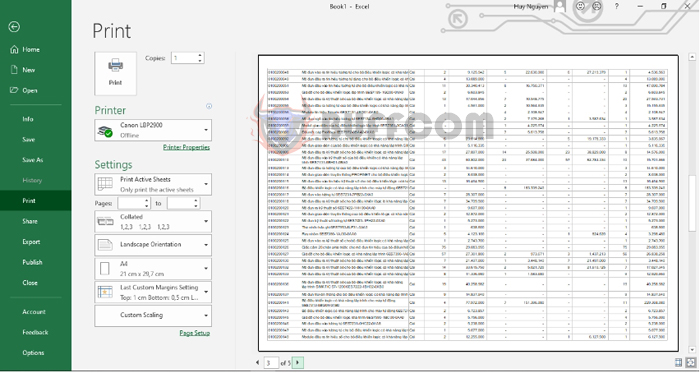
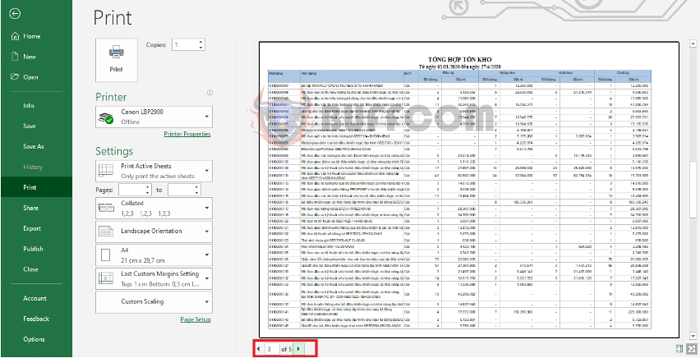
Now, the table header has been repeated on subsequent pages when printed. However, it will not appear on the Excel worksheet but only when printed. You can check whether the header has been repeated on subsequent pages by pressing the Ctrl + P shortcut to open the Print page. Here, we can see that the current page is page 3, and the header has been repeated.
How to repeat table header row in Excel on the next page
In conclusion, this article has shown you how to repeat the table header row on subsequent pages when printed in Excel. We hope this article will be helpful to you in your work. Good luck!

