How to replace underline with italic in word?

Here are two methods to replace all underline characters with italic in Word:
Replace all underline characters with italic using Find and Replace:
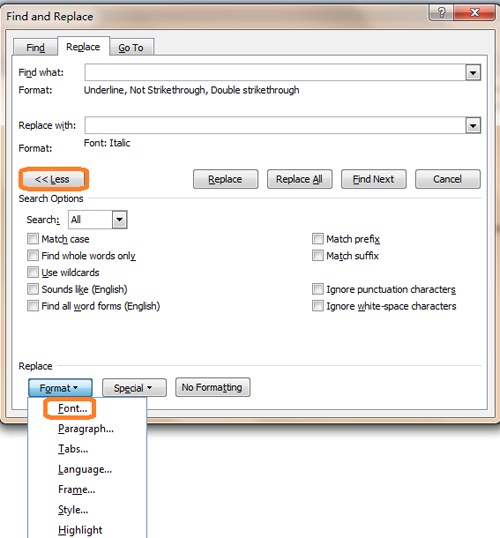
- Click on the “Home” tab, then click on “Replace” in the Editing group, or press Ctrl + H to open the Find and Replace dialog box.
- Click “More” to show additional options.
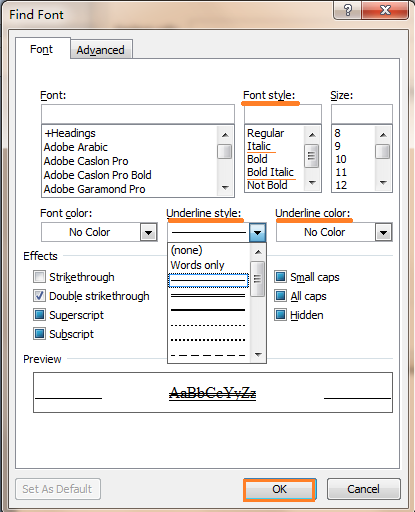
- In the “Find what” box, click on “Format” and choose “Font”. Then, select “Underline” in the Font dialog box.

- In the “Replace with” box, click on “Format” and choose “Font”. Then, select “Italic” in the Font dialog box.
- Click “OK” to close the Font dialog box, then click “Replace All” to replace all instances of underline with italic.

How to replace underline with italic in word
Replace all underline characters with italic using VBA:
- Press Alt + F11 to open the Visual Basic for Applications (VBA) editor.
- Click on “Insert” in the menu, then click on “Module” to insert a new module.
- Copy and paste the following VBA code into the module window:
Sub ReplaceUnderlineWithItalic()

Selection.Find.ClearFormatting

Selection.Find.Font.Underline = wdUnderlineSingle

Selection.Find.Replacement.ClearFormatting

Selection.Find.Replacement.Font.Italic = True.Text = “”
.Replacement.Text = “”
.Forward = True
.Wrap = wdFindContinue
.Format = True
.MatchCase = False
.MatchWholeWord = False
.MatchWildcards = False
.MatchSoundsLike = False
.MatchAllWordForms = False
End With
End Sub
- Press F5 or click on “Run” to execute the macro.
These methods will replace all underline characters with italic in your Word document.


