Attaching Professional Files in Excel
Attaching Professional Files in Excel. During data processing, you may want to insert any files into Excel but do not know how. Don’t worry, this article will guide you on how to attach professional files in Excel. Let’s find out below!
When you send an Excel file to anyone, they will have attached files. When they click on it, any other Excel file will open. Additionally, it includes other files such as Word files.
Steps to Follow Attaching Professional Files in Excel
So how can you attach an Excel file? You will perform the following steps:
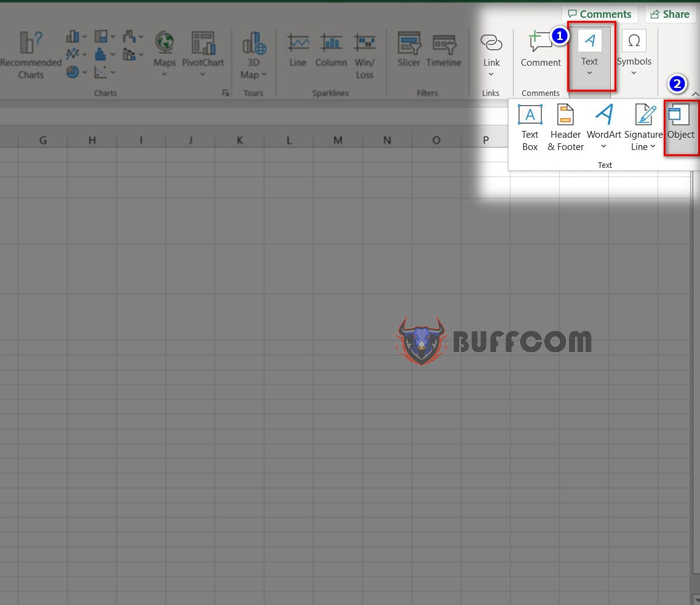
Step 1: Select the cell where you want to insert the file. Then go to the Insert tab => Text => Object.
Attaching Professional Files in Excel
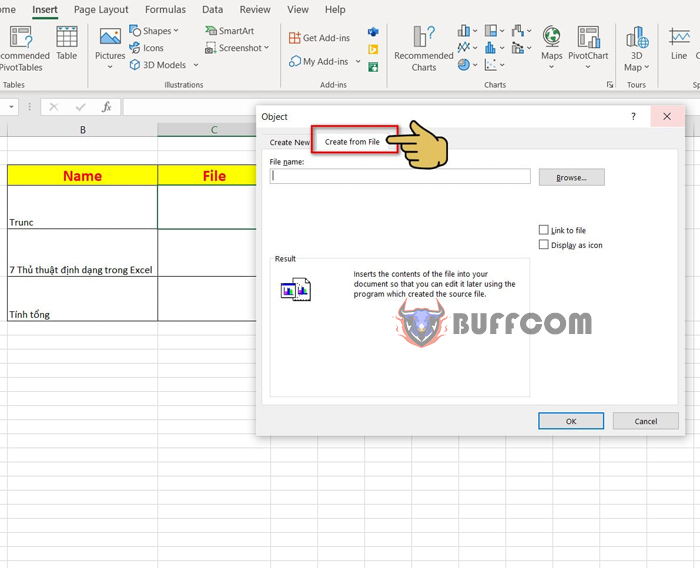
Step 2: Display the Object dialog box. In the dialog box, move to the “Create from File” section.
Attaching Professional Files in Excel
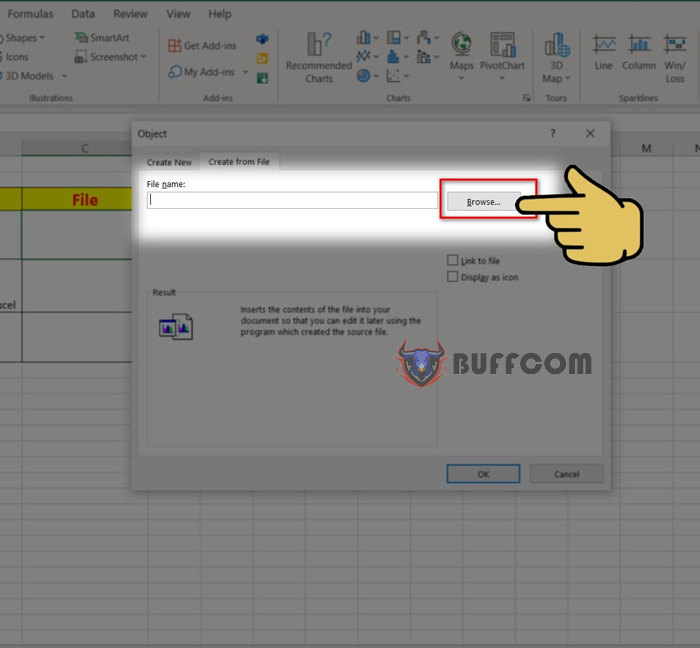
Step 3: In the File name box, add the path to the Excel file you want to insert by clicking on Browse.
Attaching Professional Files in Excel
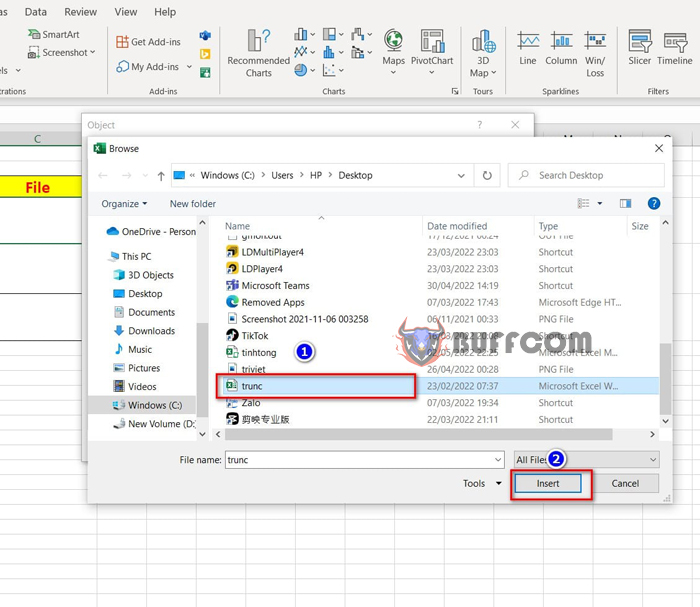
Step 4: Display the folder containing the files on your computer. You will select the Excel file you want to insert and press Insert to insert the file.
Attaching Professional Files in Excel
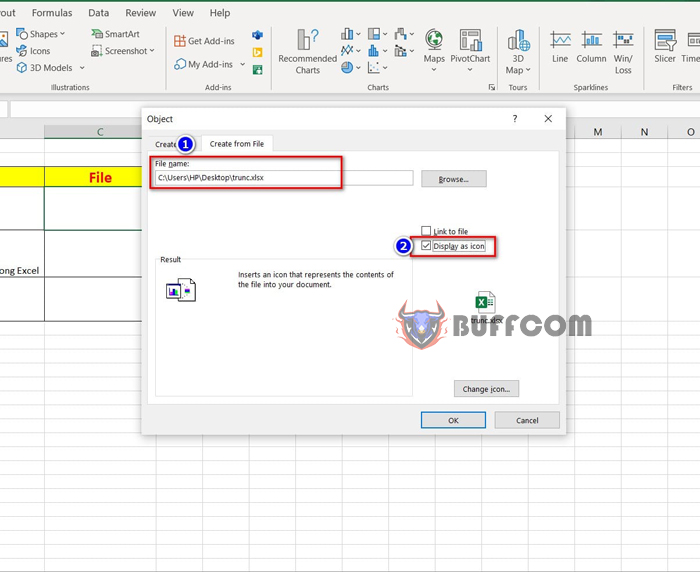
Step 5: Display the path to the file to be inserted in the File Name box and tick the Display as icon box.
Attaching Professional Files in Excel
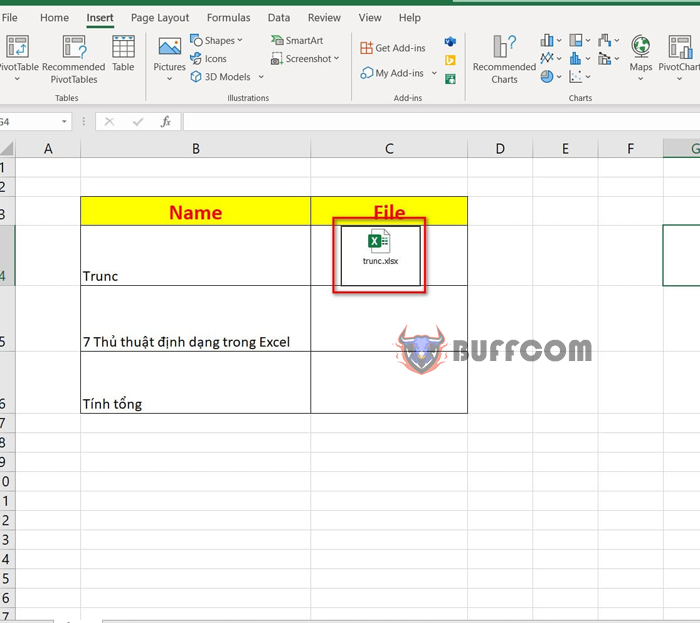
Then press Ok to complete the file insertion.
Attaching Professional Files in Excel
Note: In case the file image is too large after insertion, you can adjust the size by holding the mouse over one of the four corners of the image and dragging it inward to shrink the Excel file image to fit.
Moreover, if you want to insert a Word file, you can do the same:
In the Object dialog box, move to the “Create from File” section.
Next, click on Browse and select the Word file you want to insert.

Attaching Professional Files in Excel
Then press Insert to insert the file into the Object box.
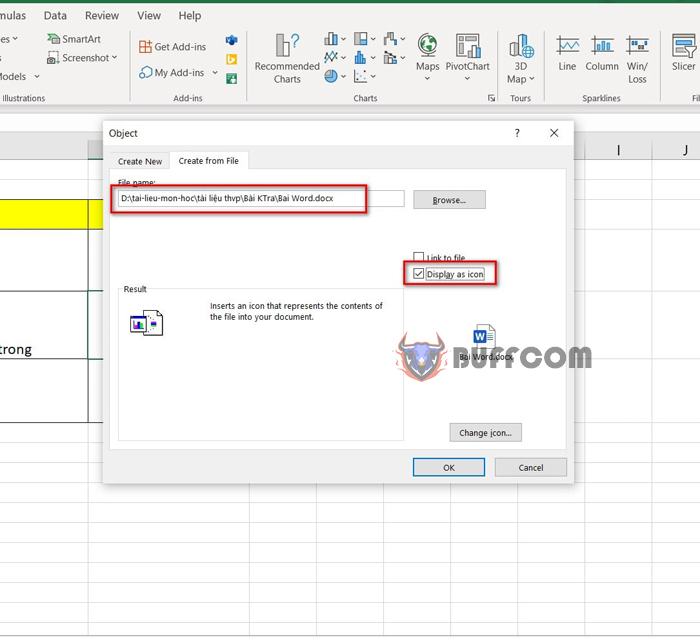
The file path is displayed in the File Name box. Also, you tick Display as icon to display an icon when inserting the file.
Attaching Professional Files in Excel
Finally, press Ok to complete the insertion.
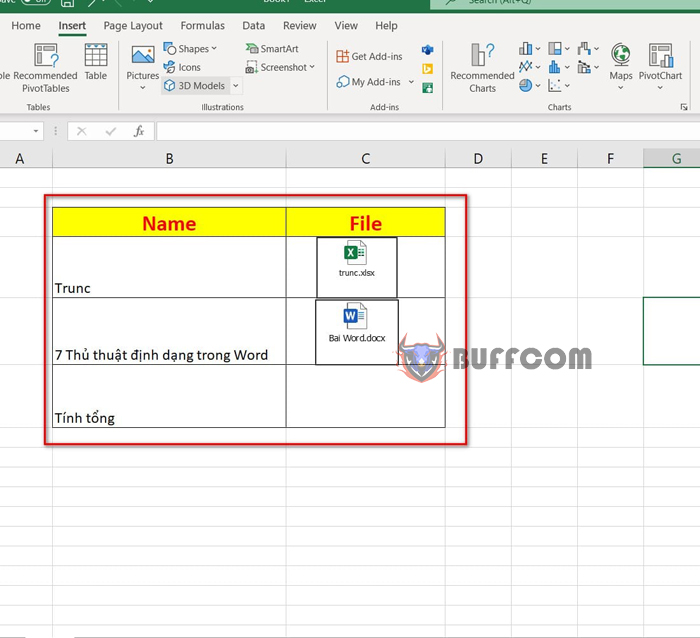
Attaching Professional Files in Excel
After the files are inserted, to open the file, you will click on each file you want to open. It will automatically open the data in the file you selected.
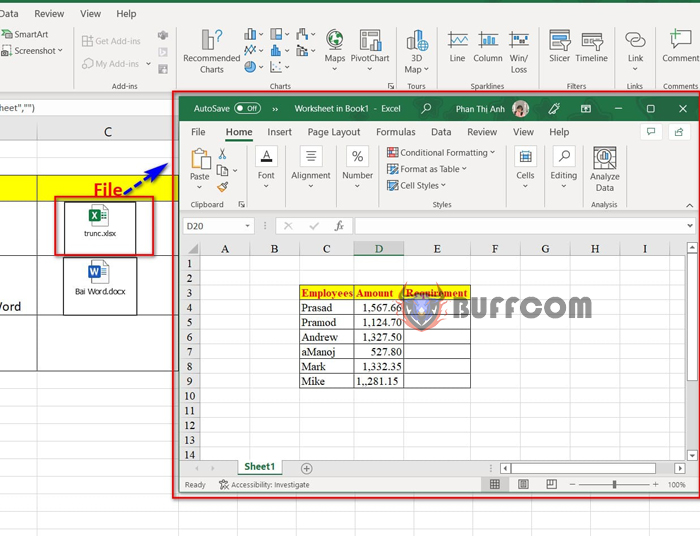
Attaching Professional Files in Excel
So I have finished guiding you on how to attach professional files in Excel. I hope this article will be helpful to you. If you find it useful, don’t forget to rate the article below to help me!


